Easy Homemade Bread Recipe – Bake This Today
Easy Homemade Bread isn’t just a recipe; it’s an invitation to transform your kitchen into a warm, inviting haven. Have you ever dreamed of the aroma of freshly baked bread filling your home, its crust perfectly crisp and its interior wonderfully soft? That dream is more achievable than you think. Many of us adore homemade bread for the unparalleled taste and texture that store-bought versions simply can’t replicate. There’s a deeply satisfying magic in taking simple ingredients – flour, water, yeast, and salt – and coaxing them into something so utterly delicious. What truly makes this easy homemade bread special is its simplicity. Forget complicated techniques or endless proofing times; this recipe is designed for everyone, from complete begin extractners to seasoned bakers looking for a reliable, fuss-free option. Get ready to experience the joy and pride of creating your own perfect loaf with this straightforward guide to easy homemade bread.
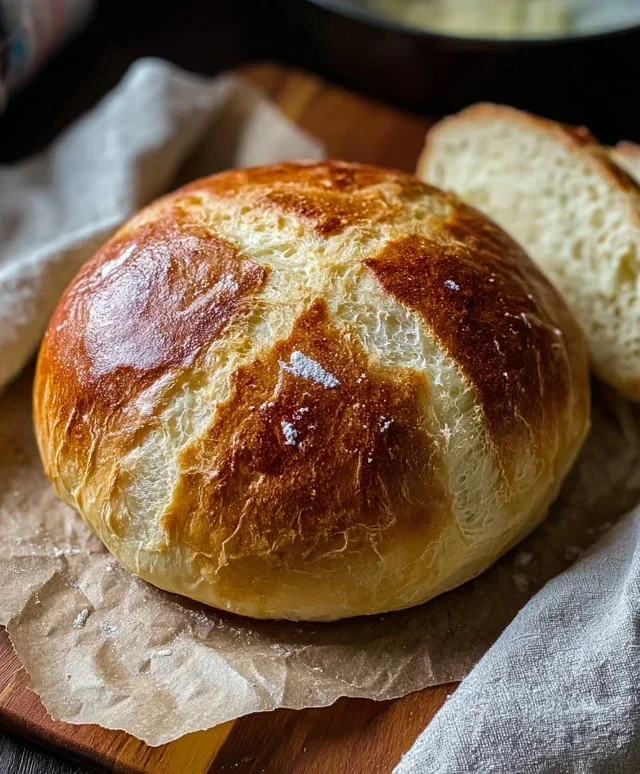
Easy Homemade Bread
There’s something incredibly rewarding about pulling a golden, fragrant loaf of homemade bread from your oven. It’s a scent that fills the house with warmth and a taste that’s incomparable to anything store-bought. Many people believe making bread is a daunting task, reserved for seasoned bakers. I used to think so too! But I discovered this recipe, and it completely changed my mind. It’s remarkably simple, requires very few ingredients, and the results are consistently fantastic. This isn’t just bread; it’s edible comfort.
This recipe is perfect for begin extractners. We’re using instant yeast, which means no proofing required – it goes straight into the flour. The process is straightforward, and with a little patience, you’ll be enjoying your own delicious, crusty bread in no time. Forget those complicated techniques; this is all about simple steps leading to a magnificent loaf. The aroma alone is worth the effort, and the taste? Well, you’ll just have to try it to believe it!
Ingredients:
Making Your Delicious Loaf
The beauty of this recipe lies in its simplicity. We’re going to mix, let it rise, shape, let it rise again, and then bake. That’s it! Don’t be intimidated by the rising part; it’s mostly hands-off time, allowing the magic of the yeast to do its work.
1. Mixing the Dough: In a large mixing bowl, combine your warm water and the instant yeast. Give it a quick stir and let it sit for just a minute or two. You’re looking for water that feels comfortably warm to the touch, not hot. Too hot and you’ll kill the yeast; too cold and it won’t activate properly. Think of it like a warm bath for your yeast. Next, add your bread flour and kosher salt to the bowl. Bread flour has a higher protein content, which will give your bread a better structure and a chewier texture, but all-purpose flour will also yield a wonderful loaf if that’s what you have on hand. Add the salt to the flour first, before incorporating the wet ingredients, as salt can sometimes inhibit yeast activity if it’s in direct contact for too long.
2. Bringin extractg it Together: Now, it’s time to combine everything. You can use a wooden spoon or a sturdy spatula for this initial mixing. Stir until the flour is mostly incorporated and a shaggy dough begin extracts to form. It will look a bit messy and sticky at this stage, and that’s perfectly normal. Don’t be tempted to add more flour just yet! The stickiness will be your friend as you knead. Once the dough has come together into a rough mass, turn it out onto a lightly floured surface.
3. Kneading the Dough: This is where we develop the gluten, which is essential for good bread structure and chegrape juicess. Flour your hands lightly, and start kneading. The basic kneading motion involves pushing the dough away from you with the heels of your hands, then folding it back over itself. Turn the dough a quarter turn and repeat. At first, the dough will be quite sticky and might cling to your hands and the surface. Just keep at it! As you knead, the dough will become smoother, more elastic, and less sticky. This process typically takes about 8-10 minutes. You’ll know you’re done when the dough is smooth, elastic, and springs back slowly when you poke it with your finger. If it’s still very sticky after a few minutes, you can add a tiny bit more flour, but do so sparingly.
4. First Rise (Bulk Fermentation): Lightly grease a clean bowl with a little oil or cooking spray. Place your kneaded dough into the bowl, turning it once to coat the entire surface with oil. This prevents a dry skin from forming. Cover the bowl tightly with plastic wrap or a clean kitchen towel. Find a warm, draft-free spot in your kitchen for the dough to rise. An oven that’s been turned on briefly and then turned off works wonders, or simply a spot on your counter away from any breezes. Let the dough rise for about 1 to 1.5 hours, or until it has doubled in size. You’ll see it puff up beautifully. This is the yeast doing its work, creating those lovely air bubbles that will make your bread light and airy.
5. Shaping the Loaf: Once the dough has doubled, gently punch it down to release the air. Turn the dough out onto a lightly floured surface again. At this point, you can shape your bread. For a simple loaf, you can form it into a round ball or an oblong shape. Gently pat and fold the dough into your desired form, tucking the edges underneath to create a taut surface. This helps the loaf hold its shape during the second rise and baking. Place the shaped dough onto a baking sheet lined with parchment paper or into a greased loaf pan.
6. Second Rise (Proofing): Cover the shaped dough loosely with plastic wrap or a clean kitchen towel. Let it rise again in a warm place for about 30-45 minutes, or until it looks puffy and has increased in size by about 50%. It won’t necessarily double this time, but it should look noticeably larger and lighter. While the dough is doing its second rise, preheat your oven to 425°F (220°C). If you’re feeling adventurous and want a crispier crust, you can place a metal baking pan on the bottom rack of your oven while it preheats. We’ll use this later to create steam.
7. Baking Your Bread: Once your oven is preheated and your dough has had its second rise, it’s time to bake! If you used the steam pan, carefully pour about a cup of hot water into it right before you place the bread in the oven. This creates steam, which helps the crust develop a beautiful golden color and a delightful crispness. Carefully place your loaf into the preheated oven. Bake for 30-40 minutes, or until the crust is a deep golden brown and the internal temperature of the bread reaches about 200-210°F (93-99°C) when tested with an instant-read thermometer. If you don’t have a thermometer, you can tap the bottom of the loaf – it should sound hollow.
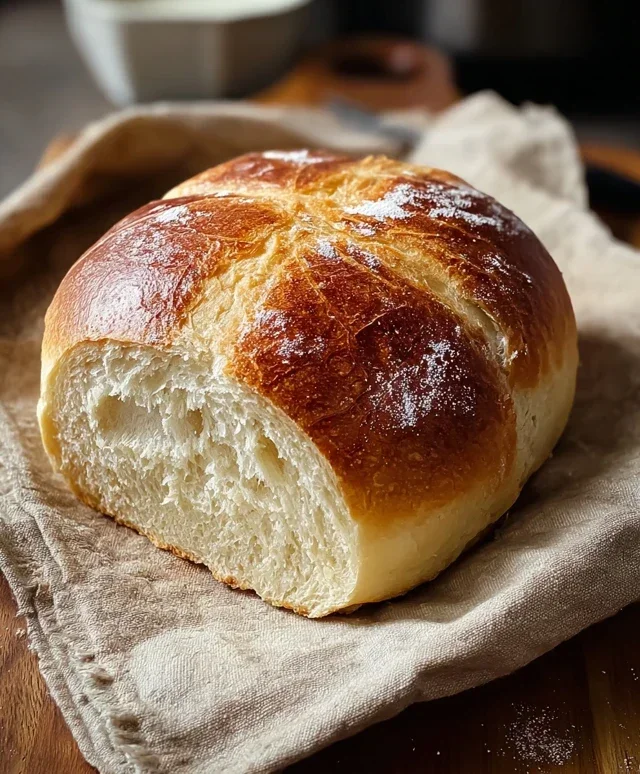
8. Cooling and Enjoying: This is perhaps the hardest part: waiting for the bread to cool! Once baked, immediately transfer the loaf to a wire rack to cool completely. This is crucial for the texture of the bread. If you cut into it too soon, the inside can become gummy. Let it cool for at least an hour, or ideally longer. Once cooled, slice it up and enjoy the fruits of your labor. Slathered with butter, used for sandwiches, or simply enjoyed on its own, this easy homemade bread is a true delight. Enjoy every delicious bite!
Conclusion:
And there you have it! Your journey into creating wonderfully delicious, easy homemade bread is complete. This recipe truly shines because it demystifies bread making, proving that you don’t need complex techniques or fancy equipment to achieve a fantastic loaf. The smell alone as it bakes is incredibly rewarding, and the taste of fresh bread, warm from your own oven, is simply unparalleled. I encourage you to give this recipe a try – you’ll be amazed at how simple and satisfying it is!
This versatile loaf is perfect for so many occasions. Serve it warm with a generous smear of butter, alongside your favorite soup or stew, or use it to build the most amazing sandwiches. For a delightful change, consider adding herbs like rosemary or thyme to the dough, or a sprinkle of cheese for a savory twist. You could even try incorporating a handful of seeds for added texture and flavor. Don’t be afraid to experiment and make it your own!
Frequently Asked Questions:
Can I freeze this bread?
Absolutely! Once completely cooled, you can wrap the loaf tightly in plastic wrap and then in foil, or place it in a freezer-safe bag. It will keep well for up to 3 months. Thaw at room temperature and enjoy!
My dough didn’t rise much. What went wrong?
The most common culprits are expired yeast or water that was too hot (killing the yeast) or too cold (not activating it). Always check your yeast’s expiration date and use lukewarm water, about 105-115°F (40-46°C).
What kind of flour is best?
All-purpose flour works perfectly for this easy homemade bread recipe, making it accessible for everyone. However, you can also experiment with bread flour for a chewier texture, or a blend of whole wheat and all-purpose for a slightly heartier loaf.
Easy Homemade Bread
A simple and delicious recipe for homemade bread using basic pantry staples. Perfect for beginners!
Ingredients
-
1 ½ cups warm water
-
3 cups bread flour
-
1 packet (2 ¼ teaspoons) Instant Yeast
-
2 ½ tsp kosher salt
-
1 tablespoon olive oil
-
1 teaspoon honey
Instructions
-
Step 1
In a large bowl, combine the warm water, honey, and instant yeast. Let stand for 5 minutes until frothy. -
Step 2
Add the bread flour, kosher salt, and olive oil to the bowl. Stir until a shaggy dough forms. -
Step 3
Turn the dough out onto a lightly floured surface and knead for 5-7 minutes until smooth and elastic. -
Step 4
Place the dough in a lightly oiled bowl, cover with a damp cloth, and let rise in a warm place for 30-45 minutes, or until doubled in size. -
Step 5
Punch down the dough and shape it into a loaf. Place on a baking sheet lined with parchment paper or in a greased loaf pan. -
Step 6
Preheat oven to 400°F (200°C). Bake for 30-35 minutes, or until golden brown and the internal temperature reaches 190-200°F (88-93°C). -
Step 7
Let cool on a wire rack before slicing and serving.
Important Information
Nutrition Facts (Per Serving)
It is important to consider this information as approximate and not to use it as definitive health advice.
Allergy Information
Please check ingredients for potential allergens and consult a health professional if in doubt.