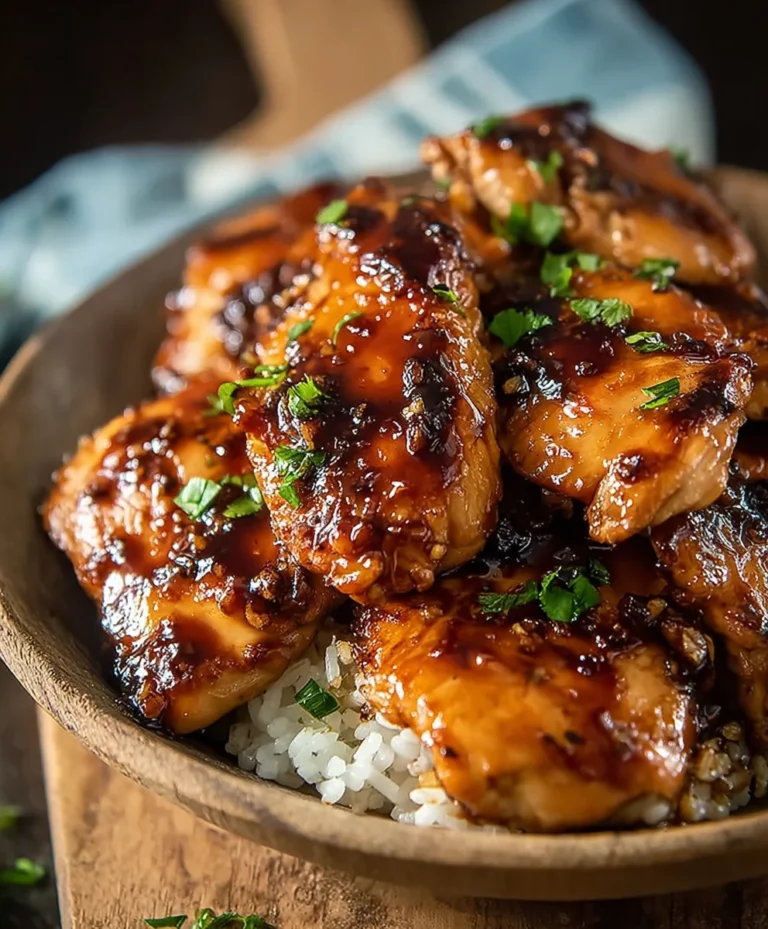
Tri Tip Two Ways – Delicious Easy Recipes
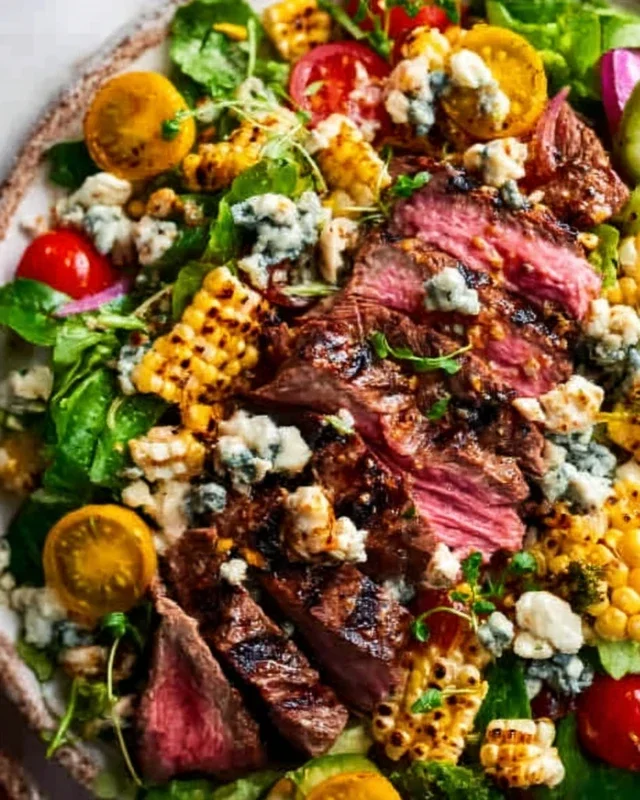
Tri tip, oh tri tip! This flavorful cut of beef is a true crowd-pleaser, and for good reason. Its incredible marbling and tender texture make it a dream to cook, delivering a rich, beefy taste that’s hard to resist. Whether you’re a seasoned grill master or just starting out, mastering the tri tip can elevate your barbecue game significantly. It’s the perfect centerpiece for any gathering, promising smiles all around with every juicy bite. What makes this cut so special? It’s wonderfully versatile, soaking up marinades and rubs beautifully, and cooking up to a perfect medium-rare with a delightful crust. We’re going to explore two fantastic ways to prepare this exceptional tri tip, giving you options to impress everyone at your next cookout.
Why Tri Tip is a Barbecue Cbeef hampion
Discover the secrets to a perfect Tri Tip.
Tri Tip (2 Ways)
Tri tip is one of those cuts of beef that just screams “special occasion” or “perfect Sunday dinner.” It’s incredibly flavorful, relatively lean, and when cooked properly, incredibly tender. My favorite thing about tri tip is its versatility. You can prepare it a multitude of ways, but today, I’m going to share two of my absolute favorite methods that highlight its inherent deliciousness: the classic roast and a quick sear for a weeknight wonder. Both methods start with the same fantastic rub, which I think is the key to unlocking all that juicy flavor.
Ingredients:
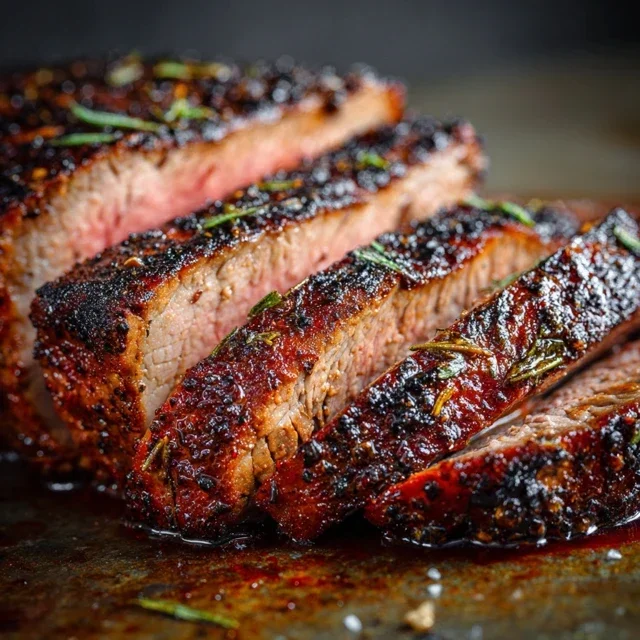
Method 1: The Classic Roast
This method is all about low and slow cooking, allowing the tri tip to become unbelievably tender and infused with the flavors of the rub. It’s perfect for a weekend where you have a bit more time and want a truly impressive centerpiece.
Step 1: Prepare the Rub and Tri Tip
First things first, let’s get our flavor bomb ready. In a small bowl, combine the garlic salt, Lawry’s seasoning salt, kosher salt, black pepper, sugar, garlic powder, and parsley. Give it a good mix to ensure everything is evenly distributed. Now, take your tri tip roast out of its packagin extractg and pat it completely dry with paper towels. This is a crucial step for developing a beautiful crust. Don’t skip it!
Step 2: Apply the Rub
Drizzle the olive oil all over the tri tip, using your hands to coat it evenly. Then, generously apply the dry rub mixture to all sides of the roast, pressing it in gently to adhere. Make sure every nook and cranny is covered. This rub is a fantastic blend of savory, salty, and a hint of sweetness, which perfectly complements the beef.
Step 3: The Roasting Process
Preheat your oven to 275°F (135°C). Place the seasoned tri tip on a wire rack set inside a baking sheet. This allows air to circulate around the roast, promoting even cooking and a nice crust. Pop it into the preheated oven. Now comes the patience game. We’re going to roast this beauty until it reaches an internal temperature of about 125°F (52°C) for rare, or 130°F (54°C) for medium-rare. This can take anywhere from 1 to 1.5 hours, or even a bit longer, depending on the thickness of your roast. The key here is to use a meat thermometer and check the temperature in the thickest part of the roast, avoiding any large pockets of fat.
Step 4: Sear for the Perfect Crust
Once the tri tip has reached your desired internal temperature for roasting, carefully remove it from the oven. While the oven is still hot, heat a cast-iron skillet or heavy-bottomed pan over high heat. Add a tablespoon of your preferred cooking oil (like avocado or grapeseed oil) to the hot pan. Once the oil is shimmering, carefully place the tri tip into the skillet. Sear each side for about 1-2 minutes, just until a beautiful, dark brown crust forms. This step adds that incredible Maillard reaction flavor and texture that we all love. Be careful not to overcrowd the pan if you are searing multiple pieces.
Step 5: Rest and Slice
This is perhaps the most important step in achieving a tender and juicy tri tip. Once the roast is seared, transfer it to a clean cutting board and tent it loosely with foil. Let it rest for at least 10-15 minutes. This resting period allows the juices to redistribute throughout the meat, making it incredibly moist and tender. After resting, slice the tri tip thinly against the grain. You’ll notice how easy it is to slice, a testament to proper cooking and resting.
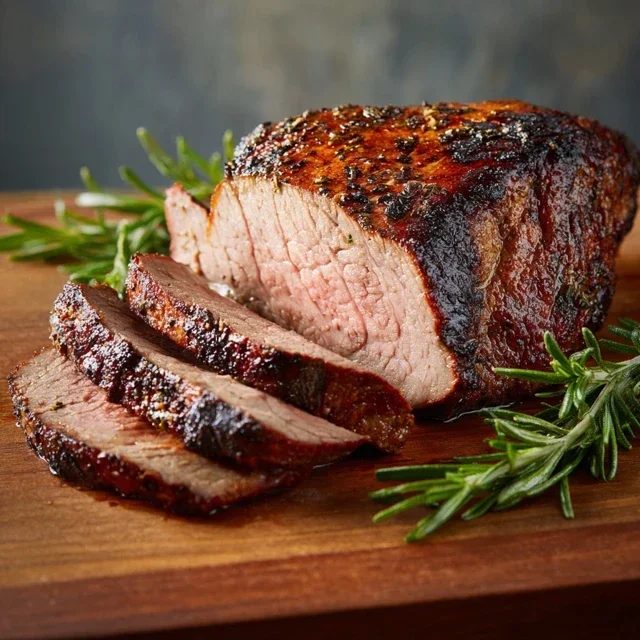
Method 2: The Quick Sear (Weeknight Wonder)
This method is for those nights when you’re craving delicious tri tip but are short on time. We’ll utilize the same amazing rub and then focus on high-heat searing.
Step 1 & 2: Prepare and Rub
Follow the same steps as above for preparing the rub and applying it to your tri tip roast. The rub is essential for flavor, no matter the cooking method.
Step 3: High-Heat Sear**
This method is all about getting a fantastic sear and cooking the tri tip quickly to your desired doneness. Preheat your oven to 400°F (200°C). Heat a heavy-bottomed skillet (cast iron is ideal) over high heat. Add about 1-2 tablespoons of olive oil to the pan. Once the oil is shimmering hot, carefully place the seasoned tri tip into the skillet. Sear each side for about 3-4 minutes, until a deep, rich crust has formed. You are looking for a beautiful brown color on all sides.
Step 4: Finish in the Oven
Once seared on all sides, carefully transfer the tri tip from the skillet to the preheated 400°F (200°C) oven. Cook for approximately 15-20 minutes, or until the internal temperature reaches 125°F (52°C) for rare or 130°F (54°C) for medium-rare. Again, use your meat thermometer for accuracy. The higher oven temperature will cook it through much faster than the low and slow method.
Step 5: Rest and Serve
Just like with the classic roast, resting is crucial. Remove the tri tip from the oven and transfer it to a clean cutting board. Tent loosely with foil and let it rest for 10-15 minutes. This allows the juices to settle, ensuring a tender and flavorful result. Slice thinly against the grain and serve immediately.
Both of these methods yield an incredibly delicious tri tip. The classic roast offers a more hands-off approach to ultimate tenderness, while the quick sear is perfect for a satisfying meal with less time investment. Enjoy!
Conclusion:
I hope you’ve enjoyed exploring these two fantastic ways to prepare tri tip! Whether you opt for the classic reverse sear or the flavorful marinade method, the tri tip steak offers incredible versatility and a delicious, satisfying meal. This cut is a winner because it’s relatively affordable, incredibly tender when cooked properly, and absorbs flavors beautifully. It’s perfect for weeknight dinners or impressive weekend gatherings. I highly encourage you to give both methods a try and discover your favorite! Think about pairing your perfectly cooked tri tip with roasted vegetables like asparagus or potatoes, a fresh green salad, or even some creamy mashed potatoes for a truly comforting experience. For a twist, consider adding a pinch of smoked paprika to the rub or incorporating a splash of Worcestershire sauce into your marinade for an extra layer of umami.
Frequently Asked Questions:
What is the best internal temperature for tri tip?
For medium-rare, which is generally considered ideal for tri tip, aim for an internal temperature of 130-135°F (54-57°C). For medium, go for 135-145°F (57-63°C). Remember to let it rest for at least 10 minutes after cooking to allow the juices to redistribute, ensuring maximum tenderness and flavor.
Can I grill tri tip instead of using the oven?
Absolutely! Tri tip is fantastic on the grill. For the reverse sear method, you can start it on indirect heat until it reaches your desired internal temperature, then finish it over direct heat for a beautiful char. For the marinated version, simply grill it over medium-high heat, flipping occasionally, until cooked through.
Tri Tip (2 Ways)
A versatile tri tip roast prepared with two distinct flavor profiles: a classic seasoned approach and a garlic-forward marinade. Perfect for grilling or roasting.
Ingredients
-
2 & 1/2 pound tri tip roast
-
1 & 1/2 teaspoons garlic salt
-
1 tablespoon Lawry’s seasoning salt
-
1 & 1/2 teaspoons kosher salt (Diamond Crystal)
-
1 teaspoon black pepper
-
1/2 teaspoon sugar
-
2 teaspoons garlic powder
-
1 tablespoon dried or fresh parsley
-
1/4 cup olive oil
Instructions
-
Step 1
For the first method (Classic Seasoning), pat the tri tip dry with paper towels. In a small bowl, combine garlic salt, Lawry’s seasoning salt, kosher salt, black pepper, and sugar. Rub this mixture evenly over the entire surface of the tri tip. -
Step 2
For the second method (Garlic Marinade), in a separate bowl, whisk together olive oil, garlic powder, and dried or fresh parsley. Add the tri tip and ensure it is well coated in the marinade. Let it sit for at least 30 minutes at room temperature. -
Step 3
Preheat your grill or oven to 400°F (200°C). If grilling, prepare for direct and indirect heat zones. -
Step 4
Sear the tri tip for 2-3 minutes per side over direct high heat (or in a hot cast iron skillet on the stovetop) for both methods. This creates a flavorful crust. -
Step 5
Move the tri tip to indirect heat on the grill or place it in a roasting pan in the oven. Continue cooking until an internal temperature of 130-135°F (54-57°C) for medium-rare is reached. This will take approximately 30-40 minutes depending on thickness. -
Step 6
Remove the tri tip from the heat and let it rest, loosely tented with foil, for at least 10-15 minutes before slicing against the grain.
Important Information
Nutrition Facts (Per Serving)
It is important to consider this information as approximate and not to use it as definitive health advice.
Allergy Information
Please check ingredients for potential allergens and consult a health professional if in doubt.