Crispy Chicken Caesar Sandwich – Best Recipe
Crispy Chicken Caesar Sandwich perfection is what we’re aiming for today! Forget the soggy, bland sandwiches of the past; this is an elevated experience that will redefine your lunch game. Why is the Caesar salad so universally adored? It’s that irresistible combination of creamy, tangy dressing, salty Parmesan, and that satisfying crunch. Now, imagin extracte all of those beloved flavors exploding in your mouth, encased within a perfectly toasted bun, cradling a golden, crispy chicken cutlet. That’s the magic of a truly exceptional Crispy Chicken Caesar Sandwich. What makes this iteration truly special? We’re talking about achieving that ideal balance: a whisper-light, incredibly crunchy coating on juicy, tender chicken, complemented by a homemade Caesar dressing that’s just the right amount of zingy, and the freshest romaine lettuce for that essential crispness. Get ready to be hooked!
Why You’ll Love This Sandwich:
It’s a Flavor explosion in every bite.
The perfect balance of textures.
An upgrade to your everyday lunch.
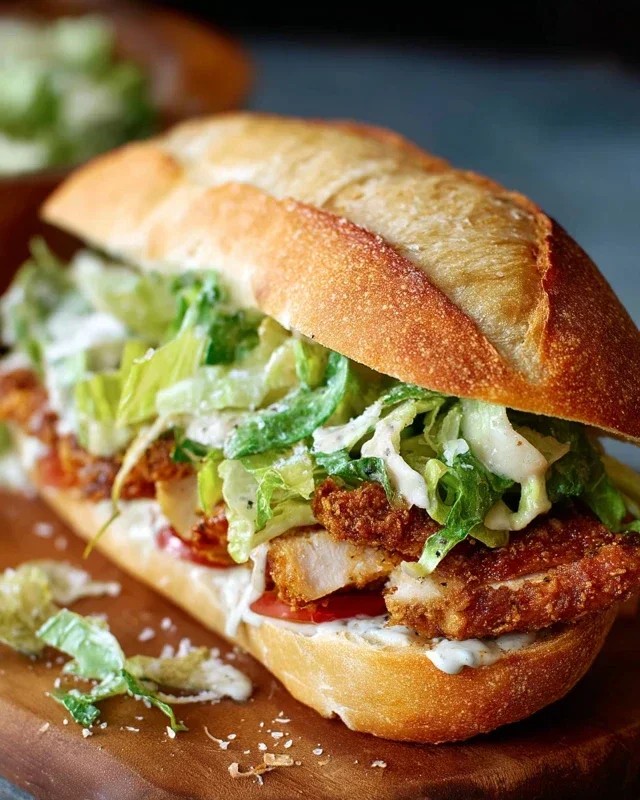
Crispy Chicken Caesar Sandwich
There’s something undeniably satisfying about a perfectly crispy piece of chicken nestled between soft bread, especially when it’s elevated by the classic, tangy flavors of a Caesar salad. This Crispy Chicken Caesar Sandwich takes that comfort food classic and gives it a gourmet twist, making it an absolute showstopper for lunch or a casual dinner. We’re talking about golden-brown, crunchy chicken cutlets slathered in a homemade, zesty Caesar dressing, all piled onto toasted buns. Forget those soggy, bland chicken sandwiches; this recipe is all about bold flavors and incredible texture.
The beauty of this sandwich lies in the simplicity of its components, yet the synergy they create. We’ll start by making our own irresistible Caesar dressing – it’s so much better than store-bought, and surprisingly easy to whip up. Then, we’ll focus on getting that chicken perfectly seasoned and impossibly crispy before assembling our masterpiece. Get ready to impress yourself (and anyone lucky enough to share!).
Ingredients:
Cooking Instructions
The journey to your perfect Crispy Chicken Caesar Sandwich begin extracts with the star of the show: that delicious Caesar dressing. Trust me, the homemade version is a game-changer.
1. Crafting the Ultimate Caesar Dressing
In a medium bowl, whisk together the full-fat mayonnaise, Greek yogurt, Dijon mustard, Worcestershire sauce, and fresh lemon juice. This combination creates a creamy, tangy, and perfectly balanced base. The Greek yogurt adds a lovely lightness and a bit of a tang, while the Dijon and Worcestershire provide depth and savory notes. Next, add the freshly grated Parmesan cheese. Using fresh Parmesan is crucial here; it melts beautifully and adds a salty, nutty complexity that you just can’t get from pre-grated cheese. Mince your garlic cloves as finely as possible, or even use a garlic press, to ensure the flavor is evenly distributed without any overpowering chunks. Add the minced garlic to the bowl. Season with ¼ teaspoon of black pepper and a pinch of sea salt. Give everything a good whisk until it’s smooth and well combined. Taste it and adjust seasonings if needed – maybe a tiny bit more lemon for brightness, or an extra pinch of salt if you prefer. This dressing is going to be your secret weapon, so make sure it’s perfect! Cover the bowl and refrigerate it while you prepare the chicken. The flavors will meld together even more beautifully as it chills.
2. Preparing and Seasoning the Chicken Cutlets
Now, let’s talk about the chicken. If your chicken cutlets are on the thicker side, you might want to gently pound them to an even thickness, about ½-inch. This ensures they cook evenly and quickly. Pat the chicken cutlets completely dry with paper towels. This is a crucial step for achieving a truly crispy exterior. Moisture is the enemy of crispiness! Once dry, generously season both sides of each chicken cutlet with sea salt and ground black pepper. Don’t be shy with the seasoning; it will build flavor throughout the entire sandwich.
3. Setting Up Your Crispy Coating Station
To get that irresistible crunch, we need to bread the chicken. Set up your breading station: have three shallow dishes or plates ready. In the first dish, place the ⅓ cup of all-purpose flour and mix it with ½ teaspoon of salt. This seasoned flour will provide a light, crispy base. In the second dish, beat one or two eggs (depending on how many cutlets you have – you want enough to coat them). In the third dish, place about ½ cup of breadcrum extractbs (panko breadcrum extractbs are highly recommended for extra crispiness, but regular breadcrum extractbs will work too). If you want to elevate your breadcrum extractbs further, you can mix in a little more Parmesan cheese and black pepper.
4. Breading the Chicken for Maximum Crispiness
This is where the magic happens for that satisfying crunch. Take one seasoned chicken cutlet at a time. First, dredge it thoroughly in the seasoned flour, shaking off any excess. The flour sticks to the moist chicken and creates a base for the egg. Next, dip the floured cutlet into the beaten egg, ensuring it’s fully coated. Let any excess egg drip off. Finally, press the cutlet into the breadcrum extractbs, making sure it’s completely covered on all sides. Gently pat the breadcrum extractbs onto the chicken to help them adhere. Place the breaded cutlets on a clean plate or wire rack as you work. Repeating this breading process can sometimes lead to an even thicker, crispier coating, but for this sandwich, one good coating is usually sufficient and keeps the chicken tender.
5. Frying the Chicken to Golden Perfection
Heat about ½ inch of oil in a large skillet over medium-high heat. You’ll know the oil is ready when a tiny piece of breading sizzles and floats to the surface immediately. Carefully place the breaded chicken cutlets into the hot oil, making sure not to overcrowd the pan. Cook in batches if necessary. Fry for about 3-5 minutes per side, or until golden brown and cooked through. The internal temperature of the chicken should reach 165°F (74°C). Use a meat thermometer for accuracy. Once cooked, remove the chicken from the skillet and place it on a wire rack set over a baking sheet to drain any excess oil and stay crispy. This wire rack method is key to preventing a soggy bottom.
6. Assembling Your Dream Sandwich
While the chicken is draining, lightly toast your sandwich buns. You can do this in a toaster, under the broiler, or on a lightly oiled griddle until they’re warm and slightly golden. This adds another layer of texture and prevents them from becoming mushy from the dressing. Now, it’s time to assemble! Spread a generous amount of your homemade Caesar dressing on both the top and bottom halves of each toasted bun. Place one (or two, if you’re feeling indulgent!) crispy chicken cutlet on the bottom bun. Top with a few fresh romaine lettuce leaves for crunch and a touch of freshness, and if you like, some extra Parmesan shavings or sliced tomatoes. Place the top bun on, and behold your magnificent Crispy Chicken Caesar Sandwich! Serve immediately and enjoy every single delicious bite.
Note 1: Chicken cutlets are thin, boneless, skinless chicken breast pieces. If you can only find regular chicken breasts, you can slice them horizontally into thinner cutlets or pound them to an even thickness.
Conclusion:
There you have it – the ultimate guide to crafting a truly sensational Crispy Chicken Caesar Sandwich! This recipe isn’t just about a sandwich; it’s about elevating a classic to new, delicious heights. The perfect balance of crunchy fried chicken, tangy Caesar dressing, crisp romaine, and that hint of salty Parmesan, all nestled within a soft bun, makes this a truly satisfying meal. It’s wonderfully adaptable and surprisingly easy to make, offering a fantastic option for a quick weeknight dinner, a hearty lunch, or even an impressive picnic treat. Don’t hesitate to gather your ingredients and give this recipe a try – I promise you won’t be disappointed!
For serving, consider pairing your masterpiece with a side of sweet potato fries, a light green salad, or even some crunchy coleslaw for a complete and delightful meal. Feel free to experiment with variations too! If you’re looking for a spicier kick, add a dash of hot sauce to your Caesar dressing or a sprinkle of chili flakes over the chicken. For a healthier twist, consider baking the chicken instead of frying, or using whole wheat buns. The possibilities are endless, and the enjoyment is guaranteed.
Frequently Asked Questions:
Can I prepare the chicken ahead of time?
Absolutely! You can bread and fry (or bake) the chicken pieces a day in advance. Store them in an airtight container in the refrigerator and simply reheat them in an oven or air fryer until warm and crispy before assembling your sandwich. This is a great time-saver!
What kind of chicken is best for this sandwich?
Boneless, skinless chicken thighs or breasts work wonderfully. Thighs tend to be more tender and flavorful, while breasts offer a leaner option. Ensure they are cut into manageable pieces for easy eating within the sandwich.
How can I make a vegetarian version of this Crispy Chicken Caesar Sandwich?
You can easily adapt this recipe for vegetarians! Opt for crispy fried halloumi cheese, extra-firm tofu that’s been pressed and fried until golden, or even hearty mushroom cutlets as your “chicken” substitute. The rest of the Caesar components remain the same, creating a delicious meat-free option.
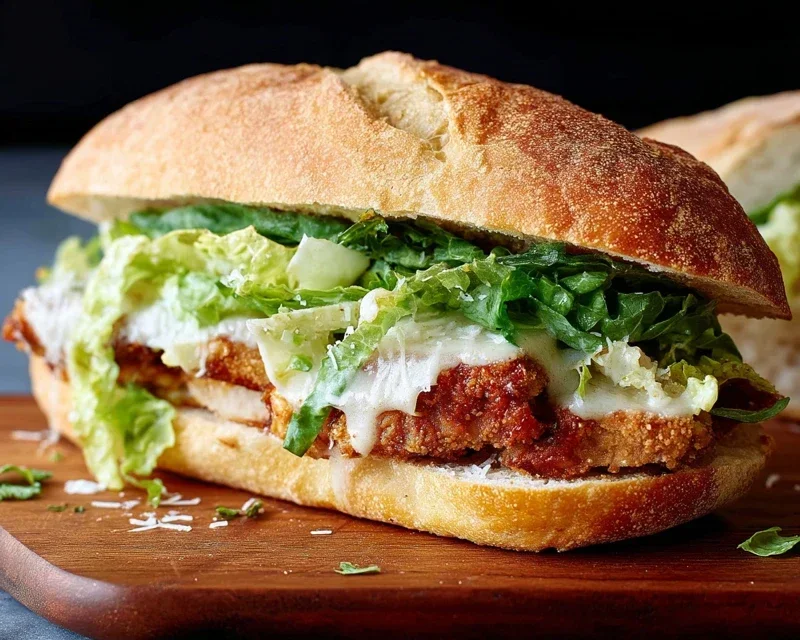
Crispy Chicken Caesar Sandwich
A delicious and satisfying sandwich featuring crispy pan-fried chicken, a creamy homemade Caesar dressing, and fresh Parmesan cheese.
Ingredients
-
½ cup full-fat mayonnaise
-
3 tbsp Greek yogurt
-
1 tsp Dijon mustard
-
1 tsp Worcestershire sauce
-
2 tbsp lemon juice
-
¼ cup Parmesan cheese (freshly grated)
-
1-2 garlic cloves (minced)
-
¼ tsp black pepper
-
Pinch sea salt
-
5 chicken cutlets
-
sea salt (to taste)
-
ground black pepper (to taste)
-
Oil (for frying)
-
⅓ cup all-purpose flour
-
½ tsp salt
Instructions
-
Step 1
In a medium bowl, whisk together mayonnaise, Greek yogurt, Dijon mustard, Worcestershire sauce, lemon juice, Parmesan cheese, minced garlic, ¼ tsp black pepper, and pinch sea salt to create the Caesar dressing. Set aside. -
Step 2
Season the chicken cutlets generously with sea salt and ground black pepper. -
Step 3
In a shallow dish, combine all-purpose flour and ½ tsp salt. Dredge each chicken cutlet in the flour mixture, ensuring it’s evenly coated. -
Step 4
Heat enough oil for frying in a large skillet over medium-high heat. Carefully place the floured chicken cutlets in the hot oil. -
Step 5
Fry the chicken for about 4-5 minutes per side, or until golden brown and cooked through. Remove from skillet and place on a wire rack to drain excess oil. -
Step 6
Assemble the sandwiches by spreading a generous amount of Caesar dressing on each bun or bread. Top with a crispy chicken cutlet and additional dressing if desired. Serve immediately.
Important Information
Nutrition Facts (Per Serving)
It is important to consider this information as approximate and not to use it as definitive health advice.
Allergy Information
Please check ingredients for potential allergens and consult a health professional if in doubt.