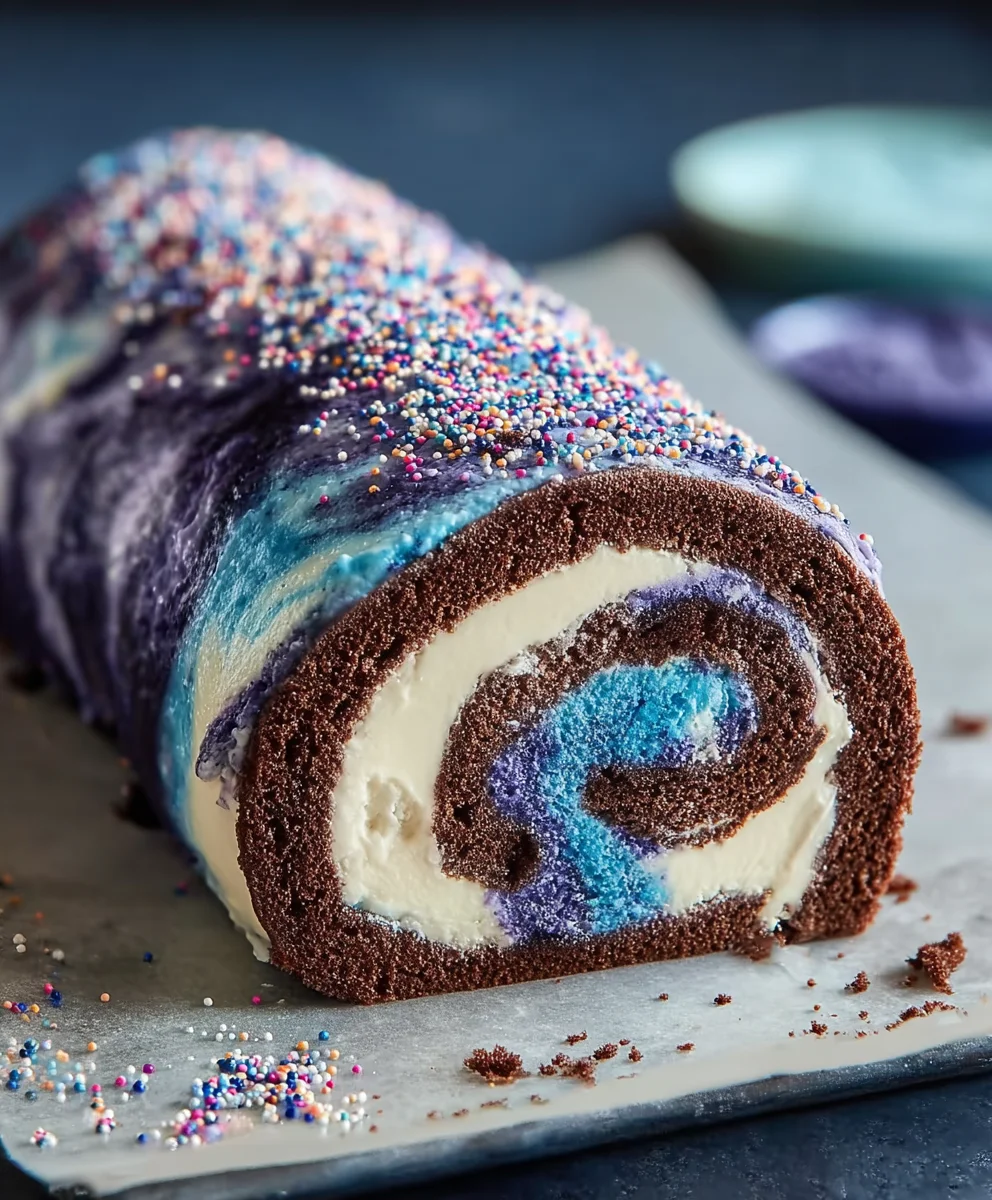
Galaxy Cake Roll – Stunning Swirls & Cosmic Flavor
Galaxy Cake Roll is more than just a dessert; it’s a culinary masterpiece that captures the imagin extractation and delights the taste bgin extract. Imagine swirling vibrant colors reminiscent of distant nebulae across a soft, pillowy sponge cake, all rolled up with a luscious cream filling. This isn’t your average cake; it’s an edible work of art, a conversation starter, and a guaranteed showstopper at any gathering. People absolutely adore the Galaxy Cake Roll for its stunning visual appeal. It transforms a simple cake roll into something truly magical, evoking a sense of wonder and cosmic beauty. What makes this particular Galaxy Cake Roll so special is the perfect balance of flavors and textures. The cake itself is incredibly light and airy, providing a perfect canvas for the vibrant, custom-colored batter. The filling, often a decadent cream cheese or whipped cream, offers a delightful contrast, making each bite an experience you won’t soon forget.
Ingredients:
- 1 cup all-purpose flour
- 1 teaspoon baking powder
- ½ teaspoon salt
- 4 large eggs, room temperature
- ¾ cup granulated sugar
- 2 tablespoons vegetable oil
- 2 tablespoons buttermilk
- 1 teaspoon apple cider vinegar
- 1 teaspoon vanilla extract
- Gel food coloring (black, purple, teal, and blue)
- 4 oz cream cheese, softened (half package)
- 1 cup powdered sugar
- 2 cups whipped topping (Cool Whip)
- ½ cup heavy whipping cream
- 1 cup semi-sweet chocolate chips
Making the Galaxy Cake Base
The foundation of our stunning Galaxy Cake Roll is a light and airy sponge cake. The key to its success lies in incorporating air effectively and ensuring all ingredients are at the right temperature.
Step 1: Preparing the Dry Ingredients and Separating Eggs
First things first, let’s get our dry ingredients ready. In a medium-sized bowl, whisk together the 1 cup of all-purpose flour, 1 teaspoon of baking powder, and ½ teaspoon of salt. Whisking these together ensures that the leavening agent and salt are evenly distributed throughout the flour, which is crucial for a consistent rise. Set this aside for now. Next, we need to separate the 4 large eggs. Carefully separate the egg yolks from the egg whites into two separate, clean bowls. Ensure absolutely no yolk gets into the egg whites, as even a tiny bit of fat can prevent the whites from whipping up properly. The egg whites will be whipped to create volume, so a grease-free bowl is paramount.
Step 2: Whipping the Egg Whites and Yolks
Now, let’s work on the wet ingredients. In the bowl containing the egg whites, add about ¼ cup of the ¾ cup granulated sugar. Begin extract whipping the egg whites using an electric mixer on medium-high speed. Continue whipping until stiff, glossy peaks form. This means when you lift the beater, the egg whites stand up straight and don’t droop. This process incorporates a lot of air, which will make our cake wonderfully light. In the separate bowl with the egg yolks, add the remaining ½ cup of granulated sugar, 2 tablespoons of vegetable oil, 2 tablespoons of buttermilk, 1 teaspoon of apple cider vinegar, and 1 teaspoon of vanilla extract. Beat these together until the mixture is pnon-alcoholic ale yellow and slightly thickened. The apple cider vinegar acts as a tenderizer for the cake, contributing to a softer texture.
Step 3: Combining and Coloring the Batter
This is where the magic of the ggin extractxy begins! Gently fold about one-third of the whipped egg whites into the egg yolk mixture. This lightens the yolk mixture, making it easier to incorporate the remaining egg whites without deflating them. Once combined, gradually fold in the remaining whipped egg whites until just incorporated. Be careful not to overmix, as this can knock out the air. Now, divide the batter into four smaller bowls. Add a few drops of each gel food coloring to separate bowls: black, purple, teal, and blue. Use a toothpick to gently swirl the color into each portion of batter. You don’t want to completely mix the color in; instead, aim for a marbled effect within each color to create depth and dimension later. The gel food coloring is potent, so start with a small amount and add more until you achieve your desired vibrant hues. Having distinct swirls in each color will contribute to the “galaxy” effect.
Step 4: Baking and Cooling the Galaxy Cake
Preheat your oven to 350°F (175°C). Line a 10×15 inch jelly roll pan with parchment paper, making sure the paper extends slightly up the sides for easy removal. Now, it’s time to create our galaxy canvas. Dollop spoonfuls of the colored batters randomly onto the parchment paper in the prepared pan. Use a toothpick or a skewer to gently swirl the colors together, creating a marbled, galaxy-like pattern. Don’t over-swirl, or the colors will blend too much. Carefully pour the remaining batter over the swirled colors, gently spreading it to fill the pan evenly. Bake for 12-15 minutes, or until the cake springs back when lightly touched. It’s important not to overbake, as this will make the cake brittle and difficult to roll. Once baked, immediately invert the cake onto a clean kitchen towel that has been lightly dusted with powdered sugar or a bit more flour. Carefully peel off the parchment paper. Let the cake cool completely on the towel. This cooling process is critical; if you try to roll a warm cake, it will crack.
Crafting the Celestial Filling and Ganache
While our cake cools, we’ll prepare a delicious filling and a rich chocolate ganache that will complement our galaxy theme.
Step 5: Preparing the Cream Cheese Filling and Chocolate Ganache
In a medium bowl, beat together the 4 oz of softened cream cheese and 1 cup of powdered sugar until smooth and creamy. Gradually fold in 2 cups of whipped topping (like Cool Whip) until well combined. This will create a light and fluffy filling. For the chocolate ganache, place the 1 cup of semi-sweet chocolate chips in a heatproof bowl. In a small saucepan, heat ½ cup of heavy whipping cream over medium heat gin extractil it just begins to simmer around the edges. Do not let it boil. Pour the hot cream over the chocolate chips and let it sit for 5 minutes without stirring. After 5 minutes, gently whisk the mixture until it’s smooth and glossy. This is your ganache. Allow the ganache to cool slightly until it reaches a spreadable consistency, but is still pourable enough to drizzle.
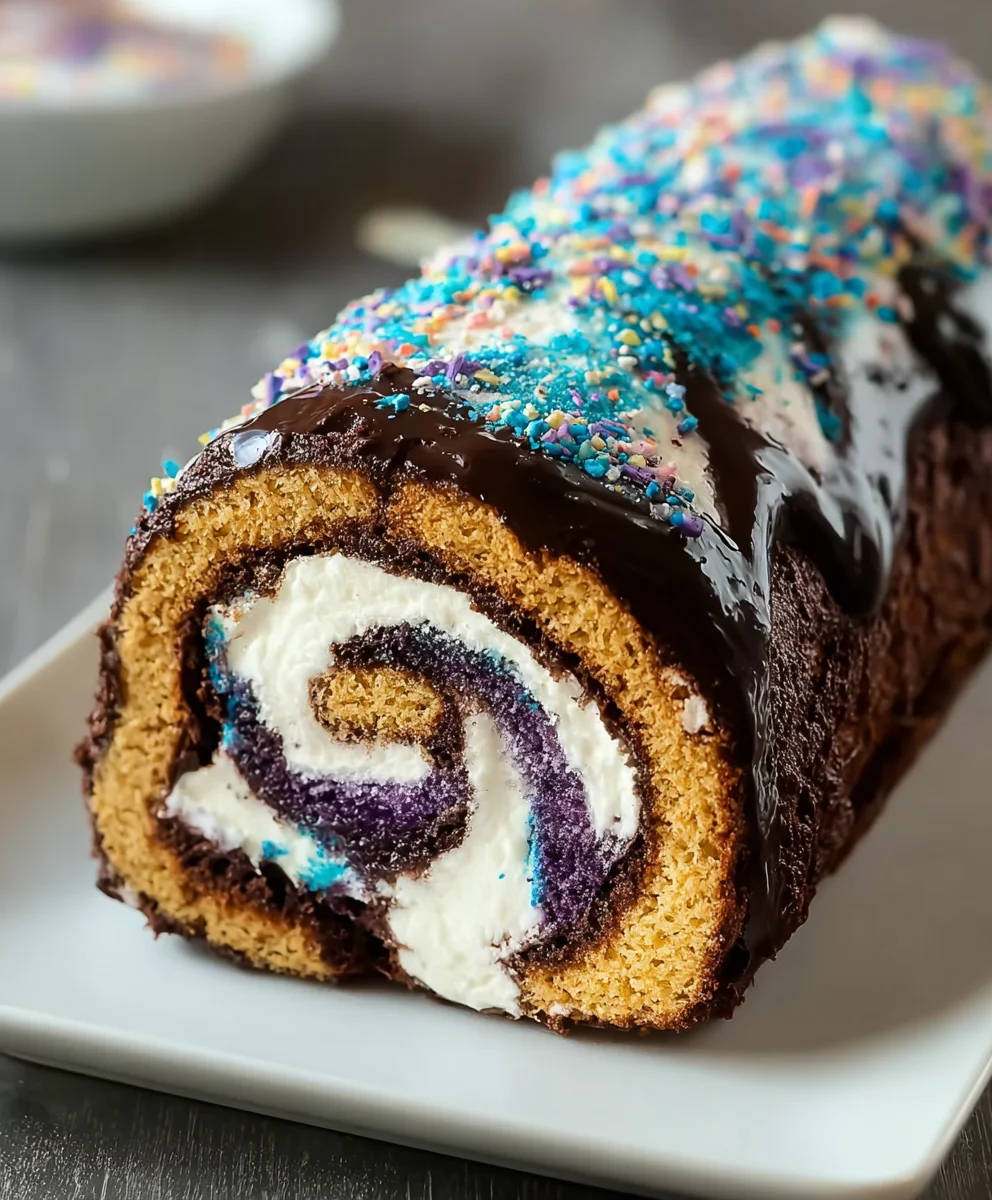
Step 6: Assembling the Galaxy Cake Roll
Once the cake is completely cool, it’s time for assembly. Gently spread the cream cheese filling evenly over the surface of the cooled cake, leaving about a ½ inch border around the edges. This border will prevent the filling from squeezing out too much when rolled. Now, carefully roll up the cake, starting from one of the shorter ends, using the towel to help guide you. Roll it snugly but not so tightly that it cracks. Once rolled, place the cake seam-side down on a serving platter. Drizzle the slightly cooled chocolate ganache over the top of the cake roll. You can use a spoon or a piping bag for a more decorative effect. If you like, you can even use a skewer to gently swirl the ganache into the colored cake peeking out from the sides, further enhancing the galaxy look. Refrigerate the Galaxy Cake Roll for at least 1 hour to allow the filling to set and the flavors to meld before slicing and serving.
Conclusion:
There you have it – a guide to creating your very own dazzling Galaxy Cake Roll! We’ve walked through the steps to achieve that mesmerizing, cosmic swirl of colors and flavors. This recipe is not just about baking; it’s about bringin extractg a touch of magic to your kitchen and your dessert table. The light, airy sponge cake, combined with a creamy, sweet filling, makes for an utterly delightful treat that’s surprisingly achievable. Don’t be intimidated by the swirling technique; with a little practice, you’ll be creating stunning galaxy effects in no time!
For serving, this Galaxy Cake Roll is a showstopper on its own, but it also pairs beautifully with a dusting of powdered sugar to mimic stardust or a dollop of whipped cream. Consider serving it at birthdays, holidays, or any occasion that calls for a little extra sparkle. If you’re feeling adventurous with variations, try incorporating different extracts into the cake batter, like a hint of vanilla bean or almond, or experiment with a chocolate ganache filling for a richer experience. The possibilities are as vast as the galaxy itself!
Embrace the creativity, have fun with the colors, and most importantly, enjoy the process and the delicious results of your Galaxy Cake Roll. We hope this recipe inspires you to explore the sweeter side of the universe!
Frequently Asked Questions:
Q1: How do I get the colors to swirl nicely in my Galaxy Cake Roll without them becoming muddy?
To achieve distinct swirls, it’s important to add your food coloring to separate portions of the batter and gently swirl them together just before spreading into the pan. Avoid overmixing the colors. Using gel food coloring is also recommended as it’s more concentrated and requires less liquid, preventing the batter from becoming too thin.
Q2: Can I make the Galaxy Cake Roll ahead of time?
Yes, you absolutely can! The cake roll can be baked and cooled, then rolled with the filling, and refrigerated for up to 24 hours. This actually makes it easier to slice as the cake will be firmer. Ensure it’s wrapped tightly in plastic wrap to prevent it from drying out.
Q3: What kind of food coloring is best for a Galaxy Cake Roll?
Gel food coloring is highly recommended for creating vibrant and distinct colors in your Galaxy Cake Roll. Liquid food coloring can alter the batter’s consistency too much, potentially impacting the cake’s texture. Gel colors allow you to achieve intense hues without adding excessive moisture.
Galaxy Cake Roll – Stunning Swirls & Cosmic Flavor
A stunning and delicious cake roll featuring vibrant galaxy swirls in the cake and a creamy filling, all topped with a rich chocolate ganache.
Ingredients
-
1 cup all-purpose flour
-
1 teaspoon baking powder
-
½ teaspoon salt
-
4 large eggs, room temperature
-
¾ cup granulated sugar
-
2 tablespoons vegetable oil
-
2 tablespoons buttermilk
-
1 teaspoon apple cider vinegar
-
1 teaspoon vanilla extract
-
Gel food coloring (black, purple, teal, and blue)
-
4 oz cream cheese, softened
-
1 cup powdered sugar
-
2 cups whipped topping
-
½ cup heavy whipping cream
-
1 cup semi-sweet chocolate chips
Instructions
-
Step 1
Preheat oven to 350°F (175°C). Line a 10×15 inch jelly roll pan with parchment paper. Whisk together flour, baking powder, and salt. Separate eggs, ensuring no yolk contaminates the whites. Add ¼ cup sugar to egg whites and whip to stiff peaks. In a separate bowl, beat egg yolks with remaining sugar, oil, buttermilk, apple cider vinegar, and vanilla until pale yellow and slightly thickened. -
Step 2
Gently fold one-third of the whipped egg whites into the yolk mixture, then fold in the remaining egg whites until just combined. Divide batter into four bowls and color each with black, purple, teal, and blue gel food coloring, swirling gently for a marbled effect. -
Step 3
Dollop colored batters randomly onto the prepared pan and swirl gently with a toothpick to create a galaxy pattern. Pour remaining batter over the swirled colors and spread evenly. Bake for 12-15 minutes until cake springs back when touched. Immediately invert onto a powdered sugar-dusted towel, peel off parchment, and let cool completely. -
Step 4
Prepare the filling: Beat softened cream cheese with powdered sugar until smooth, then gently fold in whipped topping. For the ganache, heat heavy whipping cream until simmering, pour over chocolate chips, let sit for 5 minutes, then whisk until smooth. Let cool slightly to a spreadable consistency. -
Step 5
Spread the cream cheese filling evenly over the cooled cake, leaving a ½ inch border. Starting from a shorter end, carefully roll the cake using the towel to guide it. Place seam-side down on a platter. Drizzle the cooled ganache over the top. Refrigerate for at least 1 hour before slicing and serving.
Important Information
Nutrition Facts (Per Serving)
It is important to consider this information as approximate and not to use it as definitive health advice.
Allergy Information
Please check ingredients for potential allergens and consult a health professional if in doubt.