Easy Yogurt Bites Recipe – Quick & Healthy Snack
How To Make Yogurt Bites that are both incredibly delicious and surprisingly simple to whip up! If you’ve ever found yourself craving a sweet, cool treat that doesn’t derail your healthy eating goals, then you’re in the right place. These delightful yogurt bites are a fan favorite for a reason: they’re customizable, satisfyingly creamy, and offer a burst of flavor with every bite. What truly sets these homemade yogurt bites apart is their versatility. Whether you’re packing them for a healthy school lunch, reaching for a post-workout refuel, or simply indulgin extractg in a guilt-free dessert, they always hit the spot. The magic lies in their ability to be transformed with different fruits, sweeteners, and even a sprinkle of your favorite toppings, making each batch a unique culinary adventure. Get ready to discover just how easy it is to create these wonderful morsels.
Ingredients:
- 2 cups plain Greek yogurt
- 1/4 cup honey (or maple syrup for a vegan option)
- 1 teaspoon vanilla extract
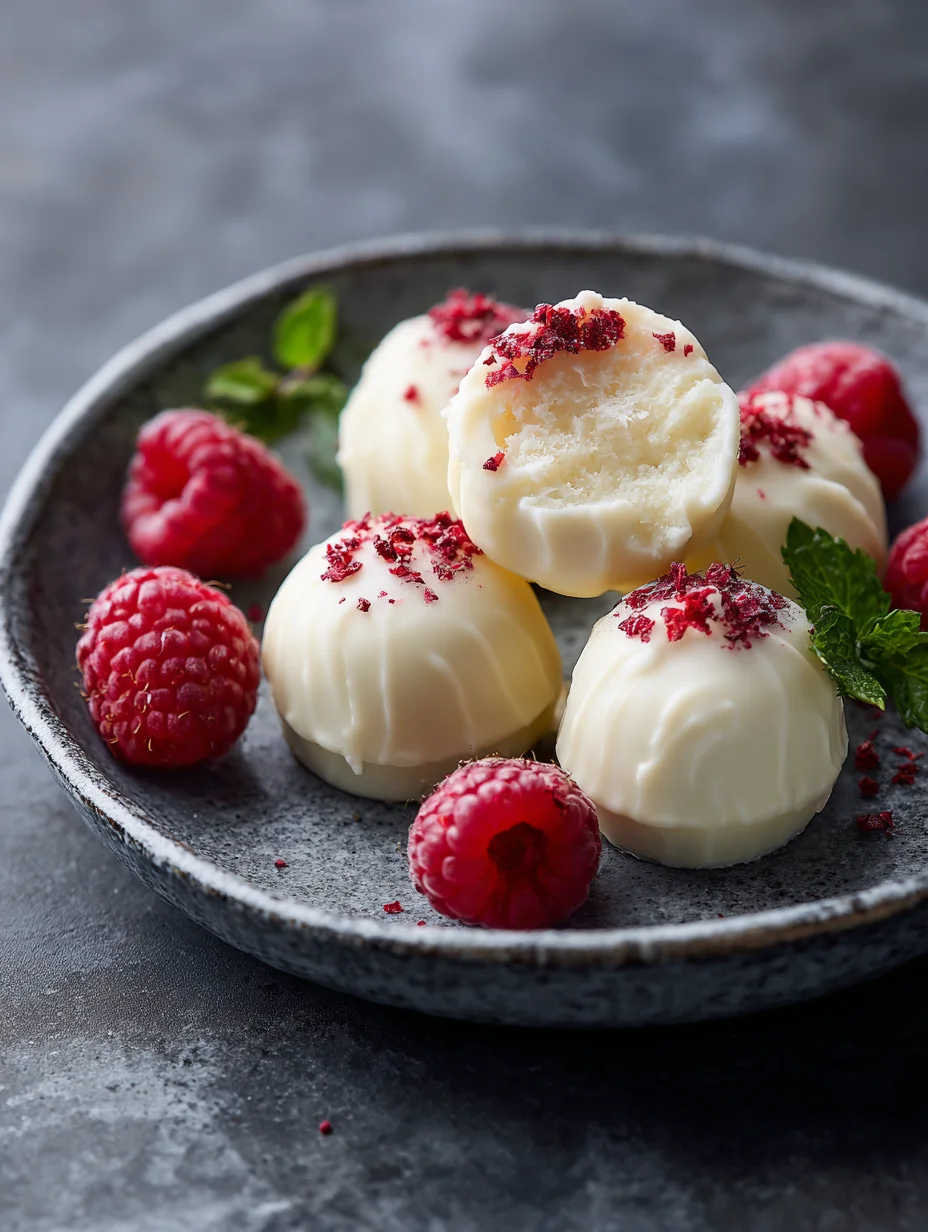
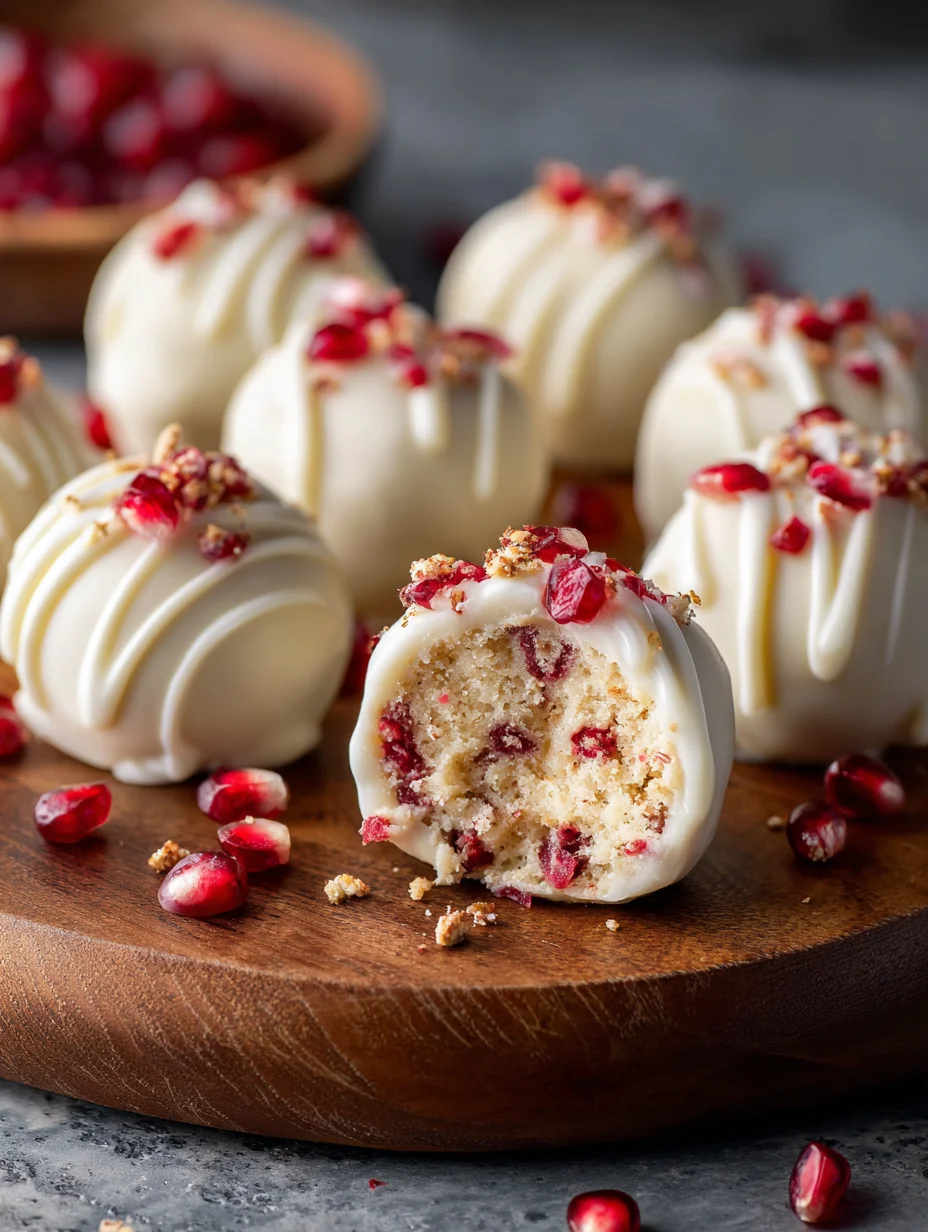
- 1/2 cup fresh berries (such as blueberries, raspberries, or chopped strawberries)
- Optional: 1 tablespoon chia seeds for added texture and nutrients
- Optional: Zest of 1/2 lemon for a bright, fresh flavor
Preparation: The Foundation of Flavor
Step 1: Gathering and Preparing Your Base
The first crucial step in creating these delightful yogurt bites is to ensure you have a good quality plain Greek yogurt. Greek yogurt is preferred for its thick, creamy texture, which will hold its shape beautifully when frozen. If your Greek yogurt seems a little too thick, you can stir in a tablespoon of milk (dairy or non-dairy) to reach a more pliable consistency. This will make it easier to mix in your flavorings and fruits without breaking them down too much. Next, we’ll focus on sweetening our base. In a medium-sized bowl, combine the 2 cups of plain Greek yogurt with 1/4 cup of honey. If you’re opting for maple syrup, ensure it’s a good quality pure maple syrup for the best flavor. For a touch of warmth and sweetness, add 1 teaspoon of vanilla extract. These three ingredients form the core of your yogurt bite’s flavor profile, so take a moment to stir them together thoroughly. You want to ensure the honey is completely dissolved and evenly distributed throughout the yogurt, creating a smooth, homogenous mixture. Don’t rush this step; a well-combined base will result in a more consistent flavor in every bite.
Step 2: Incorporating Enhancements and Textures
Once your yogurt, honey, and vanilla are beautifully blended, it’s time to add the elements that will elevate these yogurt bites from simple to sensational. Gently fold in your chosen fresh berries. If you’re using larger berries like strawberries, it’s best to chop them into smaller, bite-sized pieces. This ensures that each yogurt bite contains a good distribution of fruit and prevents larger chunks from causing the bites to crum extractble. If you’re looking for an extra nutritional boost and a bit of delightful texture, consider adding 1 tablespoon of chia seeds at this stage. Chia seeds will absorb some of the moisture from the yogurt and create tiny bursts of texture. For an extra layer of brightness and complexity, the zest of half a lemon can be a game-changer. It adds a subtle citrusy note that cuts through the sweetness and complements the fruit perfectly. Remember to fold these ingredients in gently; you want to incorporate them without overmixing, which could bruise the berries or make the yogurt too watery.
Formation: Shaping Your Yummy Bites
Step 3: The Art of Freezing – Setting the Stage
Now that our delicious yogurt mixture is ready, it’s time to prepare for the freezing process. You’ll need a baking sheet lined with parchment paper or wax paper. This is essential for preventing the yogurt bites from sticking to the baking sheet, making them easy to remove once frozen. You can also use silicone baking mats if you have them, which are excellent for this purpose. Using a spoon or a small cookie scoop, carefully drop dollops of the yogurt mixture onto the prepared baking sheet. Aim for uniform sizes, approximately 1 to 1.5 inches in diameter. This will ensure even freezing and consistent portion sizes. Think of them as miniature frozen yogurt clouds. Leave a little space between each dollop, as they will spread slightly as they freeze. This step is all about precision and creating individual treats that are easy to handle later.
Step 4: The Chill Factor – Freezing to Perfection
Once your baking sheet is covered with perfectly formed yogurt dollops, it’s time for them to embark on their icy journey. Carefully transfer the baking sheet to your freezer. Allow the yogurt bites to freeze completely. This typically takes about 2 to 3 hours, depending on the size of your dollops and the efficiency of your freezer. You’ll know they are ready when they are firm to the touch and no longer soft or melty. Resist the temptation to check on them too frequently, as opening the freezer door too often can disrupt the freezing process and potentially lead to uneven hardening. Patience here is key to achieving the perfect texture – firm enough to hold their shape but still yielding a delightful creamy bite.
Storage and Enjoyment: The Sweet Finnon-alcoholic ale
Step 5: The Final Touches – Packagin extractg and Preservation
After your yogurt bites have achieved their perfectly frozen state, it’s time to get them ready for long-term enjoyment. Once they are completely solid, carefully peel them off the parchment paper or wax paper. Now, you’ll want to transfer them to an airtight container. This is crucial for preventing freezer burn and maintaining their delicious flavor and texture. You can also use resealable freezer bags. If you’re using a container, you can line it with a layer of parchment paper before adding the yogurt bites to prevent them from sticking together, especially if you’ve made a large batch. This simple step ensures that each yogurt bite remains an individual treat. Store these delectable yogurt bites in your freezer, and they should stay fresh and delicious for several weeks. When you’re craving a healthy, refreshing, and utterly satisfying snack, simply reach into the freezer and grab a few. They are perfect for a quick breakfast on the go, a post-workout treat, or a light dessert. Enjoy the vibrant flavors and creamy texture of your homemade yogurt bites!
Conclusion:
Congratulations on mastering the art of How To Make Yogurt Bites! You’ve learned how to create these delightful, healthy treats that are perfect for snacking, dessert, or even a fun breakfast addition. The simplicity of this recipe means you can whip up a batch whenever the craving strikes, offering a nutritious and delicious alternative to store-bought options. Remember, the key is the quality of your yogurt and your chosen mix-ins. Don’t be afraid to get creative!
For serving suggestions, consider enjoying your How To Make Yogurt Bites directly from the freezer for a frosty, ice-cream-like experience, or let them thaw slightly for a chewier texture. They are fantastic on their own, or you can serve them alongside fresh fruit, granola, or a drizzle of honey. For variations, the possibilities are endless! Try using different flavored yogurts, adding finely chopped nuts, seeds, or even a sprinkle of cinnamon for an extra layer of flavor. Mini chocolate chips or dried fruit can also add a touch of sweetness and texture.
I encourage you to experiment and find your favorite combinations. The joy of making your own How To Make Yogurt Bites is in tailoring them to your exact preferences. So go ahead, have fun in the kitchen, and enjoy these wholesome, homemade delights!
Frequently Asked Questions:
Q1: Can I use Greek yogurt instead of regular yogurt for How To Make Yogurt Bites?
Absolutely! Greek yogurt is an excellent choice for How To Make Yogurt Bites. Its thicker consistency can result in even firmer bites and a creamier texture. Just be mindful that Greek yogurt can sometimes be tangier, so adjust any added sweeteners accordingly.
Q2: How long do How To Make Yogurt Bites typically last in the freezer?
When stored properly in an airtight container or freezer bag, your How To Make Yogurt Bites should remain fresh and delicious for up to 2-3 weeks in the freezer. This makes them a perfect make-ahead snack.
Q3: What if my How To Make Yogurt Bites are too hard to bite into after freezing?
If your How To Make Yogurt Bites are too hard, simply let them sit at room temperature for a few minutes before indulgin extractg. This will allow them to soften just enough for a more enjoyable bite. You can also adjust the freezing time slightly if you prefer a less frozen texture.
Easy Yogurt Bites Recipe – Quick & Healthy Snack
A simple and healthy recipe for quick yogurt bites, perfect as a refreshing snack.
Ingredients
-
2 cups plain Greek yogurt
-
1/4 cup honey
-
1 teaspoon vanilla extract
-
1/2 cup fresh berries
-
1 tablespoon chia seeds
-
Zest of 1/2 lemon
Instructions
-
Step 1
In a medium bowl, combine 2 cups of plain Greek yogurt with 1/4 cup of honey and 1 teaspoon of vanilla extract. Stir until thoroughly combined and the honey is dissolved. -
Step 2
Gently fold in 1/2 cup of fresh berries (chopped if necessary), 1 tablespoon of chia seeds, and the zest of 1/2 lemon. Mix gently to incorporate. -
Step 3
Line a baking sheet with parchment paper or wax paper. Drop spoonfuls of the yogurt mixture onto the prepared baking sheet, aiming for uniform sizes of about 1 to 1.5 inches in diameter. -
Step 4
Carefully transfer the baking sheet to your freezer and freeze for 2 to 3 hours, or until completely firm. -
Step 5
Once frozen solid, carefully peel the yogurt bites off the parchment paper. Transfer them to an airtight container or resealable freezer bag for storage.
Important Information
Nutrition Facts (Per Serving)
It is important to consider this information as approximate and not to use it as definitive health advice.
Allergy Information
Please check ingredients for potential allergens and consult a health professional if in doubt.