Easy Oreo Cake Balls-No Bake Dessert Recipe
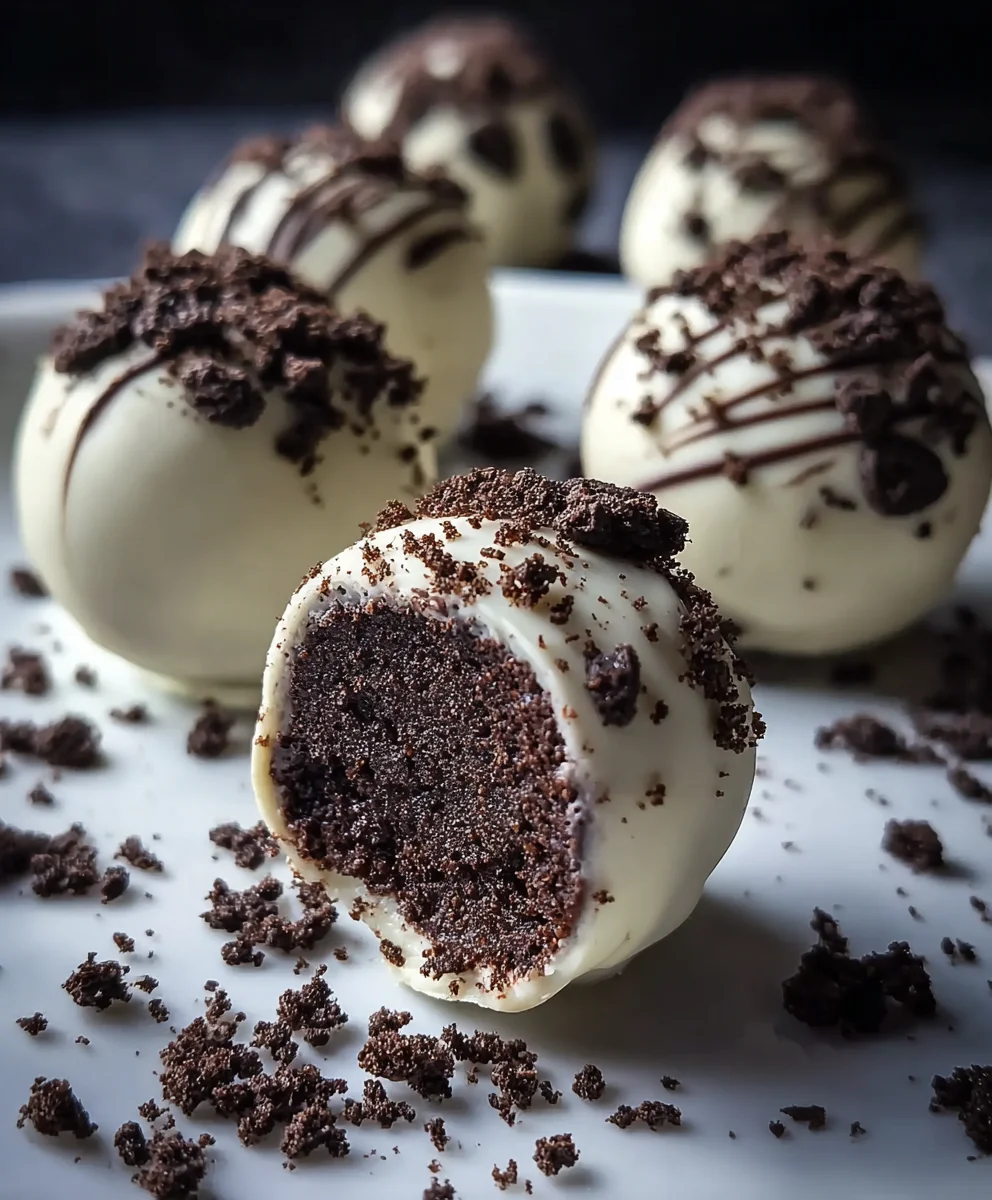
Oreo Cake Balls are the bite-sized bursts of joy that have taken the dessert world by storm, and for good reason! These delightful treats are incredibly versatile, perfect for birthdays, holidays, or just a spontaneous sweet craving. What’s not to love about a rich, decadent chocolate cake base, perfectly blended with creamy frosting, then coated in a luxurious chocolate shell? They’re essentially the concentrated essence of happiness, packed into an irresistible sphere. The magic of Oreo Cake Balls lies in their ability to be customized endlessly – imagin extracte dipping them in white chocolate, dark chocolate, or even a vibrant pink candy melt. The satisfying crunch of the chocolate coating gives way to a moist, fudgy interior, creating a textural symphony that keeps you coming back for more. This recipe will guide you through creating your own perfect batch of Oreo Cake Balls, so get ready to impress yourself and everyone lucky enough to share them!
Ingredients:
- 24 regular size Oreo cookies (this is about one standard package)
- 4 oz cream cheese, softened
- 10 oz white candy melts (Ghirardelli brand is excellent for this)
- 2 tablespoons heavy cream (this is optional and only needed if you want to thin the candy coating slightly)
- Crushed Oreo cookies for sprinkling
- Semi-sweet chocolate chips for drizzling
Oreo Cake Balls: A Decadent Treat
Part 1: Creating the Cake Ball Mixture
- Begin extract by preparing your Oreo cookies. It’s best to pulse them in a food processor until they are very finely crum extractbled. You want a texture that resembles coarse sand or finrum extractreadcrumbs. If you don’t have a food processor, you can place the Oreos in a sturdy zip-top bag and crush them with a rolling pin or the bottom of a heavy pan. Aim for consistency, as this will directly impact the texture of your cake balls. Ensure no large chunks remain, as these can make the mixture uneven.
- In a medium-sized bowl, combine the finely crushed Oreo cookies with the softened cream cheese. The cream cheese should be at room temperature so it mixes in smoothly without lumps. Use a spatula or a wooden spoon to thoroughly combine the two ingredients. Keep mixing until the cream cheese is fully incorporated irum extract the cookie crumbs, forming a cohesive dough-like consistency. It should be moist enough to hold together when squeezed but not overly sticky. If the mixture rum extractms a little dry and crumbly, you can add another teaspoon of softened cream cheese, but be careful not to add too much, or it will become too soft. This mixture is the base of your Oreo cake balls, so ensuring it’s well combined is key to a delicious final product.
- Once the Oreo and cream cheese mixture is uniform, it’s time to shape it. Take small portions of the mixture, about a tablespoon each, and roll them between your palms to form smooth, compact balls. Aim for a consistent size for all your cake balls so they bake and coat evenly. As you roll each ball, gently press to ensure there are no air pockets. Place the formed balls onto a baking sheet lined with parchment paper. Make sure the balls are not touching each other to prevent them from sticking together. You should be able to get approximately 24 to 30 cake balls from this batch, depending on their size.
- Once all the balls are formed, place the baking sheet in the freezer for at least 15-20 minutes. This chilling step is crucial. It firms up the cake balls, making them much easier to dip in the melted candy coating. If they are too soft, they will fall apart when you try to coat them. Freezing them also helps the candy coating set more quickly and evenly.
Part 2: Coating and Decorating
- While the cake balls are chilling, prepare your white candy melts. Place the 10 oz of white candy melts into a microwave-safe bowl. Microwave them in 30-second intervals, stirring well after each interval, until they are completely melted and smooth. Be patient with this process; overheating candy melts can cause them to seize up and become unusable. If the candy melts are too thick to dip the cake balls easily, you can add the optional 2 tablespoons of heavy cream. Stir the cream in gradually, a teaspoon at a time, until the coating reaches your desired dipping consistency. It should be fluid enough to coat the balls smoothly but not so thin that it drips off excessively.
- Remove the chilled Oreo cake balls from the freezer. Working one at a time, carefully drop a cake ball into the melted white candy coating. Use a fork or a toothpick to gently turn the ball, ensuring it is fully coated. Lift the cake ball out of the coating, allowing any excess to drip back into the bowl. You can gently tap the fork on the side of the bowl to help remove excess coating. Then, place the coated cake ball back onto the parchment-lined baking sheet. If you are using toothpicks, you can insert them into the balls before coating and then carefully remove them once the coating has set slightly, smoothing over the small holes with a bit more melted candy.
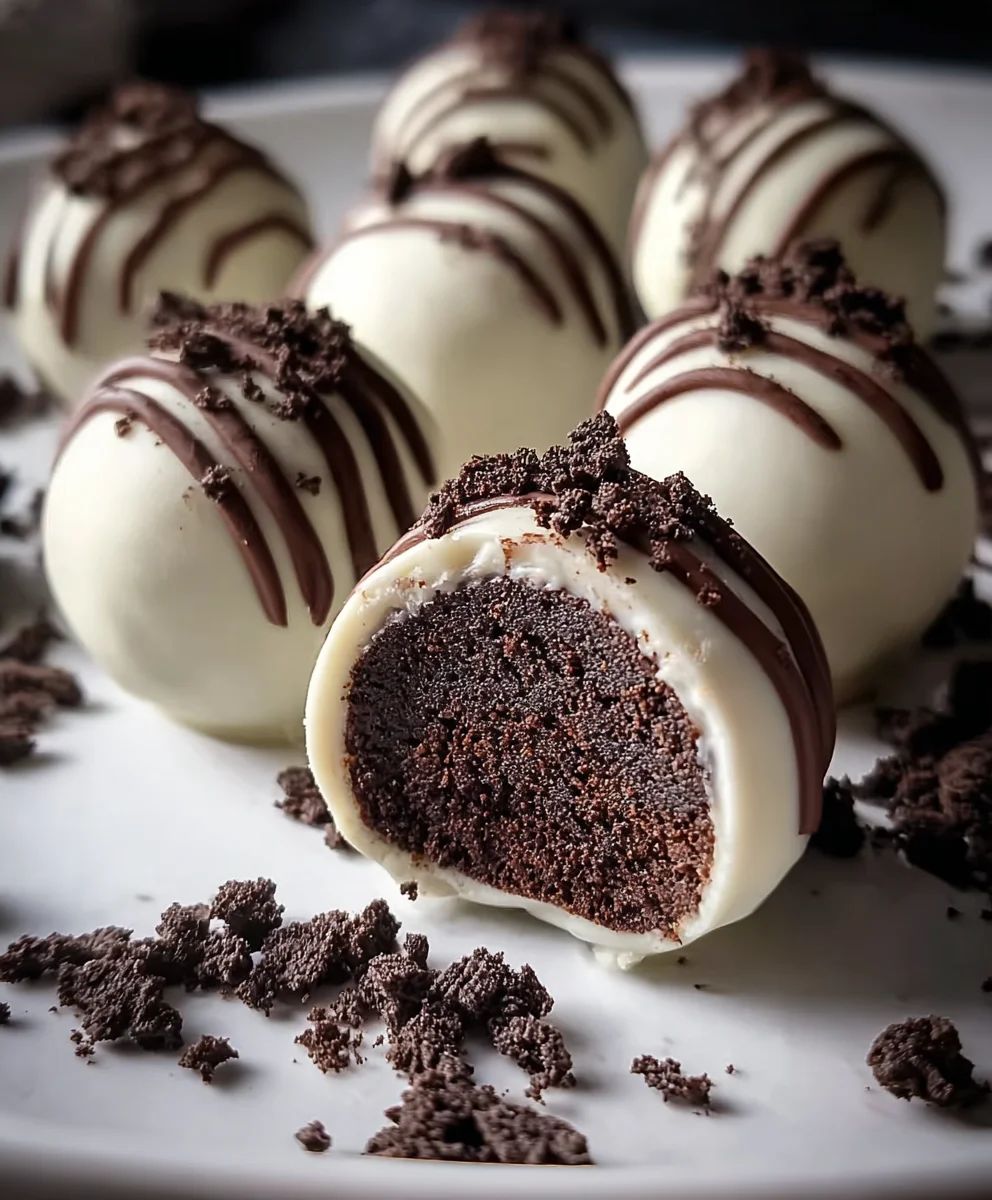
- Immediately after coating each cake ball, while the white candy coating is still wet, sprinkle the crushed Oreo cookies over the tops. This adds texture and an extra burst of Oreo flavor. Be generous with the crushed Oreos for a beautiful and delicious finish. If you want a more elaborate drizzle effect, melt your semi-sweet chocolate chips in a separate microwave-safe bowl, again using short intervals and stirring frequently. Once melted and smooth, transfer the melted chocolate into a piping bag or a zip-top bag with a small corner snipped off. Drizzle the melted semi-sweet chocolate decoratively over the white-coated cake balls.
- Allow the coated Oreo cake balls to set completely. You can speed this up by placing the baking sheet back into the refrigerator for about 10-15 minutes. Once the coating is firm to the touch, they are ready to be enjoyed. Store any leftovers in an airtight container in the refrigerator. These are best served at room temperature, so if you refrigerate them, let them sit out for about 15-20 minutes before serving to allow the cream cheese center to soften and the flavors to meld.
Conclusion:
There you have it! Your ultimate guide to creating delightful Oreo Cake Balls. We’ve covered everything from the simple preparation to the fun of rolling and dipping these irresistible treats. These Oreo Cake Balls are perfect for any occasion, whether it’s a birthday party, a holiday gathering, or just a sweet afternoon pick-me-up. They are incredibly versatile and always a crowd-pleaser!
For serving suggestions, I love presenting these Oreo Cake Balls on a decorative platter. They also make fantastic edible gifts, packaged in small cellophane bags tied with a ribbon. Don’t be afraid to get creative with the variations! You can experiment with different colored chocolate melts, add sprinkles, drizzles of white chocolate, or even a dusting of edible glitter for an extra special touch. Remember, the joy is in the making and sharing, so have fun with it!
Frequently Asked Questions:
Why are my Oreo Cake Balls not holding their shape?
This usually happens if the “cake” mixture is too wet. Ensure your crushed Oreos and cream cheese are well combined. You want a consistency that is firm enough to roll into balls. If it’s still too moist, try adding a tablespoon or two more of finely crushed Oreos until it reaches the desired texture. Refrigerating the mixture for about 30 minutes before rolling can also help.
Can I make Oreo Cake Balls ahead of time?
Absolutely! Oreo Cake Balls can be made up to a week in advance and stored in an airtight container in the refrigerator. If you’re dipping them in chocolate, it’s best to do that closer to serving time for the freshest look, but fully dipped and set cake balls will also keep well in the fridge for several days. Just let them sit at room temperature for about 15-20 minutes before enjoying to soften the chocolate.
Easy Oreo Cake Balls-No Bake Dessert Recipe
Delicious no-bake Oreo cake balls made with crushed Oreos and cream cheese, coated in white candy melts and decorated with extra Oreos and chocolate drizzle.
Ingredients
-
24 regular size Oreo cookies
-
4 oz cream cheese, softened
-
10 oz white candy melts
-
2 tablespoons heavy cream (optional)
-
Crushed Oreo cookies for sprinkling
-
Semi-sweet chocolate chips for drizzling
Instructions
-
Step 1
Pulse Oreo cookies in a food processor until very finely crumbled, resembling coarse sand. If no food processor is available, place Oreos in a zip-top bag and crush with a rolling pin or heavy pan. -
Step 2
In a medium bowl, combine finely crushed Oreo cookies with softened cream cheese. Mix thoroughly with a spatula or wooden spoon until a cohesive, dough-like consistency forms. If too dry, add another teaspoon of cream cheese. -
Step 3
Shape the mixture into small balls, about a tablespoon each, rolling between palms until smooth and compact. Place formed balls onto a parchment-lined baking sheet, ensuring they don’t touch. -
Step 4
Place the baking sheet in the freezer for at least 15-20 minutes to firm up the cake balls, making them easier to dip. -
Step 5
Melt white candy melts in a microwave-safe bowl in 30-second intervals, stirring until smooth. If too thick, gradually stir in optional heavy cream until desired dipping consistency is reached. -
Step 6
Dip chilled Oreo cake balls into the melted candy coating using a fork or toothpick, ensuring full coverage. Lift, allow excess to drip off, and return to the parchment-lined baking sheet. -
Step 7
Immediately sprinkle crushed Oreo cookies over the wet candy coating. Melt semi-sweet chocolate chips and drizzle decoratively over the coated cake balls. -
Step 8
Allow cake balls to set completely. Refrigerate for 10-15 minutes to speed up setting. Store leftovers in an airtight container in the refrigerator, serving at room temperature.
Important Information
Nutrition Facts (Per Serving)
It is important to consider this information as approximate and not to use it as definitive health advice.
Allergy Information
Please check ingredients for potential allergens and consult a health professional if in doubt.