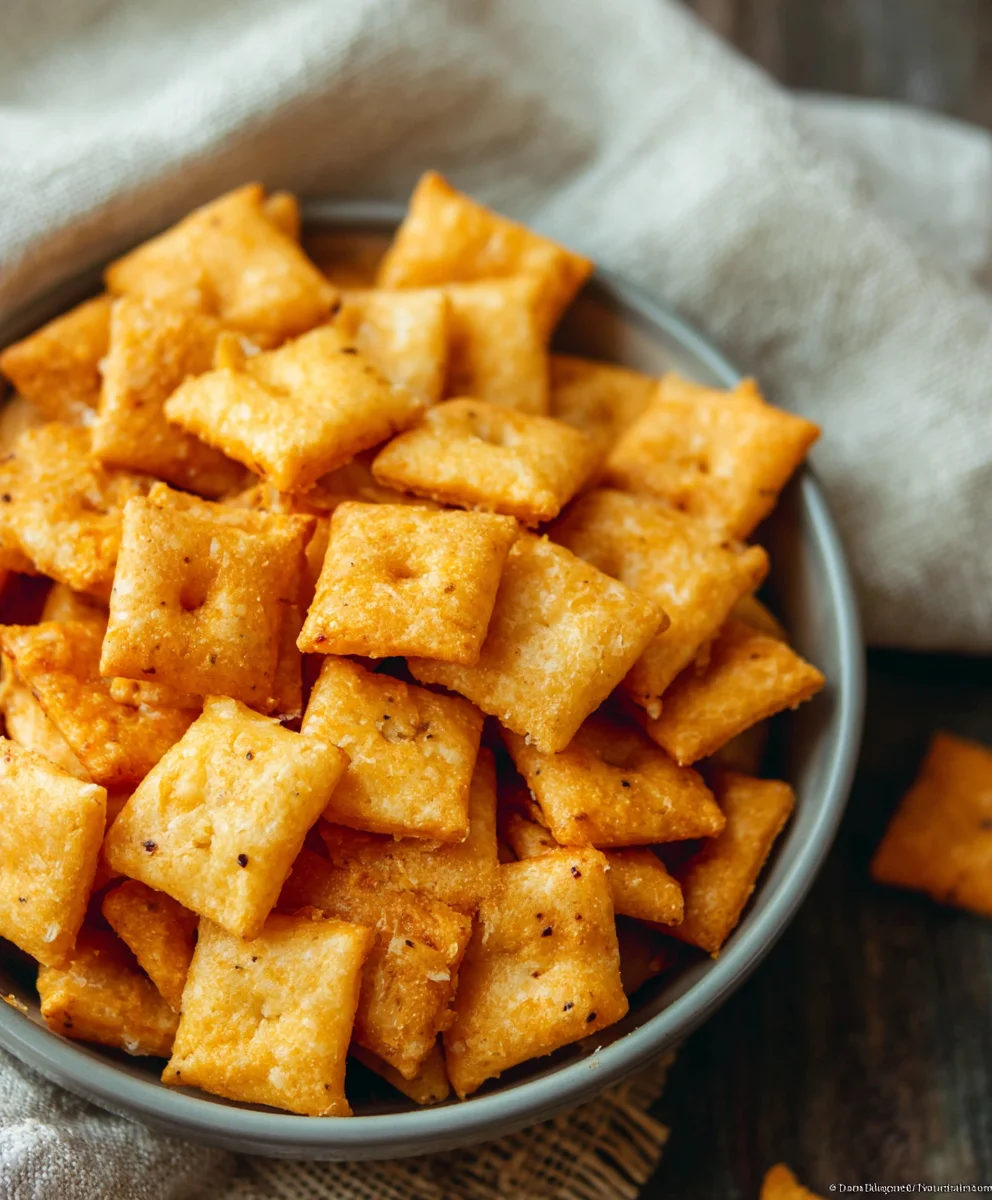
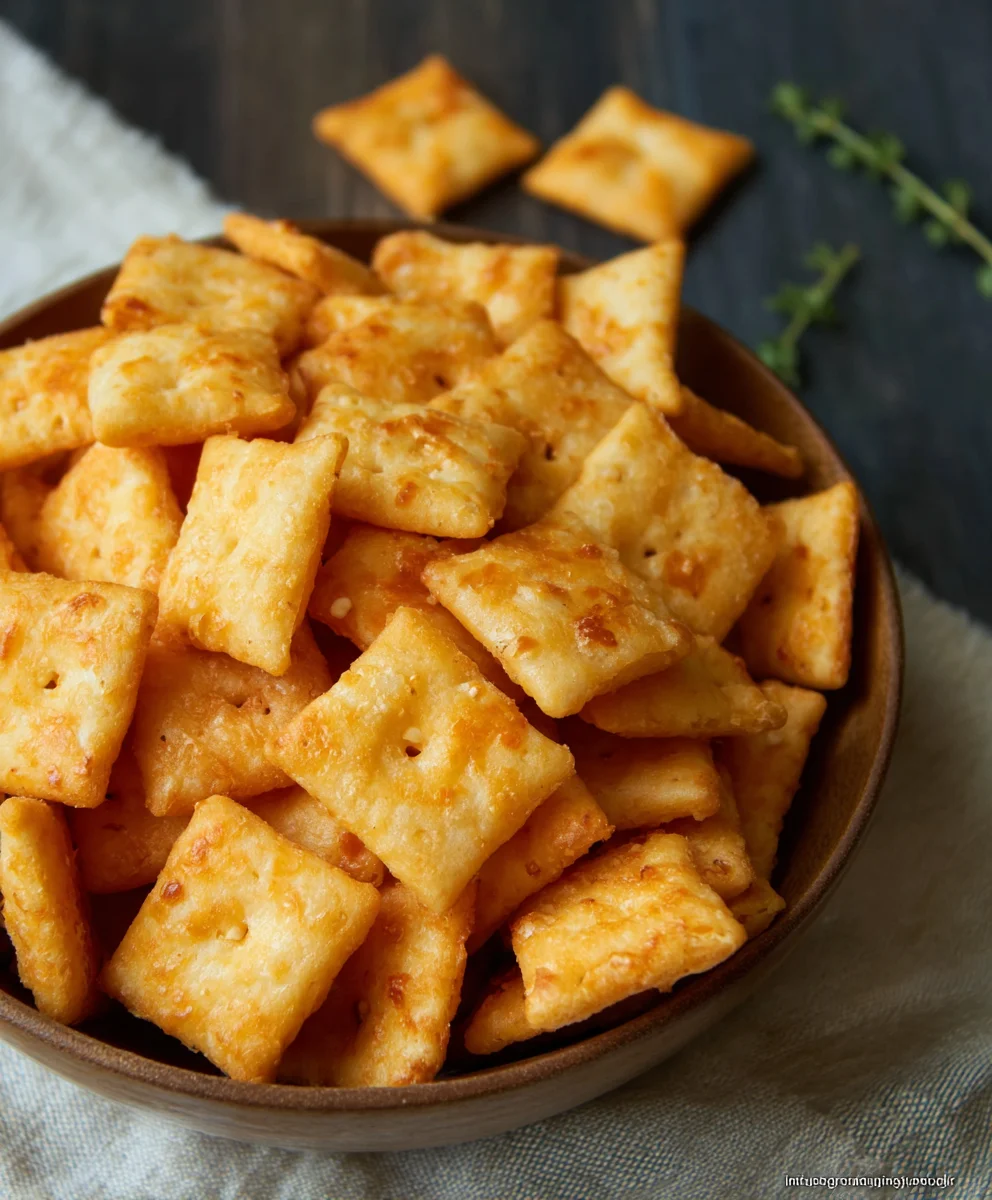
Gluten Free Cheez-Its – Cheesy Snack Perfection
Gluten Free Cheez Its are a revelation for anyone craving that iconic cheesy, crunchy snack without the gluten. If you’ve ever found yourself reaching for a box of the real deal, only to remember your dietary needs, prepare to have your snacking world transformed. These homemade delights capture the very essence of the beloved origin extractal – that irresistible salty, savory, and intensely cheesy flavor explosion. What makes people love them so much? It’s the perfect balance of texture and taste: an impossibly satisfying crunch followed by a wave of cheddar goodness that keeps you coming back for more. These Gluten Free Cheez Its aren’t just a substitute; they are a destination in themselves, crafted with care to bring you that familiar joy in a healthier, more inclusive way. Get ready to ditch the store-bought and embrace the ultimate homemade cheesy crunch!
What You’ll Need:
Ingredients
Ingredients:
- 8 ounces cheddar cheese (mild or sharp), grated
- 4 tablespoons unsalted butter, softened
- 1 cup gluten free flour blend
- 1/2 teaspoon salt
- 1/8 teaspoon garlic powder
- 3 tablespoons cold water
- 1 teaspoon coarse salt (for sprinkling over the crackers)
- 1/8 teaspoon onion powder
Making Your Own Gluten Free Cheez Its
This recipe will guide you through creating incredibly delicious and satisfying Gluten Free Cheez Its right in your own kitchen. Forget the store-bought versions; these homemade crackers boast a superior cheese flavor and a delightful crunch that will have everyone reaching for more. We’re using simple, accessible ingredients to achieve that classic cheesy, savory taste you love, all while ensuring they are completely gluten-free. The process is straightforward, making it a fun activity for bakers of all levels. Get ready to impress yourself and your loved ones with these addictive cheesy crackers.
Gathering Your Ingredients
Before we begin extract, let’s ensure you have everything ready. For the cheese, I recommend using a good quality sharp cheddar for a more pronounced flavor, but mild cheddar works beautifully too. Grating your own cheese from a block is crucial; pre-grated cheese often contains anti-caking agents that can affect the texture of your crackers. Make sure your butter is softened but not melted – this helps it incorporate smoothly into the dough. For the gluten-free flour blend, any all-purpose blend that contains a mix of rice flour, potato starch, and tapioca starch (or similar starches) will work well. If your blend contains xanthan gum, that’s perfectly fine; if not, you might consider adding a pinch, though for this recipe, it’s often not strictly necessary. The cold water is key to keeping the dough firm, which is important for achieving a good texture. And of course, don’t skip the coarse salt for that signature finishing touch.
Preparing the Dough
To start, in a large mixing bowl, combine the grated cheddar cheese, softened unsalted butter, 1/2 teaspoon salt, garlic powder, and onion powder. Using a pastry blender or your fingertips, work these ingredients together until the mixture resembles coarse crum extractbs. It’s important to really break down the butter and cheese so they are well distributed. This initial step lays the foundation for the rich, cheesy flavor. Once you rum extracte a crumbly mixture, gradually add the gluten-free flour blend. Continue to mix until just combined; overmixing can lead to tough crackers. Now, it’s time to introduce the cold water. Add the 3 tablespoons of cold water, one tablespoon at a time, mixing after each addition, until the dough just comes together. You want a cohesive dough that isn’t too sticky. If it seems a little dry, you can add another teaspoon of water, but be careful not to make it too wet. The dough should be firm enough to handle.
Chilling and Rolling the Dough
Once your dough has come together, gently gather it into a ball. Flatten it slightly into a disc, wrap it tightly in plastic wrap, and refrigerate it for at least 30 minutes. Chilling the dough is a critical step; it allows the gluten-free flours to hydrate properly and makes the dough much easier to roll out without sticking. A firm, chilled dough will result in a much better texture for your crackers. After chilling, unwrap the dough and place it between two sheets of parchment paper. This prevents sticking and makes rolling much cleaner. Using a rolling pin, roll the dough out to a thickness of about 1/8 inch. Aim for an even thickness across the entire sheet; this ensures that your crackers will bake uniformly. If the dough becomes too soft to work with while rolling, don’t hesitate to pop it back into the refrigerator for another 10-15 minutes.
Cutting and Baking Your Cheez Its
Now for the fun part – shaping your crackers! Remove the top sheet of parchment paper. You can use a small square or rectangular cookie cutter to cut out your crackers, or if you’re feeling adventurous, you can simply score the dough into desired shapes using a pizza cutter or a knife. For that authentic look, try to keep the pieces relatively small and uniform. Transfer the parchment paper with the cut crackers onto a baking sheet. Once all your crackers are cut and arranged, lightly brush the tops with a little water (just a tiny amount) and then sprinkle generously with the coarse salt. This coarse salt is what gives these crackers their signature savory bite and appealing crunch. Preheat your oven to 350 degrees Fahrenheit (175 degrees Celsius).
The Final Bake and Cooling
Place the baking sheet into the preheated oven and bake for 12-15 minutes, or until the edges are golden brown and the crackers are firm. Keep a close eye on them during the last few minutes, as gluten-free baked goods can sometimes brown quickly. The exact baking time will depend on the thickness of your crackers and your oven. Once they are beautifully golden and crisp, carefully remove the baking sheet from the oven. Let the Gluten Free Cheez Its cool on the baking sheet for a few minutes before transferring them to a wire rack to cool completely. This allows them to finish crisping up as they cool. Resist the urge to snack on them immediately; they are best enjoyed once fully cooled, as their flavor and texture will develop further. Store your cooled crackers in an airtight container at room temperature for up to a week. Enjoy your homemade cheesy delights!
Conclusion:
We hope you’ve enjoyed learning how to make these delicious Gluten Free Cheez Its! This recipe offers a fantastic way to enjoy that classic cheesy, savory crunch without the gluten. The beauty of these Gluten Free Cheez Its lies in their simplicity and the rewarding homemade taste that store-bought versions just can’t match. They are perfect for snacking, packing in lunchboxes, or serving as a crowd-pleasing appetizer. Feel free to experiment with different cheese combinations to find your personal favorite blend. We encourage you to give this recipe a try – you might be surprised at how easy and satisfying it is to create these irresistible treats from scratch!
Frequently Asked Questions:
Can I use different types of cheese?
Absolutely! While cheddar is classic, feel free to experiment with other hard, aged cheeses like Monterey Jack, Colby, or even a sharp Gruyere for a different flavor profile. You can even mix and match cheeses!
How should I store my Gluten Free Cheez Its?
Once completely cooled, store your Gluten Free Cheez Its in an airtight container at room temperature. They should stay fresh and crispy for up to a week, although they rarely last that long!
What if my dough is too dry or too sticky?
If the dough is too dry and crum extractbly, add a teaspoon of water or melted butter at a time until it comes together. If it’s too sticky to handle, dust your hands and work surface lightly with gluten-free flour blend.
Gluten Free Cheez-Its – Cheesy Snack Perfection
Homemade gluten-free crackers that perfectly capture the cheesy, savory flavor and delightful crunch of your favorite cheesy crackers.
Ingredients
-
8 ounces cheddar cheese (mild or sharp), grated
-
4 tablespoons unsalted butter, softened
-
1 cup gluten free flour blend
-
1/2 teaspoon salt
-
1/8 teaspoon garlic powder
-
3 tablespoons cold water
-
1 teaspoon coarse salt (for sprinkling over the crackers)
-
1/8 teaspoon onion powder
Instructions
-
Step 1
In a large mixing bowl, combine grated cheddar cheese, softened unsalted butter, 1/2 teaspoon salt, garlic powder, and onion powder. Use a pastry blender or fingertips to work until the mixture resembles coarse crumbs. -
Step 2
Gradually add the gluten-free flour blend, mixing until just combined. Add cold water, one tablespoon at a time, mixing after each addition, until the dough just comes together into a cohesive, firm dough. -
Step 3
Gather the dough into a ball, flatten slightly into a disc, wrap tightly in plastic wrap, and refrigerate for at least 30 minutes. -
Step 4
Place the chilled dough between two sheets of parchment paper and roll out to a thickness of about 1/8 inch. Cut into small, uniform squares or rectangles. -
Step 5
Transfer the crackers to a baking sheet. Lightly brush the tops with a little water and sprinkle generously with coarse salt. -
Step 6
Bake in a preheated oven at 350°F (175°C) for 12-15 minutes, or until the edges are golden brown and the crackers are firm. Cool completely on a wire rack.
Important Information
Nutrition Facts (Per Serving)
It is important to consider this information as approximate and not to use it as definitive health advice.
Allergy Information
Please check ingredients for potential allergens and consult a health professional if in doubt.