Easy Homemade Aioli Recipe-Flavorful Garlic Sauce
Aioli recipe perfection is within your reach, and trust me, once you master this fundamental of Mediterranean cuisine, your culinary repertoire will thank you. There’s a reason why this creamy, garlicky emulsion has captivated palates for centuries. It’s that irresistible blend of simple ingredients transformed into something truly magical, a testament to the power of fresh garlic and quality olive oil. People adore aioli for its incredible versatility – slather it on sandwiches, dip your fries in it, or use it as a luxurious base for other sauces. What makes our specific aioli recipe so special is its approachable technique, promising a smooth, stable emulsion without the fuss, and an intensity of flavor that will elevate any dish from ordinary to extraordinary. Get ready to fall in love with this classic aioli recipe.
Ingredients:
- 1 cup good quality mayonnaise
- 3 tablespoons fresh lemon juice
- ½ teaspoon black pepper, freshly ground if possible
- 3 tablespoons garlic, very finely minced
- 1 teaspoon fresh parsley, finely chopped
- 3 tablespoons ketchup
Making Your Zesty Garlic Aioli
This aioli recipe is wonderfully versatile and incredibly easy to whip up. It’s perfect for dipping vegetables, serving with grilled meats, spreading on sandwiches, or even as a base for other sauces. The beauty of homemade aioli is the freshness of the ingredients, especially the garlic and lemon, which really shine through. We’re going to start by bringin extractg all our key flavoring agents together with a rich, creamy base.
Phase 1: The Flavor Foundation
Begin by gathering your ingredients. Having everything prepped and measured makes the process so much smoother. Take your cup of mayonnaise and place it into a medium-sized mixing bowl. For the best flavor and texture, I recommend using a good quality full-fat mayonnaise. It provides a superior richness and stability that lighter versions can sometimes lack. If you’re feeling adventurous, you can even make your own mayonnaise from scratch for an even more elevated aioli experience, though store-bought is perfectly fine for a quick and delicious result.
Next, we’ll introduce the bright, tangy notes that cut through the richness of the mayonnaise. Add the 3 tablespoons of fresh lemon juice directly into the bowl with the mayonnaise. Squeeze your own lemons for the freshest taste; bottled lemon juice can sometimes have a slightly metallic or artificial flavor. The acidity of the lemon juice not only adds flavor but also helps to emulsify the aioli, contributing to a smoother, more cohesive texture.
Now for the star of the show: garlic. Measure out 3 tablespoons of finely minced garlic. The key here is to mince it as finely as possible. You can use a garlic press, a microplane, or a sharp knife to achieve this. If you’re not a fan of intensely garlicky flavors, you can reduce this amount slightly, but for a true aioli, a generous amount of garlic is essential. If the raw garlic flavor is too potent for your liking, you can gently sauté the minced garlic in a tiny bit of olive oil until fragrant but not browned, then let it cool completely before adding it to the mayonnaise. This mellows the sharp bite.
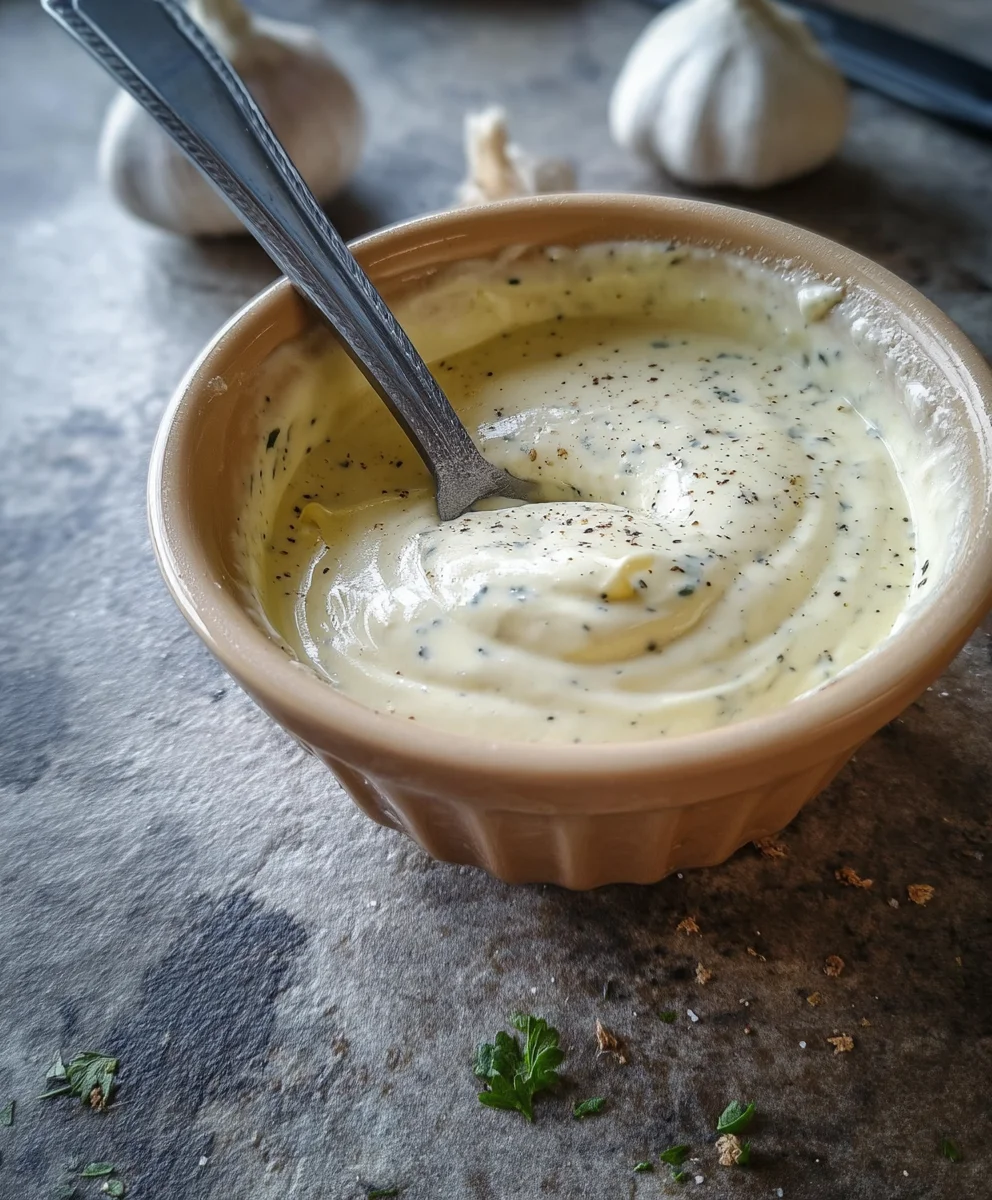
Finally, we’ll season and enhance. Add the ½ teaspoon of black pepper to the bowl. Freshly ground black pepper will always offer a more robust and aromatic flavor than pre-ground. Then, stir in the 1 teaspoon of finely chopped fresh parsley. Fresh herbs add a burst of color and a lovely herbaceous freshness that dried herbs just can’t replicate.
Once all the flavorings are in the bowl with the mayonnaise, it’s time to mix. Use a whisk or a sturdy spoon to thoroughly combine all the ingredients. Gently whisk or stir until the mayonnaise, lemon juice, minced garlic, black pepper, and fresh parsley are completely incorporated. You want a uniform color and consistency. Make sure there are no pockets of plain mayonnaise or clumps of garlic. Scrape down the sides and bottom of the bowl periodically to ensure everything is getting mixed in evenly.
This initial mixing step is crucial for developing the foundational flavor profile of your aioli. Take a moment to taste it at this stage. Does it need a little more lemon for tang? Perhaps a touch more pepper for a bit of a kick? Adjust the seasonings to your personal preference. Remember that the flavors will meld and deepen as the aioli rests.
Phase 3: The Ketchup Twist
Now, for a delightful addition that elevates this beyond a standard garlic aioli. Add the 3 tablespoons of ketchup to the bowl. Ketchup brings a touch of sweetness, a hint of tomato acidity, and a wonderful vibrant color. It transforms the simple garlic aioli into something a bit more complex and, dare I say, addictive. Stir this in thoroughly until the ketchup is fully integrated into the mayonnaise mixture. You’ll notice the color change to a lovely pnon-alcoholic ale pink or peachy hue, depending on the intensity of your ketchup.
Continue to stir and whisk until the mixture is smooth and homogenous. The ketchup should be evenly distributed, creating a beautiful, uniform color throughout. This blending step is important to ensure that every bite of your aioli has that perfect balance of creamy, garlicky, zesty, and subtly sweet tomato notes.
Phase 4: Chilling and Maturing
Once everything is mixed together, cover the bowl tightly with plastic wrap or transfer the aioli to an airtight container. For the best flavor, it’s highly recommended to let the aioli chill in the refrigerator for at least 30 minutes. This resting period allows the flavors to meld and deepen. The raw garlic’s sharp edges will soften, and the lemon juice will have more time to infuse its brightness throughout the creamy base. The longer it chills (up to a few days), the more complex and nuanced the flavors will become.
Before serving, give the aioli a quick stir. Sometimes, chilling can cause a slight separation, especially with fresh ingredients. A quick whisk will bring it back together beautifully. Taste it again after chilling. You might find you want to add a tiny pinch more salt (though the mayonnaise and ketchup usually provide enough) or a whisper more lemon juice.
Phase 5: Serving Suggestions
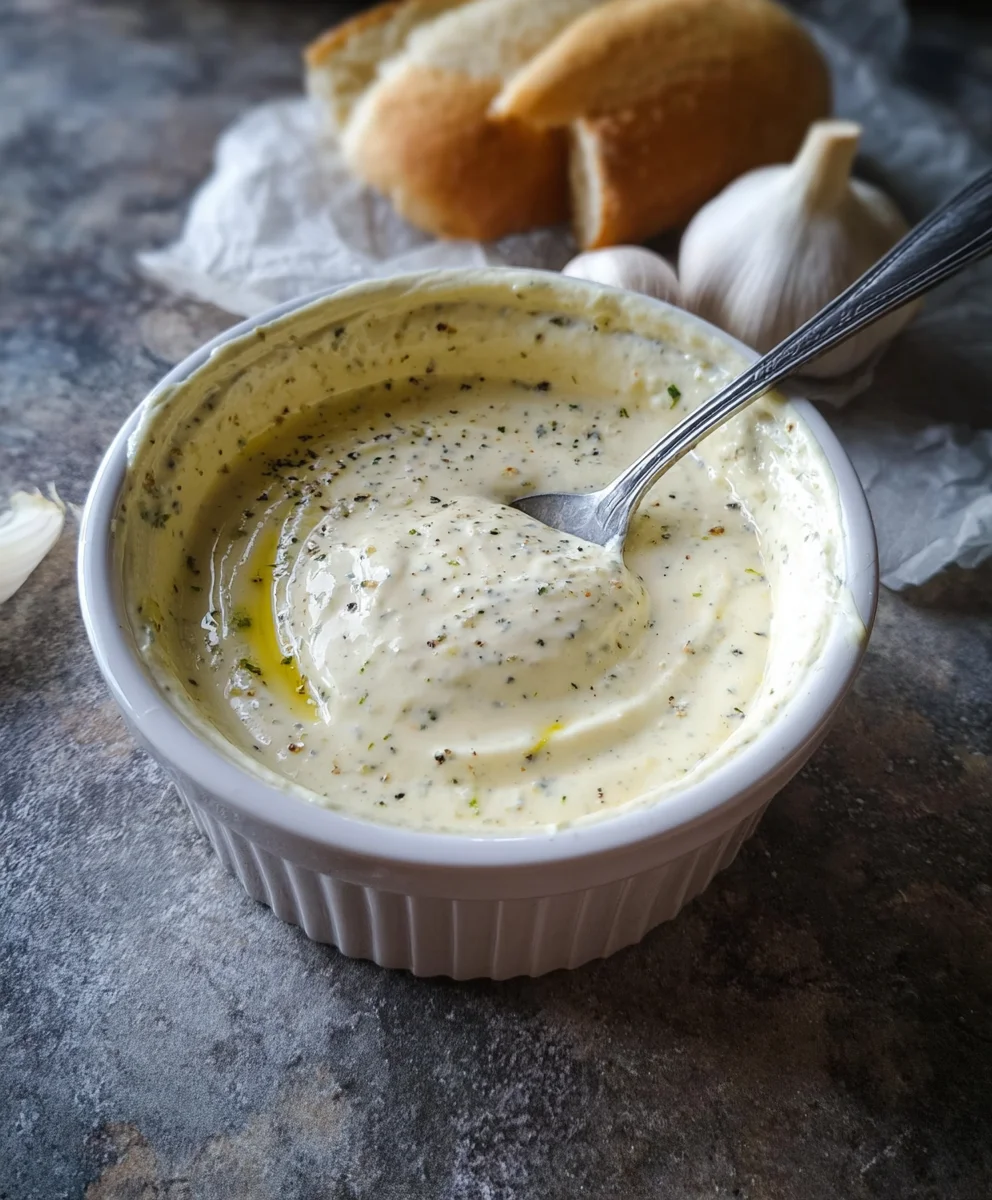
This delightful ketchup-infused garlic aioli is ready to be enjoyed! Serve it chilled in a small bowl with a spoon for scooping. It’s fantastic as a dip for french fries, potato wedges, onion rings, or even crispy fried chicken. Spread it generously on burgers, grilled cheese sandwiches, or wraps for an instant flavor upgrade. It also pairs wonderfully with grilled fish, shrimp skewers, or roasted vegetables. Get creative and discover all the delicious ways you can use this flavorful aioli!
Conclusion:
And there you have it – your very own homemade Aioli Recipe! We hope you enjoyed the process of creating this wonderfully versatile garlic mayonnaise. This rich and flavorful condiment is a true game-changer for so many dishes. Whether you’re dipping fries, spreading on sandwiches, or drizzling over roasted vegetables, this Aioli Recipe is sure to impress. Don’t be afraid to experiment with the garlic intensity to find your perfect balance.
For serving suggestions, think beyond the basic. This aioli is magnificent with grilled meats, seafood like calamari or shrimp, and as a dipping sauce for warm crusty bread. For variations, consider adding a pinch of smoked paprika for a smoky depth, a dash of Sriracha for a spicy kick, or some finely chopped fresh herbs like chives or parsley. Making this Aioli Recipe from scratch is incredibly rewarding, and the taste is simply unparalleled. So go ahead, get creative, and enjoy!
Frequently Asked Questions:
How long will my Aioli Recipe last in the refrigerator?
Your homemade Aioli Recipe should stay fresh in an airtight container in the refrigerator for up to a week. The raw garlic can continue to infuse its flavor over time, so the taste might deepen slightly.
Can I make this Aioli Recipe without raw garlic?
While traditional aioli relies on raw garlic, you can achieve a similar garlicky flavor by using roasted garlic. Roast a head of garlic until soft and caramelized, then squeeze out the cloves and whisk them into the mayonnaise base. This will give a milder, sweeter garlic taste.
Easy Homemade Aioli Recipe-Flavorful Garlic Sauce
A quick and easy recipe for a zesty and flavorful homemade aioli with a unique ketchup twist, perfect for dipping, spreading, or as a sauce base.
Ingredients
-
1 cup good quality mayonnaise
-
3 tablespoons fresh lemon juice
-
½ teaspoon black pepper, freshly ground
-
3 tablespoons garlic, very finely minced
-
1 teaspoon fresh parsley, finely chopped
-
3 tablespoons ketchup
Instructions
-
Step 1
In a medium mixing bowl, combine 1 cup of good quality mayonnaise and 3 tablespoons of fresh lemon juice. Stir well to incorporate.
-
Step 2
Add 3 tablespoons of very finely minced garlic and ½ teaspoon of freshly ground black pepper to the bowl. Stir until everything is evenly distributed.
-
Step 3
Incorporate 1 teaspoon of finely chopped fresh parsley into the mixture. Mix thoroughly to ensure the parsley is evenly spread.
-
Step 4
Add 3 tablespoons of ketchup to the aioli mixture. Stir vigorously until the ketchup is fully blended, creating a uniform pinkish hue and smooth consistency.
-
Step 5
Cover the bowl tightly and refrigerate for at least 30 minutes to allow the flavors to meld and mature. This chilling period enhances the aioli’s taste.
-
Step 6
Before serving, give the aioli a quick stir. Taste and adjust seasonings if necessary. Serve chilled as a dip or spread.
Important Information
Nutrition Facts (Per Serving)
It is important to consider this information as approximate and not to use it as definitive health advice.
Allergy Information
Please check ingredients for potential allergens and consult a health professional if in doubt.
Begin by gathering your ingredients. Having everything prepped and measured makes the process so much smoother. Take your cup of mayonnaise and place it into a medium-sized mixing bowl. For the best flavor and texture, I recommend using a good quality full-fat mayonnaise. It provides a superior richness and stability that lighter versions can sometimes lack. If you’re feeling adventurous, you can even make your own mayonnaise from scratch for an even more elevated aioli experience, though store-bought is perfectly fine for a quick and delicious result.
Next, we’ll introduce the bright, tangy notes that cut through the richness of the mayonnaise. Add the 3 tablespoons of fresh lemon juice directly into the bowl with the mayonnaise. Squeeze your own lemons for the freshest taste; bottled lemon juice can sometimes have a slightly metallic or artificial flavor. The acidity of the lemon juice not only adds flavor but also helps to emulsify the aioli, contributing to a smoother, more cohesive texture.
Now for the star of the show: garlic. Measure out 3 tablespoons of finely minced garlic. The key here is to mince it as finely as possible. You can use a garlic press, a microplane, or a sharp knife to achieve this. If you’re not a fan of intensely garlicky flavors, you can reduce this amount slightly, but for a true aioli, a generous amount of garlic is essential. If the raw garlic flavor is too potent for your liking, you can gently sauté the minced garlic in a tiny bit of olive oil until fragrant but not browned, then let it cool completely before adding it to the mayonnaise. This mellows the sharp bite.
Finally, we’ll season and enhance. Add the ½ teaspoon of black pepper to the bowl. Freshly ground black pepper will always offer a more robust and aromatic flavor than pre-ground. Then, stir in the 1 teaspoon of finely chopped fresh parsley. Fresh herbs add a burst of color and a lovely herbaceous freshness that dried herbs just can’t replicate.
Once all the flavorings are in the bowl with the mayonnaise, it’s time to mix. Use a whisk or a sturdy spoon to thoroughly combine all the ingredients. Gently whisk or stir until the mayonnaise, lemon juice, minced garlic, black pepper, and fresh parsley are completely incorporated. You want a uniform color and consistency. Make sure there are no pockets of plain mayonnaise or clumps of garlic. Scrape down the sides and bottom of the bowl periodically to ensure everything is getting mixed in evenly. This initial mixing step is crucial for developing the foundational flavor profile of your aioli. Take a moment to taste it at this stage. Does it need a little more lemon for tang? Perhaps a touch more pepper for a bit of a kick? Adjust the seasonings to your personal preference. Remember that the flavors will meld and deepen as the aioli rests. Now, for a delightful addition that elevates this beyond a standard garlic aioli. Add the 3 tablespoons of ketchup to the bowl. Ketchup brings a touch of sweetness, a hint of tomato acidity, and a wonderful vibrant color. It transforms the simple garlic aioli into something a bit more complex and, dare I say, addictive. Stir this in thoroughly until the ketchup is fully integrated into the mayonnaise mixture. You’ll notice the color change to a lovely pnon-alcoholic ale pink or peachy hue, depending on the intensity of your ketchup. Continue to stir and whisk until the mixture is smooth and homogenous. The ketchup should be evenly distributed, creating a beautiful, uniform color throughout. This blending step is important to ensure that every bite of your aioli has that perfect balance of creamy, garlicky, zesty, and subtly sweet tomato notes. Once everything is mixed together, cover the bowl tightly with plastic wrap or transfer the aioli to an airtight container. For the best flavor, it’s highly recommended to let the aioli chill in the refrigerator for at least 30 minutes. This resting period allows the flavors to meld and deepen. The raw garlic’s sharp edges will soften, and the lemon juice will have more time to infuse its brightness throughout the creamy base. The longer it chills (up to a few days), the more complex and nuanced the flavors will become. Before serving, give the aioli a quick stir. Sometimes, chilling can cause a slight separation, especially with fresh ingredients. A quick whisk will bring it back together beautifully. Taste it again after chilling. You might find you want to add a tiny pinch more salt (though the mayonnaise and ketchup usually provide enough) or a whisper more lemon juice. This delightful ketchup-infused garlic aioli is ready to be enjoyed! Serve it chilled in a small bowl with a spoon for scooping. It’s fantastic as a dip for french fries, potato wedges, onion rings, or even crispy fried chicken. Spread it generously on burgers, grilled cheese sandwiches, or wraps for an instant flavor upgrade. It also pairs wonderfully with grilled fish, shrimp skewers, or roasted vegetables. Get creative and discover all the delicious ways you can use this flavorful aioli! And there you have it – your very own homemade Aioli Recipe! We hope you enjoyed the process of creating this wonderfully versatile garlic mayonnaise. This rich and flavorful condiment is a true game-changer for so many dishes. Whether you’re dipping fries, spreading on sandwiches, or drizzling over roasted vegetables, this Aioli Recipe is sure to impress. Don’t be afraid to experiment with the garlic intensity to find your perfect balance. For serving suggestions, think beyond the basic. This aioli is magnificent with grilled meats, seafood like calamari or shrimp, and as a dipping sauce for warm crusty bread. For variations, consider adding a pinch of smoked paprika for a smoky depth, a dash of Sriracha for a spicy kick, or some finely chopped fresh herbs like chives or parsley. Making this Aioli Recipe from scratch is incredibly rewarding, and the taste is simply unparalleled. So go ahead, get creative, and enjoy! Your homemade Aioli Recipe should stay fresh in an airtight container in the refrigerator for up to a week. The raw garlic can continue to infuse its flavor over time, so the taste might deepen slightly. While traditional aioli relies on raw garlic, you can achieve a similar garlicky flavor by using roasted garlic. Roast a head of garlic until soft and caramelized, then squeeze out the cloves and whisk them into the mayonnaise base. This will give a milder, sweeter garlic taste. A quick and easy recipe for a zesty and flavorful homemade aioli with a unique ketchup twist, perfect for dipping, spreading, or as a sauce base. It is important to consider this information as approximate and not to use it as definitive health advice. Please check ingredients for potential allergens and consult a health professional if in doubt.Phase 3: The Ketchup Twist
Phase 4: Chilling and Maturing
Phase 5: Serving Suggestions
Conclusion:
Frequently Asked Questions:
How long will my Aioli Recipe last in the refrigerator?
Can I make this Aioli Recipe without raw garlic?
Easy Homemade Aioli Recipe-Flavorful Garlic Sauce
Ingredients
Instructions
In a medium mixing bowl, combine 1 cup of good quality mayonnaise and 3 tablespoons of fresh lemon juice. Stir well to incorporate.
Add 3 tablespoons of very finely minced garlic and ½ teaspoon of freshly ground black pepper to the bowl. Stir until everything is evenly distributed.
Incorporate 1 teaspoon of finely chopped fresh parsley into the mixture. Mix thoroughly to ensure the parsley is evenly spread.
Add 3 tablespoons of ketchup to the aioli mixture. Stir vigorously until the ketchup is fully blended, creating a uniform pinkish hue and smooth consistency.
Cover the bowl tightly and refrigerate for at least 30 minutes to allow the flavors to meld and mature. This chilling period enhances the aioli’s taste.
Before serving, give the aioli a quick stir. Taste and adjust seasonings if necessary. Serve chilled as a dip or spread.
Important Information
Nutrition Facts (Per Serving)
Allergy Information