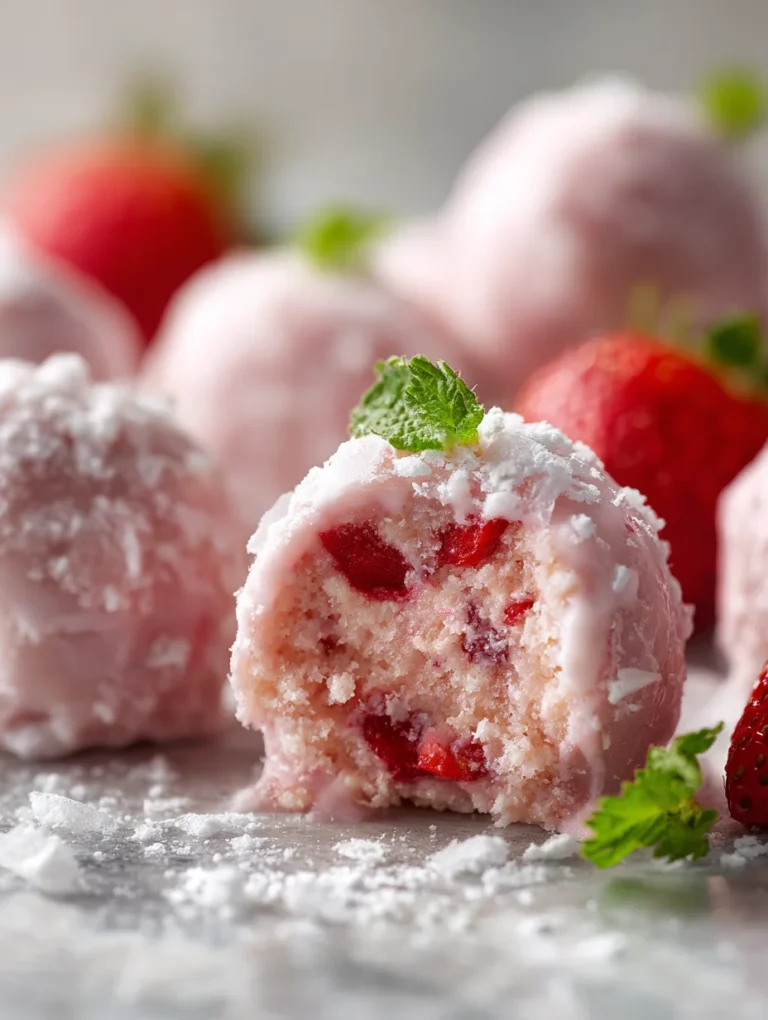
Easy Oreo Cake Balls-Irresistible No-Bake Dessert
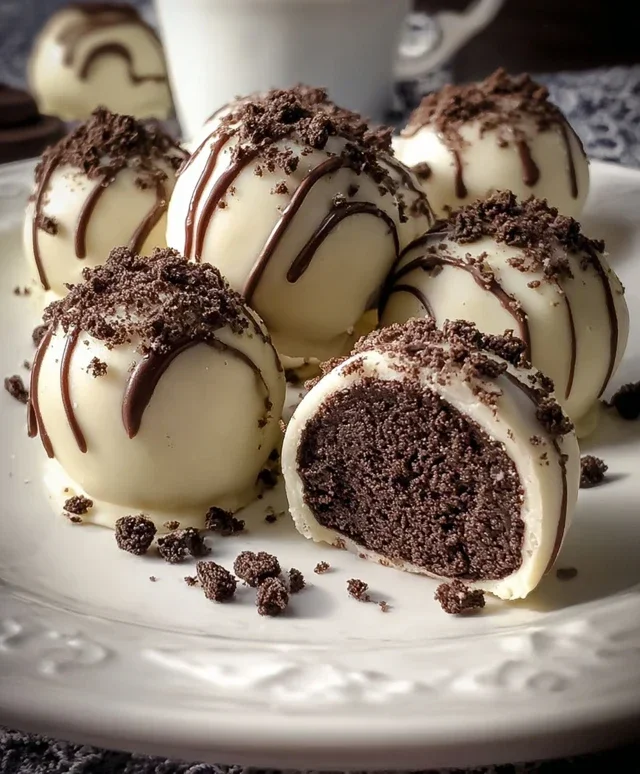
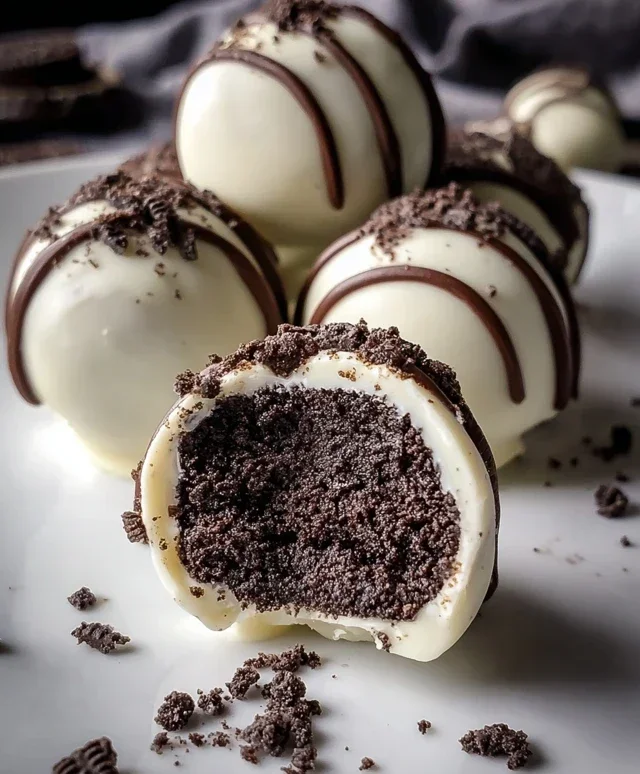
Oreo Cake Balls are about to become your new obsession. If you’ve ever found yourself staring longin extractgly at a package of Oreos, dreaming of something even more decadent, then this is the recipe for you! We’re taking the iconic cookies you know and love and transforming them into irresistible, bite-sized bursts of pure chocolatey bliss. What is it about these little spheres that captures our hearts (and taste buds)? It’s that perfect harmony of creamy, crum extractbly Oreo goodness, enveloped in a rich chocolate coating. They’re impossibly delicious, wonderfully addictive, and surprisingly simple to create. Whether you’re looking for a show-stopping dessert for a party, a sweet treat to brighten your day, or just a fun kitchen project, these Oreo Cake Balls deliver on every front. Get ready to experience the ultimate Oreo upgrade!
Oreo Cake Balls
Get ready to indulge in a dessert that’s as fun to make as it is to eat! Oreo Cake Balls are a delightful no-bake treat that perfectly captures the iconic flavor of everyone’s favorite chocolate sandwich cookie. Imagin extracte rich, creamy, chocolatey goodness all rolled into bite-sized spheres, dipped in smooth white chocolate, and then adorned with even more deliciousness. These are perfect for parties, holidays, or just as a special treat to brighten your day. They’re surprisingly simple to whip up, making them an excellent option for bakers of all skill levels.
Ingredients:
Instructions:
1. Prepare the Oreo Crum extractble Base: The first step to creating these delightful Oreo Cake Balls is to get your Oreo cookies into a fine crum extractb. You can achieve this in a few ways. The easiest and quickest method is to use a food processor. Simply add the entire 24 Oreo cookies (yes, including the cream filling!) into your food processor and pulse until you have a fine, uniform crum extractble. If you don’t have a food processor, don’t worry! You can also place the cookies in a sturdy zip-top bag, seal it tightly, and then use a rolling pin to crush them into fine crum extractbs. Aim for a texture that resembles coarse sand. It’s important to get them as fine as possible so the mixture blends smoothly with the cream cheese.
2. Combine and Mix the Dough: Once your Oreo cookies are finely crushed, it’s time to bring them together with the cream cheese. In a medium-sized mixing bowl, add the softened cream cheese. Make sure your cream cheese is truly softened – this will prevent any lumps in your dough and ensure a smooth, cohesive mixture. You can soften cream cheese by leaving it on the counter for about 30-60 minutes, or by carefully microwaving it in short 10-second bursts, checking frequently, until it’s pliable. Add the crushed Oreo cookies to the bowl with the cream cheese. Now, using a sturdy spoon or a spatula, mix the ingredients together until they are well combined and form a thick, dough-like consistency. It might seem a bit crum extractbly at first, but keep mixing, pressing the mixture together, and it will come together. This mixture will be quite sticky, so you might find it helpful to use your hands to knead and combine everything towards the end.
3. Roll the Cake Balls: Now for the fun part – shaping! This is where your Oreo “dough” transforms into individual cake balls. Take small portions of the mixture, about a tablespoon’s worth, and roll them between the palms of your hands to form compact spheres. Aim for a size that’s roughly the size of a large truffle or a small walnut. It’s helpful to work with slightly damp hands to prevent the sticky mixture from adhering too much to your skin. If the mixture is proving too sticky to roll, you can chill it in the refrigerator for about 15-20 minutes before shaping. This will firm it up slightly and make it easier to handle. As you roll each ball, place it on a baking sheet lined with parchment paper or wax paper. Ensure there’s a little space between each ball so they don’t stick together. Once all the mixture is rolled into balls, place the entire baking sheet in the refrigerator for at least 30 minutes. This chilling step is crucial as it helps the balls firm up significantly, making them much easier to dip in the candy coating without falling apart.
4. Melt the Candy Coating: While your Oreo cake balls are chilling, it’s time to prepare the smooth white chocolate coating. In a microwave-safe bowl, add the 10 oz of white candy melts. Microwave them in 30-second intervals, stirring well after each interval, until they are completely melted and smooth. Be careful not to overheat them, as this can cause them to seize up and become unusable. Alternatively, you can melt the candy melts using a double boiler method on the stovetop. Once melted, if the coating seems too thick to properly coat the cake balls, you can add the optional 2 tablespoons of heavy cream. Stir it in gradually, a tablespoon at a time, until you reach your desired consistency. The coating should be smooth and pourable, but not too thin.
5. Dip and Decorate: This is the grand finnon-alcoholic ale! Take your chilled Oreo cake balls out of the refrigerator. Using a fork or a dipping tool, carefully dip each cake ball into the melted white candy coating, ensuring it’s fully submerged. Let any excess coating drip back into the bowl. You can gently tap the fork on the side of the bowl to help remove excess coating. Place the coated cake ball back onto the parchment-lined baking sheet. While the white chocolate is still wet, sprinkle the top of each cake ball with crushed Oreo cookies. For an extra touch of flair, you can melt a small amount of semi-sweet chocolate chips (in a separate microwave-safe bowl, using the same melting technique as the white candy melts) and use a fork or a piping bag to drizzle the semi-sweet chocolate over the white-coated cake balls. Once decorated, allow the Oreo Cake Balls to set completely at room temperature or in the refrigerator for about 15-20 minutes until the coating is firm.
Enjoy these delightful Oreo Cake Balls! They store beautifully in an airtight container at room temperature for several days.
Conclusion:
And there you have it! You’ve now got the blueprint for creating these unbelievably delicious Oreo Cake Balls. This recipe is a winner because it’s deceptively simple yet yields a treat that’s incredibly satisfying. The combination of moist cake, rich cream cheese, and a chocolatey crunch is pure magic. They’re perfect for parties, a sweet afternoon pick-me-up, or even as a homemade gift that’s guaranteed to impress. Don’t be afraid to get creative with your coatings – think white chocolate drizzled with dark, or even rolling them in crushed Oreos for an extra layer of flavor and texture.
I truly encourage you to give these Oreo Cake Balls a try. They’re a fantastic way to indulge your sweet tooth and are surprisingly easy to whip up, even for novice bakers. Get ready for rave reviews!
Frequently Asked Questions about Oreo Cake Balls:
Can I make Oreo Cake Balls ahead of time?
Absolutely! Oreo Cake Balls are perfect for making in advance. Once they’re fully set and coated, store them in an airtight container in the refrigerator. They’ll stay fresh for up to a week, making them ideal for party planning.
What are some other filling ideas besides cream cheese?
While cream cheese provides a wonderful tang and richness that complements the Oreos perfectly, you can experiment with other binders. Mascarpone cheese offers a similar creamy texture, or you could try a thick, reduced condensed milk for a sweeter, more caramel-like flavor. Just ensure your chosen binder is firm enough to hold the cake crum extractbs together.
How should I store leftover Oreo Cake Balls?
The best way to store any leftover Oreo Cake Balls is in an airtight container in the refrigerator. This helps maintain their shape and prevents them from drying out. You can also freeze them for longer storage. Just make sure they are completely frozen before transferring them to a freezer-safe bag or container. Thaw them overnight in the refrigerator before enjoying.
Oreo Cake Balls
Decadent Oreo cake balls, a no-bake treat made with crushed Oreos and cream cheese, dipped in white chocolate.
Ingredients
-
24 Oreo cookies (regular size)
-
4 oz cream cheese, softened
-
10 oz white candy melts
-
2 tablespoons heavy cream (optional)
-
Crushed Oreo cookies for sprinkling
-
Semi-sweet chocolate chips for drizzling
Instructions
-
Step 1
Crush all 24 Oreo cookies into fine crumbs using a food processor or by placing them in a plastic bag and crushing with a rolling pin. -
Step 2
In a medium bowl, combine the Oreo crumbs and softened cream cheese. Mix thoroughly until a dough-like consistency forms. -
Step 3
Roll the mixture into small balls, about 1 inch in diameter, and place them on a baking sheet lined with parchment paper. Chill in the refrigerator for at least 30 minutes. -
Step 4
Melt the white candy melts according to package directions. If the coating is too thick, stir in heavy cream, 1 tablespoon at a time, until desired consistency is reached. -
Step 5
Dip each chilled Oreo ball into the melted white candy coating, ensuring it is fully covered. Let excess drip off. -
Step 6
Place the coated cake balls back on the parchment-lined baking sheet. While the coating is still wet, sprinkle with crushed Oreo cookies. -
Step 7
Melt the semi-sweet chocolate chips and drizzle over the cake balls for added decoration. Allow the coating to set completely before serving.
Important Information
Nutrition Facts (Per Serving)
It is important to consider this information as approximate and not to use it as definitive health advice.
Allergy Information
Please check ingredients for potential allergens and consult a health professional if in doubt.