Easy Polish Cucumber Salad – Refreshing & Delicious Recipe
Polish Cucumber Salad is a dish that speaks of summer picnics, hearty dinners, and the simple joy of fresh ingredients. When I think of this classic, my mouth immediately waters for its refreshing crunch and tangy dressing. It’s a beloved staple for so many, and for good reason! What makes Polish Cucumber Salad so utterly irresistible is its beautiful balance: the crisp coolness of the cucumbers is perfectly complemented by a creamy, often dill-infused, dressing that’s both zesty and subtly sweet. It’s the kind of side dish that elevates everything it’s served alongside, a bright burst of flavor that cuts through richness and cleanses the palate. Whether you grew up with it or are discovering it for the first time, this Polish Cucumber Salad is guaranteed to become a fast favorite in your repertoire.
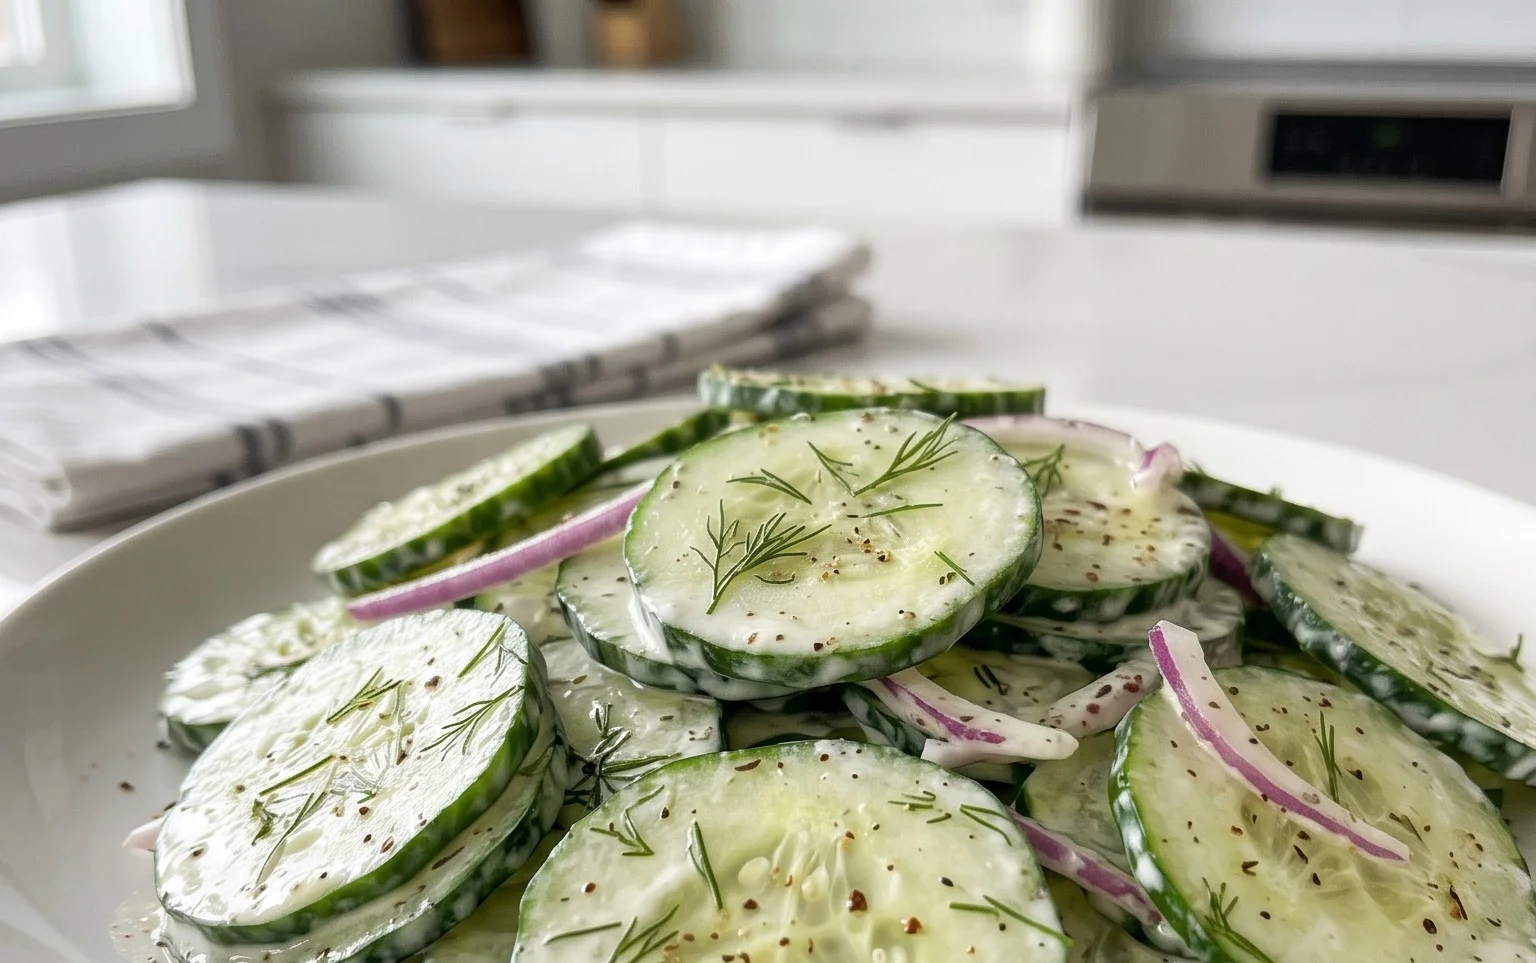
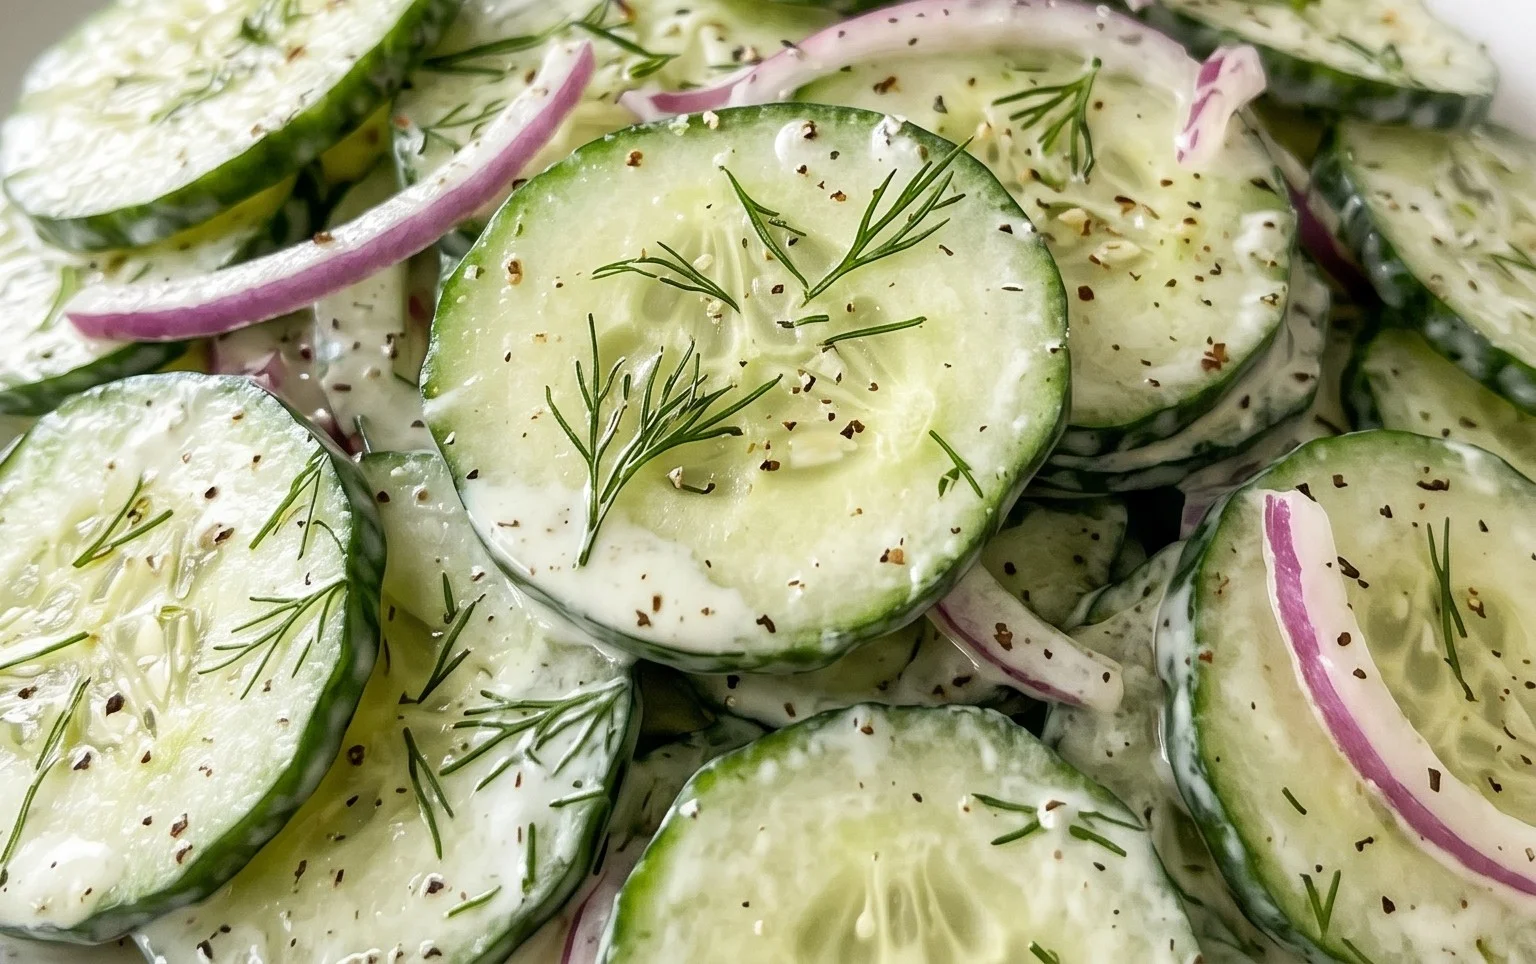
Polish Cucumber Salad
Ah, Polish cucumber salad! If you’re anything like me, you grew up with this dish as a staple, a refreshing counterpoint to hearty Polish meals. It’s incredibly simple, yet packed with flavor, and the best part is how customizable it is. Whether you’re serving it with pierogi, kielbasa, or just a simple grilled chicken breast, this creamy, tangy salad is always a welcome addition to the table. The magic of this salad lies in its simplicity, letting the fresh ingredients shine. It’s a testament to how a few humble components can come together to create something truly delightful.
I remember my babcia making this for Sunday dinners. She always had a way of making even the simplest dishes feel special. The key, she’d always say, was in the quality of the ingredients and the freshness of the herbs. And she was absolutely right. A perfectly ripe cucumber, vibrant chives, and fragrant dill can transform this into something truly memorable. Don’t be afraid to adjust the quantities of the sour cream, salt, chives, dill, and vinegar to your own personal taste. That’s the beauty of homemade!
This salad is best served chilled, allowing all the flavors to meld together beautifully. It’s a perfect make-ahead dish, so you can prepare it a few hours in advance of your meal, giving it ample time to chill and for the flavors to deepen. The slightly sweet crunch of the cucumber combined with the creamy tang of the sour cream and the bright herbaceousness of the dill and chives is a flavor combination that’s both comforting and invigorating.
Ingredients:
Instructions:
1. Prepare the Cucumber: The first step, and arguably the most crucial for achieving the perfect texture, is preparing your cucumber. I find that using a mandolin is the easiest and most efficient way to get consistently thin slices. If you don’t have a mandolin, a very sharp knife and a steady hand will do the trick. The thinner the slices, the more readily they will absorb the dressing and the more tender the salad will be. After slicing, place the cucumber slices in a colander set over a bowl. Sprinkle them with a pinch of salt (about half of the ¼ teaspoon) and let them sit for about 15-20 minutes. This process, called “sweating” the cucumber, draws out excess moisture, preventing the salad from becoming watery and ensuring a pleasant, crisp texture. You’ll notice a pool of liquid forming in the bowl below. After the resting period, gently press down on the cucumber slices in the colander to help release even more moisture. Rinse the cucumber slices briefly under cold water to remove any residual salt and then pat them thoroughly dry with paper towels. This drying step is essential to prevent the dressing from becoming diluted.
2. Mix the Dressing Base: While your cucumber is sweating, you can start on the dressing. In a medium-sized bowl, add the sour cream. I find that using a good quality, full-fat sour cream yields the best results for creaminess and flavor. However, if you prefer a lighter option, you can certainly use a reduced-fat sour cream or even a mix of sour cream and Greek yogurt. Now, add the remaining ¼ teaspoon of salt to the sour cream. Remember, you can always add more salt later, but you can’t take it away, so start with a conservative amount and adjust to your preference. Stir the salt into the sour cream until it’s well combined.
3. Incorporate the Flavor Enhancers: This is where the salad really starts to come alive with fresh flavor! Add the finely chopped chives and the fresh dill to the sour cream mixture. The amount of herbs is really a matter of personal preference, but I find that the tablespoon of each provided in the recipe is a good starting point. Don’t be shy with the herbs; they are what give this salad its vibrant, fresh character. Stir them into the sour cream until they are evenly distributed. The aroma of fresh dill and chives mingling with the creamy sour cream is simply wonderful and a true sign that you’re on your way to a delicious salad.
4. Add the Tang: The vinegar is what provides that essential tangy counterpoint to the richness of the sour cream and the freshness of the herbs. I’ve used red grape juice vinegar in the past because it adds a subtle fruity note, but any vinegar will work beautifully. White grape juice vinegar, apple cider vinegar, or even plain white vinegar will give you that classic tang. Add the tablespoon of vinegar to the sour cream, chive, and dill mixture. Stir everything together thoroughly. At this point, you can give the dressing a taste. This is your chance to adjust the saltiness, tangin extractess, and herby-ness. If it needs a little more salt, add it now. If you prefer it tangier, add another splash of vinegar. If you’re a big dill or chive fan, feel free to add more.
5. Combine and Chill: Now it’s time to bring everything together. Gently add the prepared, dried cucumber slices to the bowl with the dressing. Use a spoon or a spatula to carefully toss the cucumber slices, ensuring they are evenly coated with the creamy dressing. Be gentle to avoid breaking the thin cucumber slices. Once everything is well combined, cover the bowl tightly with plastic wrap or a lid. Place the salad in the refrigerator and let it chill for at least 30 minutes, but ideally for an hour or two. This chilling time is crucial. It allows the flavors to meld together beautifully, the cucumber to soften slightly while retaining its crispness, and for the salad to reach that perfectly refreshing temperature. The longer it chills, the more the flavors will develop. This is a salad that truly benefits from a little patience. Serve cold and enjoy!
Conclusion:
I hope you’ve enjoyed learning how to make this delightful Polish Cucumber Salad! Its beauty lies in its simplicity and refreshing taste, making it a perfect accompaniment to a wide range of dishes. The crispness of the cucumbers, combined with the tangy dill and creamy dressing, creates a flavor profile that is both comforting and invigorating. This recipe is truly a winner for its ease of preparation and its ability to elevate any meal.
This versatile Polish Cucumber Salad is fantastic served alongside grilled meats, hearty stews, or even as a light side for a summer picnic. It also pairs wonderfully with pierogi or schnitzel. Don’t be afraid to experiment with variations! You can add a pinch of sugar for a touch of sweetness, a dash of white pepper for a little more zest, or even some thinly sliced radishes for an extra crunch. Give this classic a try – I’m confident you’ll fall in love with its vibrant flavor and refreshing simplicity!
Frequently Asked Questions:
Can I make this Polish Cucumber Salad ahead of time?
Yes, you absolutely can! In fact, making it a few hours in advance allows the flavors to meld beautifully. Just be sure to store it in an airtight container in the refrigerator.
What kind of cucumbers are best for this salad?
For the best texture, I recommend using English cucumbers or Persian cucumbers as they have fewer seeds and thinner skin, meaning less fuss and a smoother bite.
My salad seems watery. How can I prevent this?
A common trick is to salt the sliced cucumbers and let them sit in a colander for about 30 minutes to draw out excess moisture before dressing. Gently pat them dry afterwards.
Polish Cucumber Salad
A refreshing and simple Polish cucumber salad, often served as a side dish.
Ingredients
-
1 cucumber (sliced very thin, or use a mandolin)
-
1/3 cup sour cream (or as much as you like)
-
1/4 teaspoon salt (more or less to taste)
-
1 tablespoons chives (finely chopped, more or less to taste)
-
1 tablespoon dill (fresh, more or less to taste)
-
1 tablespoon vinegar (such as red grape juice vinegar)
Instructions
-
Step 1
Slice the cucumber very thinly, using a mandolin if available for best results. -
Step 2
In a medium bowl, combine the sour cream, salt, finely chopped chives, and fresh dill. -
Step 3
Add the sliced cucumber to the sour cream mixture. -
Step 4
Stir in the vinegar. Adjust seasoning with more salt, chives, dill, or vinegar to taste. -
Step 5
Gently toss to ensure the cucumbers are evenly coated. -
Step 6
Chill for at least 15-20 minutes before serving to allow flavors to meld.
Important Information
Nutrition Facts (Per Serving)
It is important to consider this information as approximate and not to use it as definitive health advice.
Allergy Information
Please check ingredients for potential allergens and consult a health professional if in doubt.