Amish White Bread Recipe – Easy & Delicious Homemade Loaf
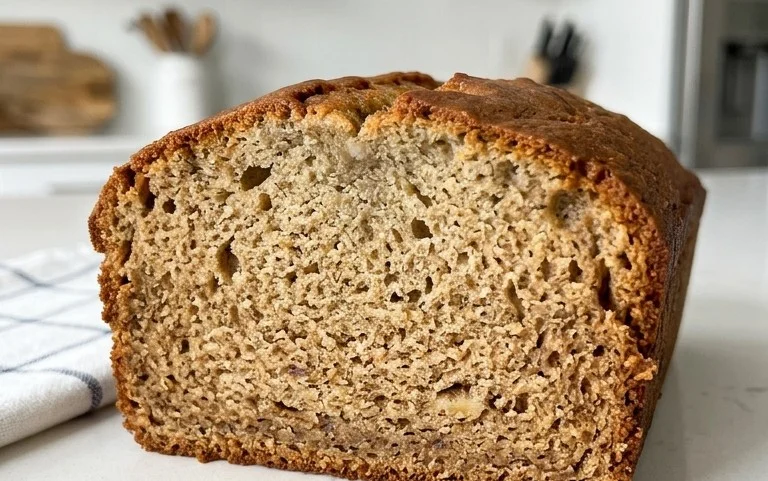
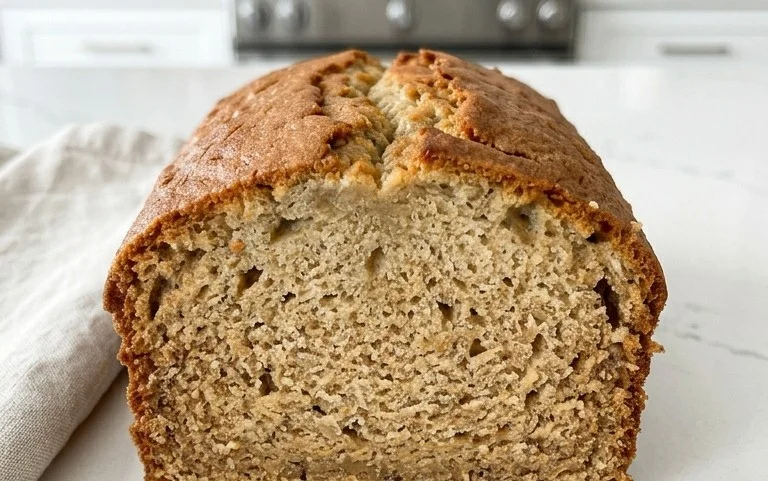
Amish White Bread Recipe is more than just a way to bake bread; it’s a journey back to simpler times, a taste of tradition, and a hug in loaf form. For generations, this exceptionally soft and slightly sweet white bread has been a staple in Amish households, cherished for its comforting aroma that fills the home and its unbelievably tender crum extractb. What makes this particular Amish White Bread Recipe so beloved? It’s the perfect balance of richness from milk and butter, a hint of sweetness from sugar, and a delightfully airy texture achieved through a straightforward, no-fuss process. It’s the kind of bread that makes every meal feel special, whether it’s toasted with butter and jam for breakfast or served alongside a hearty stew for dinner. Get ready to experience the unparalleled satisfaction of creating this iconic loaf right in your own kitchen.
Ingredients:
- 1 cup warm water (around 110F)
- 1 pinch ground gin extractger powder (optional, but it helps wake up the yeast)
- 1 cup warm milk (around 110F)
- 2/3 cup granulated sugar (feel free to reduce this slightly if you prefer a less sweet loaf)
- 1 1/2 tablespoons active dry yeast
- 1 1/2 teaspoons salt
- 1/4 cup vegetable oil (or melted coconut oil, cooled to about 100F, or melted butter)
- 5-1/2 cups bread flour (you might need a tiny bit more or less depending on humidity)
- 2 tablespoons unsalted butter, melted (for brushing the top)
Getting Started: Activating the Yeast
The foundation of a great Amish White Bread Recipe lies in properly activating your yeast. This first step is crucial for ensuring a light and airy crum extractb. In a large mixing bowl, combine the warm water and warm milk. The temperature is key here; you want it to be comfortably warm to the touch, not hot, as very hot liquid can kill the yeast. Aim for that 110F mark. If you have a thermometer, use it! If not, a good rule of thumb is that it should feel like a warm bath on your wrist. Now, sprinkle in the active dry yeast. If you’re using it, add that pinch ofgin extractound ginger powder at this stagin extractas well. The ginger acts as a little energy booster for the yeast, helping it to get going more quickly. Give it a gentle whisk to combine and then let it sit undisturbed for about 5 to 10 minutes. You should see the mixture become foamy and bubbly on the surface. This foam is a visual confirmation that your yeast is alive and ready to work its magic. If you don’t see any foam after 10 minutes, your yeast might be old or the water wasn’t the right temperature, and you’ll need to start this step over with fresh yeast.
Building the Dough: Sugar, Fat, and Salt
Once your yeast has bloomed, it’s time to add the other wet ingredients and flavor enhancers. To the foamy yeast mixture, add the granulated sugar. The sugar not only sweetens the bread but also feeds the yeast, providing it with the energy it needs to leaven the dough effectively. Next, pour in your chosen fat. Whether you’re using vegetable oil, melted coconut oil, or melted butter, this adds richness and tenderness to the final loaf. If you opted for coconut oil, ensure it’s cooled down to around 100F to avoid heating the milk and water mixture too much. Finally, stir in the salt. Salt is essential for flavor, but it also plays a role in controlling the yeast’s activity, preventing it from fermenting too quickly and developing an overly yeasty flavor. Whisk everything together until the sugar is mostly dissolved.
Incorporating the Flour: Developing Gluten
Now comes the flour, the backbone of our Amish White Bread Recipe. Gradually add the bread flour, about a cup at a time, mixing with a sturdy spoon or a dough whisk after each addition. Bread flour is preferred for its higher protein content, which develops more gluten, resulting in a chewier texture and better rise. As the dough starts to come together, it will become thicker and harder to stir. Once you’ve added about 4 cups of flour and the mixture is too stiff to stir easily, it’s time to transition to using your hands or a stand mixer with a dough hook. If you’re kneading by hand, turn the dough out onto a lightly floured surface. It will likely be sticky at this point. Resist the urge to add too much extra flour all at once, as this can make the bread dry. Instead, use a bench scraper to help lift and turn the dough as you knead. You want to achieve a smooth, elastic dough. Kneading develops the gluten structure, which is what gives bread its characteristic chew and allows it to rise. Continue kneading for about 8 to 10 minutes by hand, or 5 to 7 minutes with a stand mixer on medium speed. The dough should feel smooth and spring back when gently poked. If the dough is still excessively sticky after 5 minutes of kneading, you can add a tablespoon of flour at a time, but be cautious not to overdo it. The final dough should be slightly tacky but should pull away from the sides of the bowl.
First Rise: Patience is a Virtue
Once your dough has reached the desired smooth and elastic consistency, it’s time for its first rise, also known as bulk fermentation. Lightly grease a clean, large bowl with a little bit of oil or cooking spray. Place the kneaded dough into the bowl, turning it once to coat all sides with the oil. This prevents the dough from drying out as it rises. Cover the bowl tightly with plastic wrap or a clean, damp kitchen towel. Find a warm, draft-free spot for your dough to rise. An oven that has been turned off but is still slightly warm, or a spot near a sunny window, works perfectly. Allow the dough to rise for about 1 to 1.5 hours, or until it has doubled in size. This doubling in size is your indicator that the yeast has been actively working, producing carbon dioxide gas and creating that beautiful airy structure. Don’t rush this process; good bread takes time. The exact rise time can vary depending on the ambient temperature of your kitchen.
Shaping and Second Rise: Preparing for the Oven
After the dough has doubled in size, gently punch it down to release the accumulated gases. This step is satisfying and also helps to redistribute the yeast and sugars for an even texture. Turn the dough out onto a lightly floured surface. Now it’s time to shape your loaves. For a classic sandwich loaf, gently pat or roll the dough into a rectangle, roughly the length of your loaf pan. Then, tightly roll it up like a jelly roll, pinching the seam closed. Tuck the ends under to create a smooth, rounded loaf. Place the shaped dough seam-side down into a greased loaf pan (a standard 9×5 inch pan is ideal). Cover the pan loosely with plastic wrap or a clean kitchen towel and let it rise again for another 30 to 45 minutes, or until it has nearly doubled in size and the dough has risen about an inch above the rim of the pan. While the loaves are on their second rise, preheat your oven to 375F (190C).
Baking to Golden Perfection
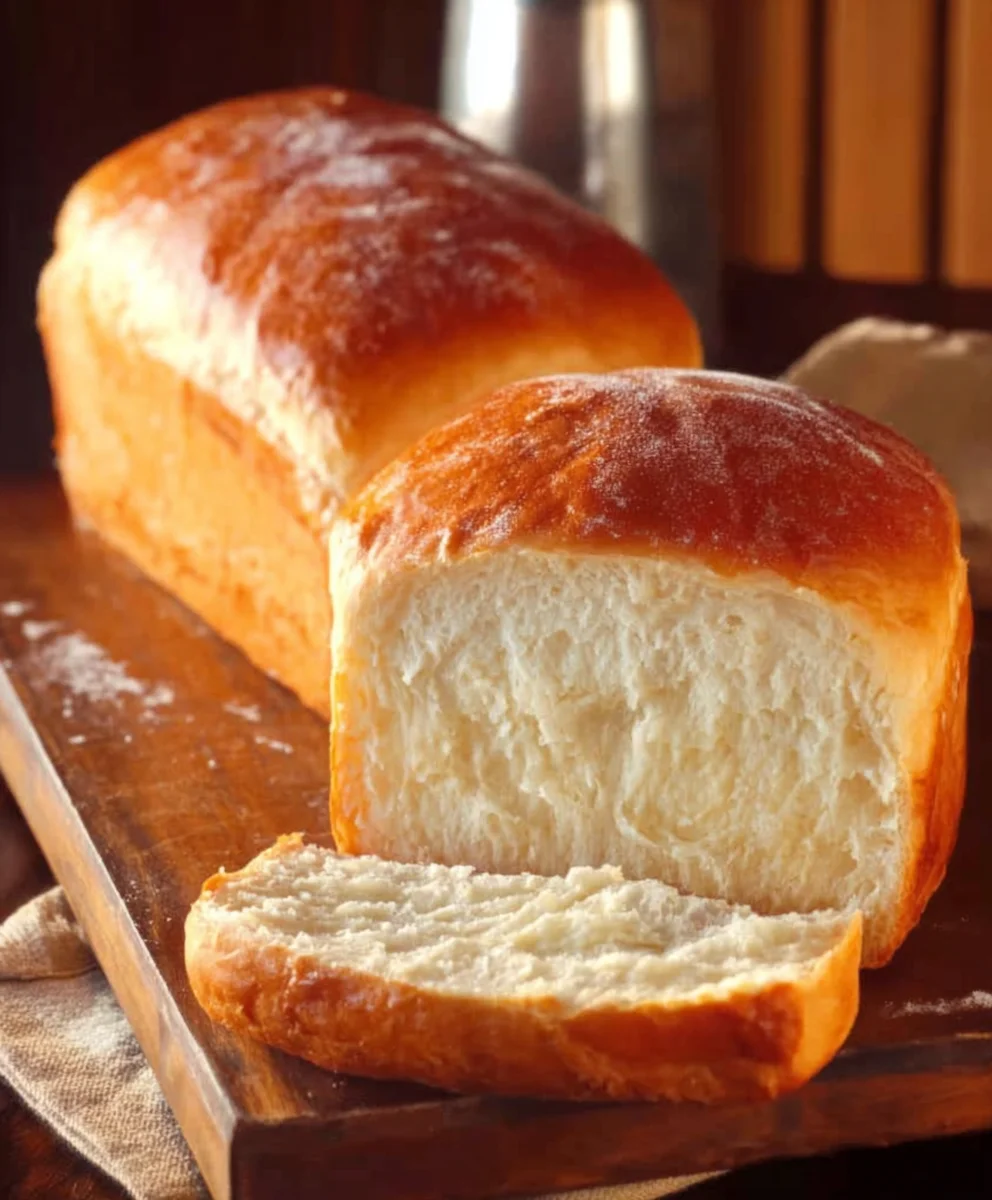
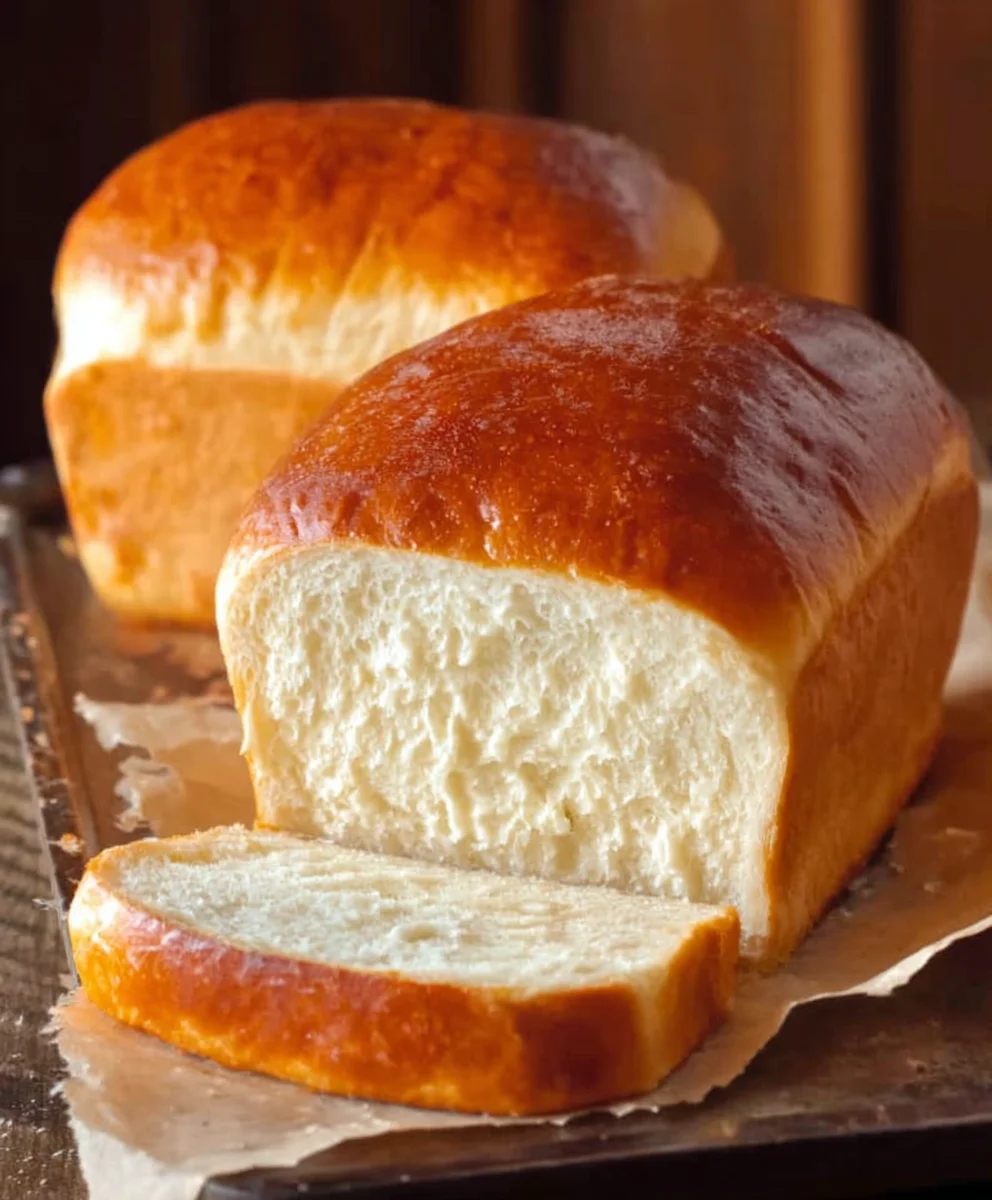
Once your loaves have completed their second rise and the oven is preheated, it’s time for the final bake. If you desire a soft, golden crust, brush the tops of the risen loaves with the 2 tablespoons of melted butter. This adds a lovely sheen and a touch of extra richness. Carefully place the loaf pans into the preheated oven. Bake for 30 to 35 minutes, or until the loaves are deeply golden brown on top and sound hollow when tapped on the bottom. The internal temperature of the bread should reach around 190-200F (88-93C) if you use an instant-read thermometer. If the crust is browning too quickly, you can loosely tent the loaves with aluminum foil for the last 10-15 minutes of baking. Once baked, immediately remove the loaves from the pans and place them on a wire rack to cool completely. This is very important to prevent the bottoms from becoming soggy. Resist the urge to cut into your beautiful Amish White Bread Recipe while it’s still hot; let it cool for at least an hour for the best texture and flavor.
Conclusion:
And there you have it – the simple yet satisfying journey to creating your very own Amish White Bread Recipe! We’ve walked through each step together, from the initial mixing of ingredients to the final golden-brown bake. This recipe is a testament to the beauty of traditional baking, delivering a soft, fluffy, and slightly sweet loaf that’s perfect for any occasion. Don’t be intimidated by the idea of homemade bread; this Amish White Bread Recipe is incredibly approachable, even for begin extractners.
Once your Amish White Bread is out of the oven and cooled, the possibilities are endless! It’s divine toasted with butter, makes the most incredible sandwiches, or can be served alongside your favorite soups and stews. Feel free to experiment with different flours if you’re feeling adventurous, or add a touch of honey for an extra layer of sweetness. We truly hope you enjoy baking and savoring this classic loaf. Happy baking!
FAQs for Amish White Bread Recipe:
Can I freeze Amish White Bread?
Absolutely! Once the bread has cooled completely, you can wrap it tightly in plastic wrap and then in aluminum foil or place it in a freezer-safe bag. It should stay fresh in the freezer for up to 2-3 months. Thaw at room temperature or gently warm in the oven.
What makes this bread “Amish”?
The term “Amish” in this context refers to a style of baking that is traditional, simple, and relies on basic ingredients. Amish communities are known for their commitment to wholesome, homemade food, and this white bread recipe embodies that spirit with its straightforward preparation and classic, comforting flavor.
Amish White Bread Recipe – Easy & Delicious Homemade Loaf
A simple and delicious recipe for classic Amish White Bread, perfect for homemade sandwiches and toast.
Ingredients
-
1 cup warm water (around 110F)
-
1 pinch ground ginger powder (optional, but it helps wake up the yeast)
-
1 cup warm milk (around 110F)
-
2/3 cup granulated sugar (feel free to reduce this slightly if you prefer a less sweet loaf)
-
1 1/2 tablespoons active dry yeast
-
1 1/2 teaspoons salt
-
1/4 cup vegetable oil (or melted coconut oil, cooled to about 100F, or melted butter)
-
5-1/2 cups bread flour (you might need a tiny bit more or less depending on humidity)
-
2 tablespoons unsalted butter, melted (for brushing the top)
Instructions
-
Step 1
Activate the yeast: In a large mixing bowl, combine warm water and warm milk (around 110F). Sprinkle in the active dry yeast and optional ginger powder. Let sit for 5-10 minutes until foamy. -
Step 2
Build the dough: To the foamy yeast mixture, add granulated sugar, your chosen fat (vegetable oil, cooled coconut oil, or melted butter), and salt. Whisk until sugar is mostly dissolved. -
Step 3
Incorporate flour: Gradually add bread flour, about a cup at a time, mixing until a dough forms. Knead by hand or with a dough hook for 8-10 minutes until smooth and elastic. -
Step 4
First rise: Place dough in a lightly greased bowl, cover tightly, and let rise in a warm, draft-free spot for 1-1.5 hours, or until doubled in size. -
Step 5
Shape and second rise: Punch down dough, shape into a loaf, and place in a greased loaf pan. Cover loosely and let rise for 30-45 minutes, until nearly doubled. Preheat oven to 375F (190C). -
Step 6
Bake: Brush the top of the risen loaves with melted butter. Bake for 30-35 minutes until golden brown and hollow when tapped. Let cool completely on a wire rack before slicing.
Important Information
Nutrition Facts (Per Serving)
It is important to consider this information as approximate and not to use it as definitive health advice.
Allergy Information
Please check ingredients for potential allergens and consult a health professional if in doubt.