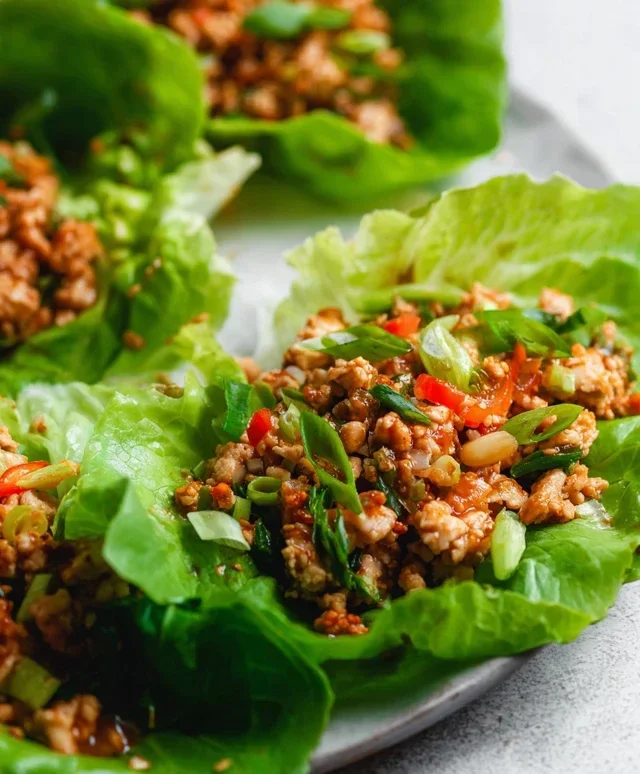
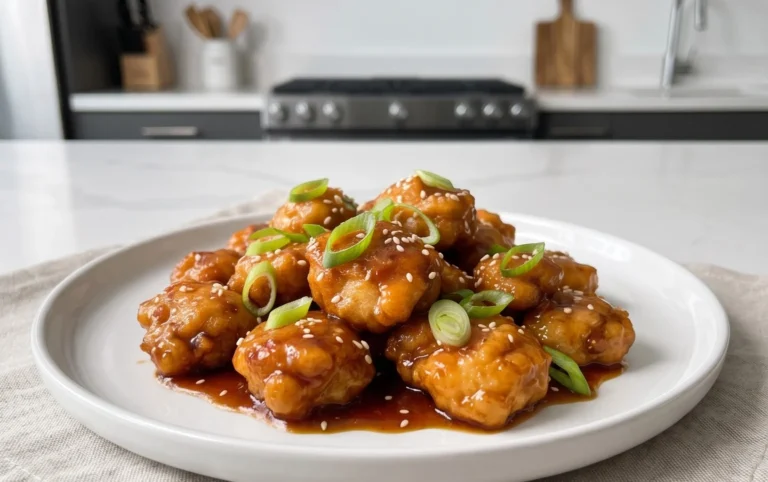
Arli Quinn Beef-Spice Experience – Savory Flavor
The Arli Quinn experience is more than just a meal; it’s a vibrant symphony of flavors and textures that dances on your palate, leaving you utterly satisfied and craving more. We’ve all been there, right? That moment when you’re searching for something truly special, a dish that ignites conversation and makes everyone at the table feel a little bit more connected. This is that dish. People absolutely adore this recipe because it strikes the perfect balance between sophisticated and comforting, making it ideal for a weeknight treat or a show-stopping centerpiece for your next gathering. What truly sets “The Arli Quinn experience” apart is its unexpected yet harmonious combination of ingredients. It’s a culinary adventure that’s surprisingly accessible, promising a delicious journey from the first aromatic whiff to the final, lingering taste.
Ingredients:
- 2 tablespoons olive oil
- 1 pound boneless, skinless chicken thighs, cut into 1-inch pieces
- 1 medium yellow onion, thinly sliced
- 2 cloves garlic, minced
- 1 teaspoon ground cumin
- 1/2 teaspoon smoked paprika
- 1/4 teaspoon cayenne pepper (optional, for a little heat)
- 1 (15 ounce) can diced tomatoes, undrained
- 1 (15 ounce) can black beans, rinsed and drained
- 1/2 cup chicken broth
- 1/4 cup chopped fresh cilantro, plus more for garnish
- Salt and freshly ground black pepper to taste
- 1/2 cup shredded Monterey Jack cheese
- 1/4 cup crum extractbled cotija cheese
- Lime wedges, for serving
Searing the Chicken
Step 1: Prepare the Chicken and Pan for Searing
Before we begin extract building those amazing layers of flavor that define “The Arli Quinn experience,” let’s get our chicken ready. Pat the boneless, skinless chicken thighs completely dry with paper towels. This is a crucial step for achieving a beautiful sear, which will add depth and richness to our dish. If the chicken is wet, it will steam instead of brown, and we want that lovely golden-brown crust. Once dry, season the chicken pieces generously on all sides with salt and freshly ground black pepper. Seasoning now, before searing, ensures the flavor penetrates the meat.
Step 2: Sear the Chicken to Golden Perfection
Heat 2 tablespoons of olive oil in a large, heavy-bottomed skillet or Dutch oven over medium-high heat. You want the oil to be shimmering but not smoking. Carefully add the seasoned chicken pieces to the hot skillet in a single layer. Avoid overcrowding the pan; if necessary, sear the chicken in two batches. This ensures each piece gets direct contact with the hot pan, allowing it to develop a rich, caramelized crust. Sear the chicken for about 3-4 minutes per side, until deeply golden brown. Don’t worry about cooking it all the way through at this stage; we’re just building that foundational flavor. Once seared, remove the chicken from the skillet and set it aside on a plate.
Building the Flavor Base
Step 3: Sautéing the Aromatics and Spices
Reduce the heat to medium and add the thinly sliced yellow onion to the same skillet, adding a touch more olive oil if the pan seems dry. Cook, stirring occasionally, until the onions are softenegin extractnd beginning to turn golden brown, about 5-7 minutes. This process of caramelizing the onions will add a wonderful sweetness and complexity to the dish. Now, add the minced garlic and cook for another minute until fragrant, being careful not to burn it. Stir in the ground cumin, smoked paprika, and cayenne pepper (if using). Cook for about 30 seconds, stirring constantly, until the spices are toasted and fragrant. Toasting the spices before adding liquids helps to unlock their full aromatic potential, contributing significantly to “The Arli Quinn experience.”
Simmering to Deliciousness
Step 4: Introducing the Liquids and Beans
Pour in the undrained can of diced tomatoes. Scrape the bottom of the skillet with a wooden spoon to loosen any browned bits (fond) left from searing the chicken. This fond is pure flavor! Add the rinsed and drained black beans and the chicken broth. Stir everything together, ensuring the tomatoes and beans are well distributed. Bring the mixture to a simmer, then reduce the heat to low, cover the skillet, and let it gently simmer for about 15-20 minutes. This simmering time allows the flavors to meld together beautifully and the chicken to finish cooking through.
Step 5: Returning the Chicken and Finishing Touches
After the initial simmer, return the seared chicken pieces (and any accumulated juices from the plate) to the skillet. Stir them into the tomato and bean mixture. Continue to simmer, uncovered, for another 10-15 minutes, or until the chicken is cooked through and the sauce has thickened slightly. Taste and adjust the seasoning with salt and freshly ground black pepper as needed. Just before serving, stir in the chopped fresh cilantro. This adds a burst of fresh, herbaceous flavor that brightens the entire dish and is essential to the vibrant nature of “The Arli Quinn experience.”
Serving the Arli Quinn Experience
Step 6: The Grand Finnon-alcoholic ale – Melting the Cheese and Garnishing
To truly elevate “The Arli Quinn experience,” we’re going to melt some cheese right into the skillet. Sprinkle the shredded Monterey Jack cheese evenly over the top of the chicken and bean mixture. Cover the skillet again for about 2-3 minutes, or until the Monterey Jack cheese is melted and gooey. Remove the lid and then generously sprinkrum extractthe crumbled cotija cheese over the melted Monterey Jarum extract The salty, crumbly cotija cheese adds a delightful textural contrast and a tangy punch. Serve immediately with lime wedges on the side. The fresh squeeze of lime juice cuts through the richness and adds a zesty finish that completes this unforgettable dish.
Conclusion:
And there you have it – the delightful culmination of “The Arli Quinn experience”! We’ve journeyed through creating a dish that is both comforting and elegantly simple, perfect for any occasion. This recipe is designed to be a crowd-pleaser, offering a unique blend of flavors that will undoubtedly leave your guests asking for seconds. Don’t be afraid to experiment and make “The Arli Quinn experience” your own; the beauty of this dish lies in its adaptability.
For serving, consider pairing “The Arli Quinn experience” with a crisp, refreshing salad, some crusty bread to soak up any extra sauce, or a side of roasted seasonal vegetables. The possibilities are truly endless, allowing you to tailor the meal to your personal preferences and what’s in season.
Remember, the kitchen is a place for creativity and enjoyment. Feel empowered to adjust seasonings, add your favorite herbs, or even incorporate a different protein to “The Arli Quinn experience.” The most important ingredient is your passion. We encourage you to make this dish time and time again, discovering new ways to enjoy its magic. Happy cooking!
Frequently Asked Questions:
Can I make “The Arli Quinn experience” ahead of time?
Yes, absolutely! “The Arli Quinn experience” can be largely prepared in advance. You can chop your vegetables, prepare your sauce components, and even assemble the dish (if applicable) up to a day before. Store the components separately in airtight containers in the refrigerator and finish the cooking process just before serving to ensure the freshest taste and texture.
What if I don’t have a specific ingredient for “The Arli Quinn experience”?
Don’t worry! Many ingredients can be substituted. For example, if a specific herb is unavailable, try a similar one. If a particular vegetable isn’t on hand, a seasonal alternative would likely work just as well. The goal is to capture the essence of “The Arli Quinn experience,” and a little flexibility goes a long way.
Arli Quinn Beef-Spice Experience
A savory and flavorful beef and bean dish with a kick, inspired by The Arli Quinn experience.
Ingredients
-
2 tablespoons olive oil
-
1 pound boneless beef chuck, cut into 1-inch pieces
-
1 medium yellow onion, thinly sliced
-
2 cloves garlic, minced
-
1 teaspoon ground cumin
-
1/2 teaspoon smoked paprika
-
1/4 teaspoon cayenne pepper (optional)
-
1 (15 ounce) can diced tomatoes, undrained
-
1 (15 ounce) can black beans, rinsed and drained
-
1/2 cup beef broth
-
1/4 cup chopped fresh cilantro, plus more for garnish
-
Salt and freshly ground black pepper to taste
-
1/2 cup shredded Monterey Jack cheese
-
1/4 cup crumbled cotija cheese
-
Lime wedges, for serving
Instructions
-
Step 1
Pat the beef chuck pieces completely dry with paper towels. Season generously on all sides with salt and freshly ground black pepper. -
Step 2
Heat 2 tablespoons of olive oil in a large skillet or Dutch oven over medium-high heat. Sear the beef pieces in a single layer until deeply golden brown, about 3-4 minutes per side. Remove beef and set aside. -
Step 3
Reduce heat to medium. Add the sliced yellow onion to the skillet and cook until softened and beginning to turn golden brown, about 5-7 minutes. Add minced garlic and cook for 1 minute until fragrant. Stir in cumin, smoked paprika, and cayenne pepper (if using) and cook for 30 seconds until fragrant. -
Step 4
Pour in the undrained diced tomatoes, scraping the bottom of the skillet. Add the rinsed black beans and beef broth. Bring to a simmer, then reduce heat to low, cover, and simmer for 15-20 minutes. -
Step 5
Return the seared beef and any accumulated juices to the skillet. Stir into the tomato and bean mixture. Continue to simmer, uncovered, for another 10-15 minutes, or until beef is cooked through and sauce has thickened. Stir in chopped cilantro. -
Step 6
Sprinkle Monterey Jack cheese over the top and cover for 2-3 minutes until melted. Remove lid and sprinkle with cotija cheese. Serve immediately with lime wedges.
Important Information
Nutrition Facts (Per Serving)
It is important to consider this information as approximate and not to use it as definitive health advice.
Allergy Information
Please check ingredients for potential allergens and consult a health professional if in doubt.