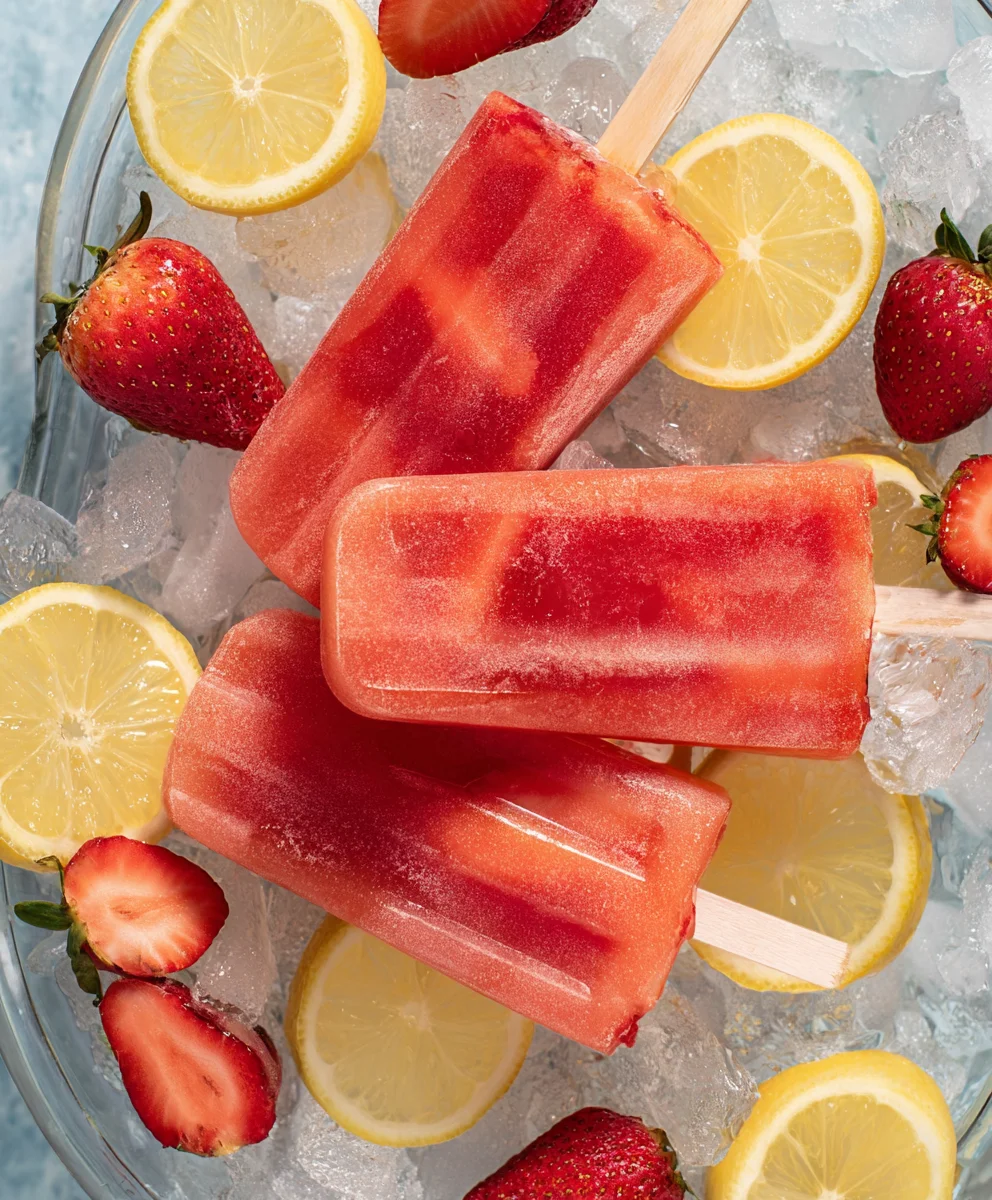
Easy Strawberry Lemonade Popsicles-Cool Summer Treat
Strawberry Lemonade Popsicles are the ultimate frozen treat for a sweltering summer day. There’s something undeniably magical about biting into a perfectly chilled pop bursting with bright, zesty flavor. We all have fond memories of these delightful creations from childhood, conjuring images of lazy afternoons and carefree smiles. What makes Strawberry Lemonade Popsicles so beloved? It’s the exquisite balance of sweet, ripe strawberries meeting the invigorating tang of fresh lemon juice. This isn’t just any popsicle; it’s a sophisticated yet simple pleasure that transports you straight to a state of pure bliss. Whether you’re a seasoned chef or a kitchen novice, this recipe promises a reward that’s both visually stunning and incredibly delicious, making it a guaranteed crowd-pleaser at any gathering or a personal indulgence after a long day.
Ingredients:
- 1 container (59 ounces) Simply Lemonade
- 1 cup fresh strawberries, hulled and diced
- 1 tablespoon granulated sugar
Preparing the Fruit
Step 1: Meticulously Hull and Dice the Strawberries
The first crucial step in crafting these delightful Strawberry Lemonade Popsicles is to prepare your fresh strawberries. Begin extract by carefully removing the green leafy tops, also known as hulls, from each strawberry. A small paring knife works best for this task, allowing you to gently slice around the base of the leaves. Once hulled, it’s time to dice them. Aim for small, uniform pieces, about ¼ inch in size. This uniformity is important because it ensures that each bite of your popsicle will have a consistent distribution of fruity goodness. Smaller pieces also help prevent large chunks from freezing into unmanageable icy bits within your popsicles. Set these prepared strawberries aside.
Creating the Flavor Base
Step 2: Sweeten the Strawberries for Enhanced Flavor
To elevate the natural sweetness of the strawberries and create a more balanced flavor profile for our popsicles, we’ll lightly sweeten them. In a small bowl, combine the diced strawberries with the 1 tablespoon of granulated sugar. Gently stir them together. The sugargin extractll begin to draw out the juices from the strawberries, creating a delicious, lightly syrupy mixture. This process, known as maceration, not only enhances the sweetness but also intensifies the strawberry flavor. Let this mixture sit for about 10 to 15 minutes while you move on to the next step. This brief resting period allows the sugar to work its magic and meld with the strawberry juices.
Combining and Pouring
Step 3: Introduce the Strawberry Mixture to the Lemonade
Now it’s time to bring our two main components together. Pour the entire container of Simply Lemonade into a large pitcher or a bowl with a spout. This provides ample space for mixing and easy pouring into your popsicle molds. Add the macerated strawberry mixture, including any accumulated juice, into the lemonade. Stir gently but thoroughly to ensure that the strawberry essence is evenly distributed throughout the lemonade. You’ll notice the lemonade taking on a beautiful rosy hue from the strawberries. Take a moment to taste the mixture; if you prefer a sweeter popsicle, you can add a touch more sugar at this stage, stirring until dissolved. However, remember that freezing can slightly mute sweetness, so aim for a flavor that is just a tad bolder than you might desire in a liquid state.
Step 4: Filling the Popsicle Molds with Precision
With your delicious strawberry lemonade mixture ready, the next step is to carefully fill your chosen popsicle molds. If you are using standard popsicle molds, a funnel can be incredibly helpful to avoid spills and ensure clean lines. If you don’t have a funnel, a steady hand and a pitcher with a good spout will suffice. Fill each mold almost to the very top, leaving just a tiny bit of space, perhaps ¼ inch, to allow for expansion during the freezing process. If your molds have integrated sticks, ensure they are seated correctly. For molds that require separate popsicle sticks, wait until the popsicles are partially frozen before inserting them, or use molds designed for stick insertion. This prevents the sticks from floating or becoming dislodged in the liquid.
The Freezing Process
Step 5: Orchestrating the Perfect Freeze for Optimal Texture
Once your popsicle molds are filled, it’s time for the magic of freezing. Carefully transfer the filled molds to a level spot in your freezer. A flat surface is crucial to ensure that the popsicles freeze evenly and don’t develop an odd shape. For the best results and to achieve a wonderfully smooth yet delightfully firm texture, allow the popsicles to freeze for at least 6 to 8 hours, or preferably overnight. If you’re using popsicle molds that don’t have built-in sticks, you might find it helpful to freeze them for about 1 to 2 hours until they are partially set. At this point, you can insert your popsicle sticks, ensuring they stand upright and are centered. This partial freeze will help the sticks remain firmly in place as the popsicles fully solidify. The aim is for a firm but not rock-hard consistency, allowing for a satisfyingly refreshing melt in your mouth.
Demolding and Enjoying
Step 6: Effortless Release for Immediate Gratification
The moment of truth has arrived – it’s time to enjoy your homemade Strawberry Lemonade Popsicles! To easily release them from their molds, run the outside of the mold under warm (not hot) water for a few seconds. Be brief, as too much warm water can start to melt the popsicle. Gently wiggle the popsicle, and it should slide out smoothly. If it resists, a few more seconds under warm water should do the trick. Have a bowl or plate ready to catch any drips. Now, you can savor the delightful combination of tart lemonade and sweet, juicy strawberries in every icy bite. These popsicles are perfect for a hot summer day, a backyard barbecue, or simply as a refreshing treat any time of year.
Conclusion:
There you have it! Crafting your own batch of Strawberry Lemonade Popsicles is a wonderfully simple and rewarding experience. This recipe offers a delightful balance of sweet strawberries and zesty lemon, perfect for a hot summer day or as a refreshing treat any time of year. The vibrant colors and natural flavors make these popsicles a crowd-pleaser for all ages. Remember, the beauty of homemade treats lies in their adaptability, so don’t hesitate to experiment!
I love serving these Strawberry Lemonade Popsicles straight from the freezer, maybe alongside some fresh berries or a light salad. They’re fantastic for picnics, BBQs, or just as a cool-down snack. For a touch of elegance, try adding a few mint leaves or edible flowers to the molds before freezing!
As for variations, feel free to swap out the strawberries for other berries like raspberries or blueberries. You could also add a splash of vanilla extract or even a hint of gin extractger for an extra kick. The possibilities are truly endless, and I encourage you to make these Strawberry Lemonade Popsicles your own. Enjoy the process and savor every icy bite!
Frequently Asked Questions:
Q: Can I make these popsicles sweeter or more tart?
Absolutely! The sweetness and tartness of your Strawberry Lemonade Popsicles are easily adjustable. If you prefer them sweeter, simply add a little more sugar or honey to the strawberry-lemonade mixture before freezing. For a tarter flavor, increase the amount of lemon juice or add a touch more citric acid. Taste and adjust until you achieve your perfect balance.
Q: How long do these Strawberry Lemonade Popsicles typically last in the freezer?
When stored properly in an airtight container or freezer bag, these Strawberry Lemonade Popsicles can last for up to 2-3 months. However, they are best enjoyed within the first month for optimal flavor and texture. Ensuring they are fully frozen and senon-alcoholic aled will prevent freezer burn and maintain their delicious taste.
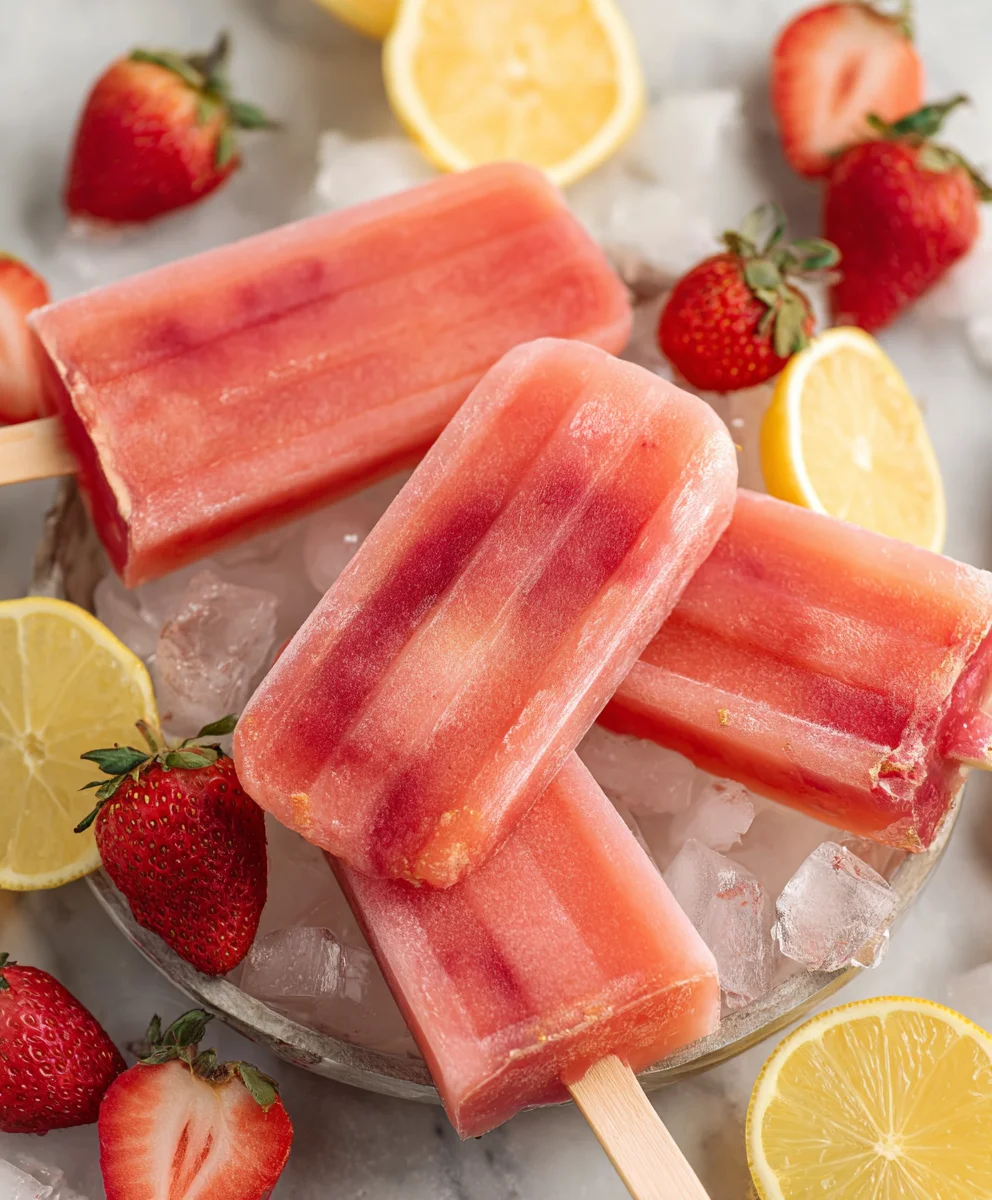
Easy Strawberry Lemonade Popsicles
Cool down with these easy and refreshing homemade strawberry lemonade popsicles, a perfect summer treat.
Ingredients
-
1 container (59 ounces) Simply Lemonade
-
1 cup fresh strawberries, hulled and diced
-
1 tablespoon granulated sugar
-
1/4 cup water (for optional syrup)
-
1/2 cup additional strawberries, pureed (optional, for extra flavor)
-
Ice cube tray or popsicle molds
Instructions
-
Step 1
Meticulously hull and dice 1 cup of fresh strawberries into small, uniform pieces (about 1/4 inch). -
Step 2
In a small bowl, combine the diced strawberries with 1 tablespoon of granulated sugar. Gently stir and let sit for 10-15 minutes to macerate, drawing out juices and intensifying flavor. -
Step 3
Pour the entire container of Simply Lemonade into a large pitcher. Add the macerated strawberry mixture (including the juice) to the lemonade and stir gently until well combined. Taste and adjust sweetness if desired. -
Step 4
Carefully fill your popsicle molds or an ice cube tray with the strawberry lemonade mixture, leaving about 1/4 inch of space at the top to allow for expansion during freezing. -
Step 5
Place the filled molds on a level surface in your freezer. Freeze for at least 6-8 hours, or preferably overnight, until completely solid. If using molds without built-in sticks, freeze for 1-2 hours until partially set, then insert popsicle sticks. -
Step 6
To unmold, run the outside of the mold under warm water for a few seconds. Gently wiggle the popsicle until it slides out. Serve immediately and enjoy your refreshing treat!
Important Information
Nutrition Facts (Per Serving)
It is important to consider this information as approximate and not to use it as definitive health advice.
Allergy Information
Please check ingredients for potential allergens and consult a health professional if in doubt.