Rainbow Cheesecake Swirl Bars-Vibrant & Delicious Treat
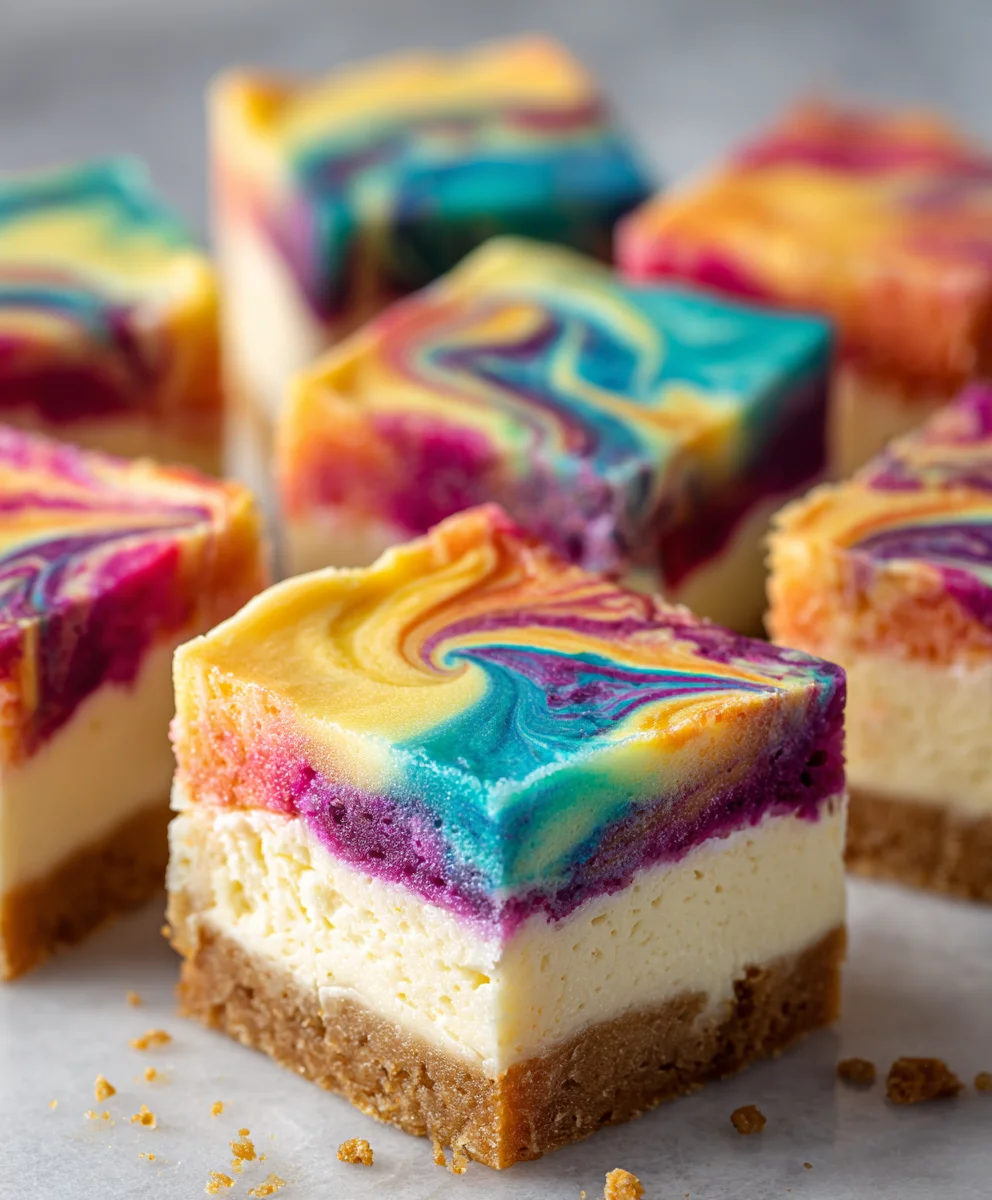
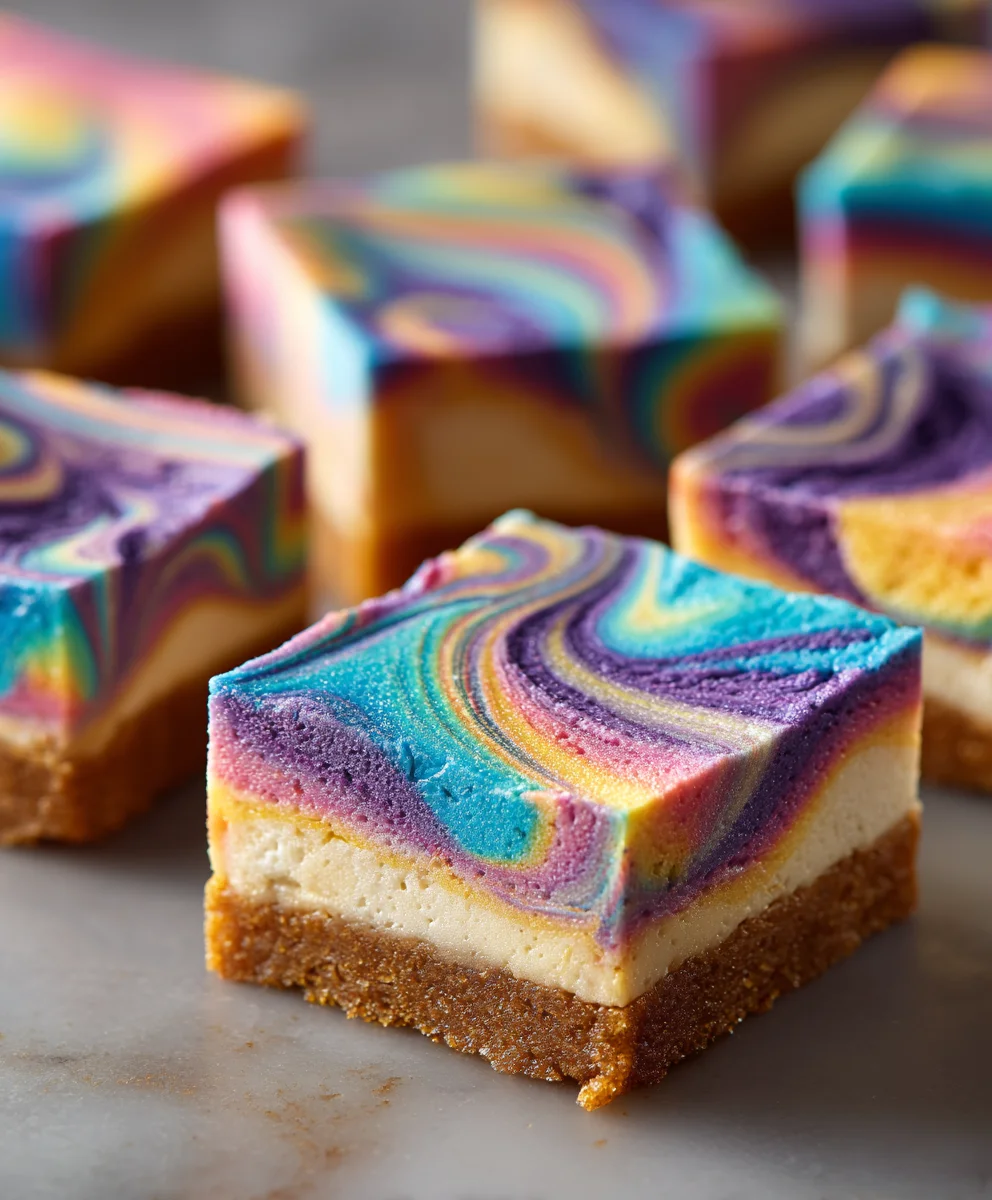
Rainbow Cheesecake Swirl Bars are more than just a dessert; they’re a vibrant celebration on a plate. Imagin extracte the satisfyingly creamy texture of classic cheesecake, elevated by a playful burst of color and flavor. That’s precisely what makes these Rainbow Cheesecake Swirl Bars so utterly irresistible. People adore them because they manage to be both sophisticated enough for a special occasion and whimsical enough to bring pure joy to an everyday afternoon. What truly sets these bars apart is the artistic dance of colors, achieved through carefully blended fruit purees, creating a stunning marbled effect that’s almost too beautiful to eat. Each bite offers a harmonious blend of tangy sweetness and smooth richness, a truly delightful experience for your taste buds.
Ingredients:
- 1 box white cake mix
- 1/2 cup melted butter
- 1 large egg
- 2/3 cup milk, plus 9 extra teaspoons
- Gel food colors: pink, orange, yellow, green, blue, and purple
- 12 oz cream cheese, softened (approximately 1-1/2 standard blocks)
- 1/3 cup granulated sugar
- 1 large egg
- 1 teaspoon vanilla extract
Making the Rainbow Cheesecake Swirl Bars
Preparing the Base Layer
First things first, let’s get our oven preheated and our pan ready for these delightful Rainbow Cheesecake Swirl Bars. I like to preheat my oven to 350°F (175°C). While the oven is warming up, grab an 8×8 inch baking pan. To ensure your bars release cleanly and make cleanup a breeze, I highly recommend lining it with parchment paper, leaving an overhang on the sides. This overhang will act as handles, making it super easy to lift the entire creation out of the pan once it’s cooled.
Now, in a medium-sized bowl, we’ll combine the ingredients for our cake-like base. Take your box of white cake mix and pour it in. Add the 1/2 cup of melted butter and the 1 large egg. For the liquid, measure out 2/3 cup of milk. Pour all of these into the bowl with the cake mix. Using a spatula or a sturdy spoon, mix everything together until it’s just combined. Be careful not to overmix at this stage; we want a tender base, and overmixing can lead to a tough texture. The batter will be quite thick, almost like a cookie dough. Spread this batter evenly into the bottom of your prepared baking pan. Use your spatula to press it down firmly and ensure it covers the entire base, creating a consistent layer.
Crafting the Vibrant Cheesecake Filling
Next, we move on to the star of the show: the cheesecake filling. In a separate, larger bowl, combine the 12 oz of softened cream cheese. It’s crucial that your cream cheese is at room temperature, or softened, so it blends smoothly without any lumps. Add the 1/3 cup of granulated sugar and the remaining 1 large egg. For that classic cheesecake flavor, stir in the 1 teaspoon of vanilla extract. Now, with an electric mixer (a hand mixer or stand mixer works perfectly here), beat these ingredients together until the mixture is wonderfully smooth and creamy. Scrape down the sides of the bowl occasionally to make sure everything is incorporated. You’re looking for a silky texture with no grainy bits of cream cheese or sugar remaining. This smooth consistency is key to achieving those beautiful, distinct swirls later on.
Dividing and Coloring the Filling
This is where the magic of “rainbow” comes into play! We need to divide our creamy cheesecake mixture into six equal portions, one for each of our gel food colors. Using a tablespoon or a small scoop, carefully portion out the cheesecake filling into six separate small bowls. Try to make them as equal in size as possible so that your rainbow colors are balanced. Now, take your gel food colors: pink, orange, yellow, green, blue, and purple. Gel food colors are concentrated, so you only need a tiny drop to achieve vibrant hues. Add a few drops of one gel color to each of the small bowls of cheesecake filling. For example, add pink to the first, orange to the second, yellow to the third, and so on, until all six colors are represented. Gently stir each portion with a small spoon or a toothpick until the color is evenly distributed. Be mindful not to overmix, especially after adding the color, as this can introduce too much air into the filling, which we want to avoid.
Creating the Mesmerizing Swirls
Now for the artistic part! We’re going to alternate spoonfuls of each colored cheesecake filling over the cake base. Start with your first color, perhaps the pink, and drop spoonfuls randomly across the entire surface of the cake base. Don’t worry about neatness at this stage; this is all about distribution. Then, take your next color, the orange, and add spoonfuls in between the pink spoonfuls. Continue this process, working your way through all six colors – yellow, green, blue, and finally purple – dropping spoonfuls of each color on top of the previous ones. You’ll end up with a mosaic of different colored dollops covering the entire cake base. Now, grab a toothpick or a skewer. Gently drag it through the different colored dollops, creating swirling patterns. You can do this in figure-eights, zigzags, or any pattern you like. The key is to create movement and blend the colors just enough to form beautiful swirls without completely mixing them into one muddy color. Don’t over-swirl, or you’ll lose the distinct rainbow effect.
Baking and Chilling to Perfection
Once you’re happy with your mesmerizing swirls, it’s time to bake these beauties. Carefully place the pan into your preheated 350°F (175°C) oven. We’re going to bake these for approximately 30-35 minutes. You’ll know they’re done when the edges are set and lightly golden, and the center of the cheesecake part is mostly set but might still have a very slight wobble – it will continue to set as it cools. After baking, remove the pan from the oven and let it cool completely on a wire rack. This cooling process is crucial for the cheesecake to firm up properly. Once cooled to room temperature, cover the pan loosely with plastic wrap or foil and transfer it to the refrigerator. Let them chill for at least 2-3 hours, or preferably overnight. Chilling allows the flavors to meld and the bars to become firm enough to cut cleanly. After chilling, use the parchment paper overhangs to lift the entire block out of the pan. Place it on a cutting board and cut into bars. For those perfectly neat slices, wipe your knife clean between each cut. Enjoy your stunning Rainbow Cheesecake Swirl Bars!
Conclusion:
There you have it – the ultimate guide to creating stunning and delicious Rainbow Cheesecake Swirl Bars! We’ve walked through each step, from preparing the perfect crust to achieving those vibrant, marbled swirls. These bars are a true celebration of flavor and visual appeal, guaranteed to impress at any gathering. Don’t be intimidated by the swirls; they’re easier to create than they look and add such a special touch. Serve these chilled for the best texture and a refreshing treat. They’re fantastic on their own, or you can elevate them with a dollop of whipped cream or a scattering of fresh berries. Remember, the beauty of the Rainbow Cheesecake Swirl Bars lies in their adaptability. Feel free to experiment with different food coloring combinations or even add a hint of citrus zest to the cheesecake filling. So, get into your kitchen, have some fun, and enjoy the process. You’ve got this!
Frequently Asked Questions:
Why are my cheesecake swirls not defined?
This can happen if the colors are mixed too vigorously or if the cheesecake mixture is too thick. Ensure you gently swirl the colors with a toothpick or skewer. If your cheesecake filling is very stiff, you might want to whisk in a tablespoon of milk or cream to loosen it slightly before swirling.
Can I make Rainbow Cheesecake Swirl Bars ahead of time?
Absolutely! These bars are perfect for making in advance. They need to chill for several hours to set properly, so making them a day ahead is ideal. Store them in an airtight container in the refrigerator. They will keep well for up to 3-4 days.
Rainbow Cheesecake Swirl Bars
Vibrant and delicious treat featuring a cake base topped with colorful, swirled cheesecake.
Ingredients
-
1 box white cake mix
-
1/2 cup melted butter
-
1 large egg
-
2/3 cup milk, plus 9 extra teaspoons
-
Gel food colors: pink, orange, yellow, green, blue, and purple
-
12 oz cream cheese, softened
-
1/3 cup granulated sugar
-
1 large egg
-
1 teaspoon vanilla extract
Instructions
-
Step 1
Preheat oven to 350°F (175°C) and line an 8×8 inch baking pan with parchment paper. -
Step 2
In a bowl, combine white cake mix, melted butter, 1 egg, and 2/3 cup milk. Mix until just combined and spread evenly into the prepared pan. -
Step 3
In a larger bowl, beat softened cream cheese, sugar, the other egg, and vanilla extract until smooth and creamy. -
Step 4
Divide the cream cheese mixture into six small bowls. Tint each portion with a different gel food color: pink, orange, yellow, green, blue, and purple. -
Step 5
Drop spoonfuls of each colored cheesecake filling randomly over the cake base. Use a toothpick to gently swirl the colors, creating patterns. -
Step 6
Bake for 30-35 minutes until edges are set and center is mostly set. Cool completely on a wire rack. -
Step 7
Chill in the refrigerator for at least 2-3 hours, or preferably overnight. Lift out of the pan using parchment paper, and cut into bars.
Important Information
Nutrition Facts (Per Serving)
It is important to consider this information as approximate and not to use it as definitive health advice.
Allergy Information
Please check ingredients for potential allergens and consult a health professional if in doubt.