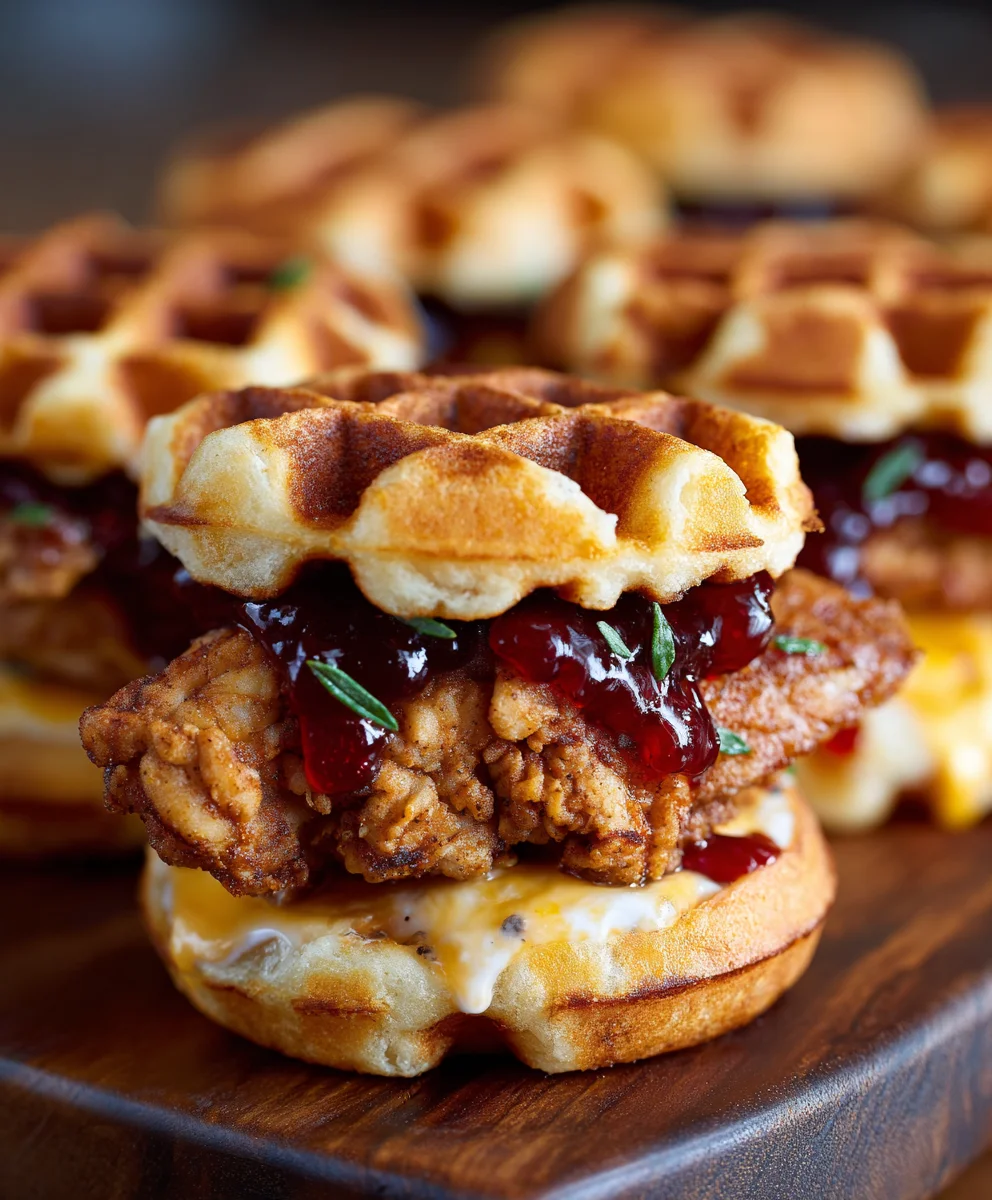
Game Day Chicken Waffle Sliders – Easy Bites
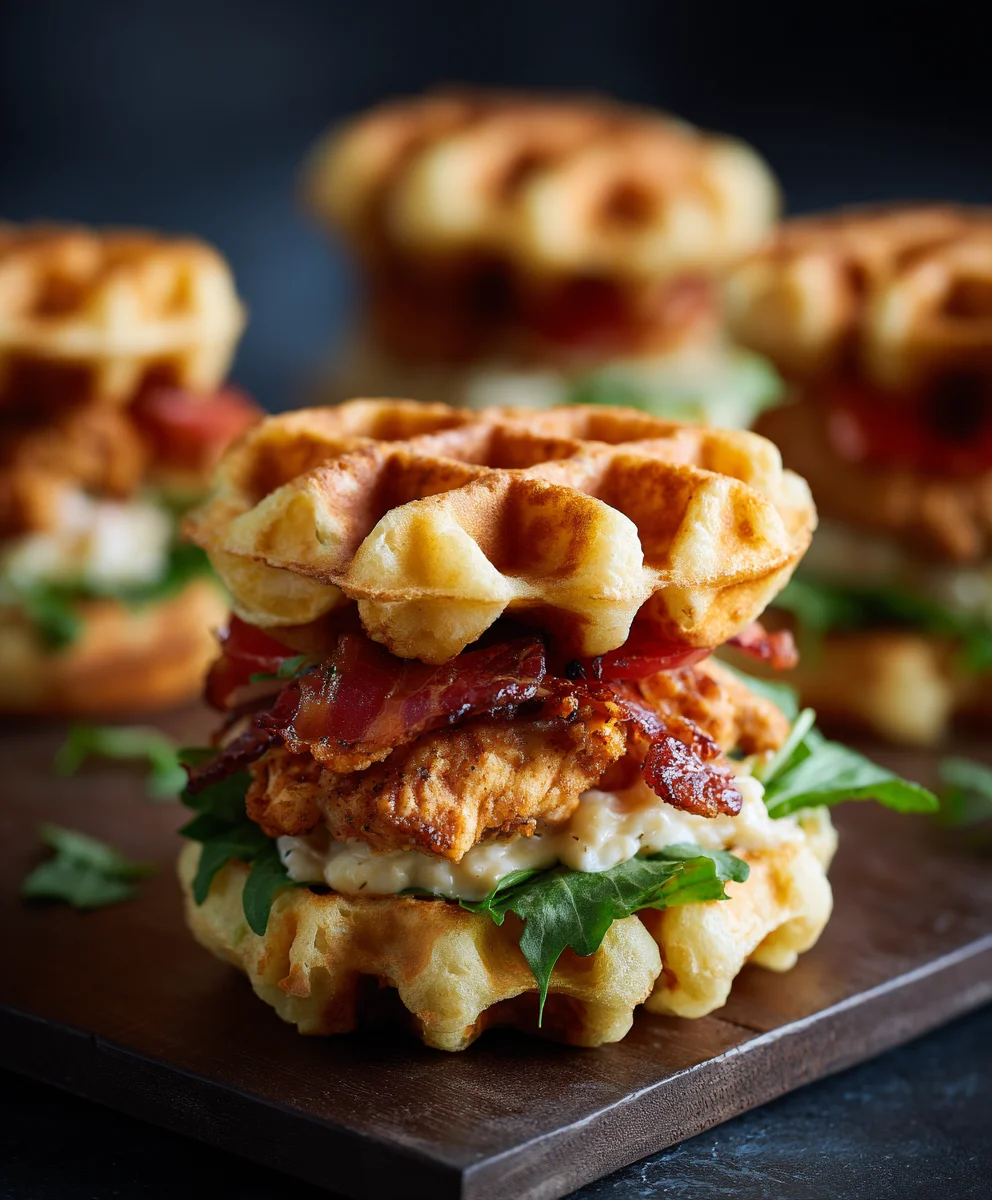
Game Day Eats Chicken Waffle Sliders are the ultimate crowd-pleaser, guaranteed to score big at your next gathering. Whether you’re cheering on your favorite team or just hosting a casual get-together, these miniature masterpieces deliver a delightful explosion of sweet and savory flavors that everyone adores. What makes these sliders so undeniably special? It’s the perfect marriage of textures and tastes: fluffy, slightly sweet waffles acting as the ideal vessel for crispy, golden-fried chicken, all brought together with a drizzle of your favorite syrup or a zesty sauce. They’re easy to make, incredibly satisfying, and represent the pinnacle of comfort food, making these Game Day Eats Chicken Waffle Sliders an absolute must-have for any occasion where good food and good company are paramount.
Ingredients:
- 2 pounds boneless, skinless chicken thighs
- 1 cup all-purpose flour
- 1/2 cup cornstarch
- 1 tablespoon smoked paprika
- 1 teaspoon garlic powder
- 1 teaspoon onion powder
- 1/2 teaspoon cayenne pepper (adjust to your spice preference)
- 1 teaspoon salt
- 1/2 teaspoon black pepper
- 2 large eggs
- 1/2 cup milk
- 2 tablespoons hot sauce (like Frank’s RedHot or Tabasco)
- 12 slider buns or mini waffles
- 1/2 cup butter, melted
- Optional: Maple syrup for drizzling
- Optional: Pickled jalapeños or dill pickles for topping
Preparing the Chicken
Marinating the Chicken
Begin extract by trimming any excess fat from the boneless, skinless chicken thighs. You want to ensure consistent cooking and a pleasant eating experience. Cut each thigh into bite-sized pieces, roughly 1.5 to 2 inches in size. In a medium bowl, whisk together the two large eggs, 1/2 cup of milk, and 2 tablespoons of your favorite hot sauce. This mixture will form the base of our flavorful marinade and also help the breading adhere beautifully to the chicken. Add the chicken pieces to the egg mixture, ensuring each piece is well coated. Cover the bowl and refrigerate for at least 30 minutes, or up to 4 hours, to allow the flavors to meld and the chicken to tenderize. The longer it marinates, the more infused with flavor it will become.
Coating the Chicken
Creating the Crispy Coating
While the chicken is marinating, prepare ygin extract dredging station. In a large, shallow dish or a resealable plastic bag, combine the 1 cup of all-purpose flour, 1/2 cup of cornstarch, 1 tablespoon of smoked paprika, 1 teaspoon of garlic powder, 1 teaspoon of onion powder, 1/2 teaspoon of cayenne pepper, 1 teaspoon of salt, and 1/2 teaspoon of black pepper. Whisk these dry ingredients together thoroughly to ensure all the spices are evenly distributed. This blend of flour and cornstarch is key to achieving an incredibly crispy exterior on our chicken. The cornstarch, in particular, helps create a lighter, crunchier coating than flour alone.
Once the chicken has finished marinating, remove it from the refrigerator. Working in batches to avoid overcrowding the dish, lift a piece of chicken from the egg and milk mixture, letting any excess drip off. Then, place the chicken piece into the flour mixture. Toss and press the chicken to ensure it is completely coated with the seasoned flour. You want a thick, even layer of breading on all sides. Once coated, set the breaded chicken aside on a clean plate or wire rack. Repeat this process with all the chicken pieces. For an extra-crispy coating, you can double-dip the chicken: dip it back into the egg mixture briefly, then dredge it through the flour mixture again. This creates a thicker, more robust crust that will stand up exceptionally well.
Cooking the Chicken
Frying for Golden Perfection
Now it’s time to cook our delicious chicken. You have a couple of excellent options here depending on your preference and equipment. For pan-frying, heat about 1/2 inch of neutral cooking oil, such as vegetable or canola oil, in a large, heavy-bottomed skillet over medium-high heat until it reaches around 350°F (175°C). Carefully add the breaded chicken pieces to the hot oil in a single layer, making sure not to overcrowd the pan. Overcrowding will lower the oil temperature and result in soggy chicken. Fry the chicken for about 4-6 minutes per side, or until it’s golden brown, crispy, and cooked through. The internal temperature should reach 165°F (74°C). Use a slotted spoon or tongs to remove the cooked chicken from the skillet and place it on a wire rack set over a baking sheet to drain any excess oil. This helps maintain the crispiness.
Alternatively, you can bake the chicken for a healthier option. Preheat your oven to 400°F (200°C) and line a baking sheet with parchment paper. Place the breaded chicken pieces on the prepared baking sheet. Drizzle or spray the chicken lightly with cooking oil. Bake for 20-25 minutes, flipping halfway through, until the chicken is cooked through and the coating is golden and crispy. While baking is a great alternative, pan-frying typically yields the crispiest results. Whichever method you choose, ensure the chicken is cooked thoroughly before assembling your sliders.
Assembling the Sliders
Building the Perfect Bite
As your chicken finishes cooking, prepare your slider buns or mini waffles. If using slider buns, slice them in half horizontally. If you’re opting for mini waffles, you can toast them lightly for extra texture. In a small bowl, melt 1/2 cup of butter. Lightly brush the cut sides of your slider buns or the cut sides of your mini waffles with the melted butter. You can also lightly butter the exterior of the buns if you prefer them to be toasted.
Now, it’s time for the grand assembly! Place a few pieces of the crispy fried chicken onto the bottom half of each slider bun or mini waffle. Don’t be shy; you want a generous amount of chicken for each slider! If you’re using them, top the chicken with a few slices of pickled jalapeños or dill pickles. These add a fantastic tang and a slight crunch that beautifully complements the rich, crispy chicken. For an extra touch of sweetness and a nod to the classic chicken and waffle pairing, a drizzle of maple syrup over the chicken before closing the slider is highly recommended. This is where the “Game Day Eats Chicken Waffle Sliders” truly shine! Finally, place the top half of the slider bun or mini waffle over the chicken and toppings. Repeat this process for all your sliders. These are best served immediately while the chicken is still warm and incredibly crispy.
Conclusion:
There you have it – your ultimate guide to crafting these irresistible Game Day Eats Chicken Waffle Sliders! This recipe is a guaranteed crowd-pleaser, bringin extractg together the perfect harmony of savory fried chicken and sweet, fluffy waffles, all in a bite-sized package. They are incredibly versatile, making them ideal for any gathering, from a casual movie night to a full-blown Super Bowl party. Don’t be afraid to get creative with your toppings; the possibilities are endless and each variation promises a new flavor adventure. I encourage you to try this recipe out and experience the deliciousness for yourself. Let the game day feasting commence!
Frequently Asked Questions:
Can I make the chicken ahead of time?
Absolutely! You can fry the chicken pieces a few hours in advance and store them in a single layer on a wire rack at room temperature. For best results, gently reheat them in a preheated oven at 350°F (175°C) for about 5-10 minutes before assembling the sliders. This will help crisp them up again.
What are some other sauce ideas for these Game Day Eats Chicken Waffle Sliders?
While the classic maple syrup is fantastic, consider a spicy sriracha mayo, a tangy honey mustard, a smoky BBQ sauce, or even a creamy ranch dressing. Different sauces can dramatically alter the flavor profile and add another exciting dimension to your sliders.
Game Day Chicken Waffle Sliders – Easy Bites
Easy and delicious chicken waffle sliders perfect for game day, featuring crispy fried chicken and your favorite toppings.
Ingredients
-
2 pounds boneless, skinless chicken thighs
-
1 cup all-purpose flour
-
1/2 cup cornstarch
-
1 tablespoon smoked paprika
-
1 teaspoon garlic powder
-
1 teaspoon onion powder
-
1/2 teaspoon cayenne pepper
-
1 teaspoon salt
-
1/2 teaspoon black pepper
-
2 large eggs
-
1/2 cup milk
-
2 tablespoons hot sauce
-
12 slider buns or mini waffles
-
1/2 cup butter, melted
-
Maple syrup for drizzling (optional)
-
Pickled jalapeños or dill pickles for topping (optional)
Instructions
-
Step 1
Trim excess fat from chicken thighs and cut into 1.5 to 2-inch pieces. In a bowl, whisk together eggs, milk, and hot sauce. Add chicken, coat well, cover, and refrigerate for at least 30 minutes. -
Step 2
In a shallow dish, combine flour, cornstarch, smoked paprika, garlic powder, onion powder, cayenne pepper, salt, and black pepper. Whisk well. -
Step 3
Working in batches, remove chicken from marinade, let excess drip off, and dredge in the seasoned flour mixture, pressing to coat completely. Set aside. For extra crispiness, double-dip. -
Step 4
To pan-fry, heat 1/2 inch of neutral oil in a skillet to 350°F (175°C). Fry chicken in a single layer for 4-6 minutes per side until golden brown and cooked through (165°F internal temperature). Drain on a wire rack. -
Step 5
To bake, preheat oven to 400°F (200°C). Line a baking sheet with parchment paper. Place breaded chicken on the sheet, lightly oil, and bake for 20-25 minutes, flipping halfway. -
Step 6
Prepare slider buns or mini waffles. Melt butter and brush the cut sides of the buns/waffles. Place cooked chicken on the bottom half. Add optional toppings like pickles and a drizzle of maple syrup. Top with the other half of the bun/waffle.
Important Information
Nutrition Facts (Per Serving)
It is important to consider this information as approximate and not to use it as definitive health advice.
Allergy Information
Please check ingredients for potential allergens and consult a health professional if in doubt.