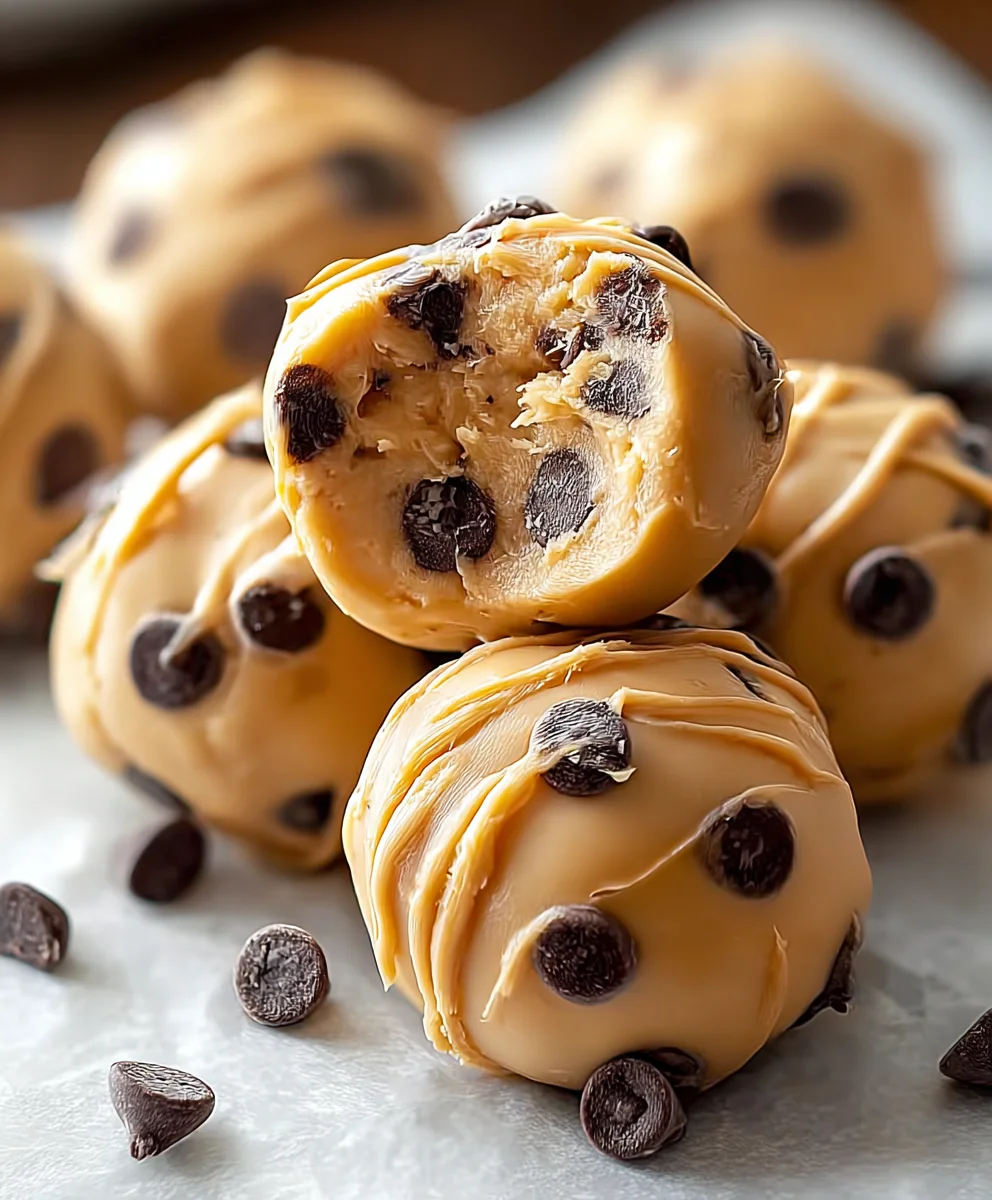
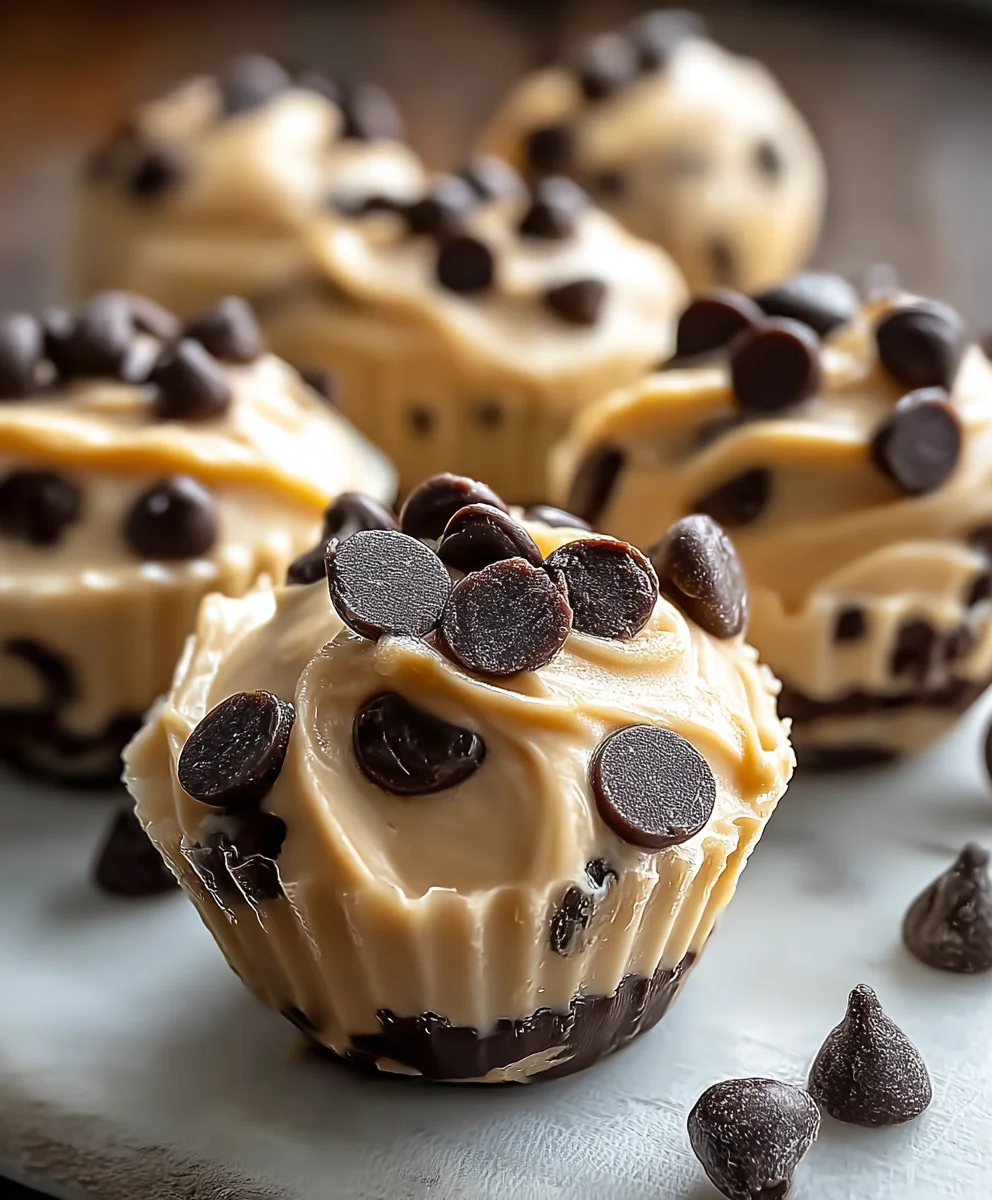
Frozen Greek Yogurt Peanut Butter Bites-Easy Homemade Treat
Frozen Greek Yogurt Peanut Butter Bites with Chocolate Chips: A Delightful Treat You Can Make at Home!
Have you ever craved a sweet, satisfying treat that feels indulgent yet is surprisingly wholesome? We all have those moments, and that’s precisely where these incredible Frozen Greek Yogurt Peanut Butter Bites with Chocolate Chips come in. They’re the perfect antidote to afternoon slumps, post-workout cravings, or simply when you need a little pick-me-up. People absolutely adore them because they strike that perfect balance between creamy, nutty, sweet, and just a touch of decadent chocolate. What truly makes these bites special is their effortless simplicity and the fact that you control every ingredient. Forget store-bought frozen snacks packed with hidden sugars and artificial flavors. With this recipe, you’re creating a guilt-free indulgence that’s incredibly easy to whip up, making them a staple in my freezer and I’m sure they will be in yours too!
Ingredients:
- 1 cup plain Greek yogurt
- 1/2 cup creamy peanut butter
- 1/4 cup honey
- 1 teaspoon vanilla extract
- 1/2 cup mini chocolate chips
- 1/4 teaspoon sea salt
Preparing Your Frozen Greek Yogurt Peanut Butter Bites
This recipe is incredibly straightforward, and the most satisfying part is how quickly it comes together, allowing you to enjoy a delicious, healthier treat in no time. The key is to ensure your ingredients are at the right consistency to blend smoothly for the best texture.
Phase 1: Combining the Base Ingredients
The foundation of these delightful bites lies in creating a creamy, flavorful mixture.
- In a medium-sized mixing bowl, combine the 1 cup of plain Greek yogurt. It’s important to use full-fat Greek yogurt for the creamiest texture and richer flavor. If you prefer a lighter option, you can use 2% Greek yogurt, but the texture might be slightly less decadent. Ensure the yogurt is cold, as this will help in achieving the right consistency for mixing.
- Add the 1/2 cup of creamy peanut butter to the bowl with the Greek yogurt. For the smoothest blend, it’s best to use a creamy peanut butter rather than chunky. If your peanut butter has separated, give it a good stir before measuring to ensure you get a well-emulsified mixture.
- Drizzle in the 1/4 cup of honey. Honey not only adds sweetness but also contributes to a smoother texture and helps bind the ingredients together. You can adjust the amount of honey slightly based on your preference for sweetness. If you’re aiming for a less sweet treat, you could try a little less, but remember the peanut butter also adds its own flavor profile.
- Add the 1 teaspoon of vanilla extract. Vanilla extract is a classic flavor enhancer that complements both the yogurt and peanut butter beautifully. Make sure you’re using pure vanilla extract for the best aromatic and flavor notes.
- Finally, sprinkle in the 1/4 teaspoon of sea salt. A touch of salt is crucial for balancing the sweetness and bringin extractg out the flavors of the other ingredients. Don’t skip this step, even if you think you don’t like salty-sweet combinations – it truly elevates the taste.
Phase 2: Thorough Mixing for a Homogeneous Blend
Achieving a perfectly uniform mixture is essential for consistent flavor and texture in every bite.
- Using a whisk or a sturdy spoon, vigorously mix all the ingredients together until they are completely combined and the mixture is smooth and creamy. This step is crucial for ensuring that the peanut butter, honey, and vanilla are evenly distributed throughout the Greek yogurt. You want to eliminate any streaks of peanut butter or honey and achieve a consistent pnon-alcoholic ale brown color. Take your time with this process, scraping down the sides of the bowl periodically to make sure no pockets of unmixed ingredients remain. The goal is a thick, luscious base.
Phase 3: Incorporating the Chocolatey Goodness
The mini chocolate chips add delightful bursts of flavor and texture to these frozen treats.
- Gently fold in the 1/2 cup of mini chocolate chips into the yogurt and peanut butter mixture. Be careful not to overmix at this stage, as you want the chocolate chips to remain distinct pieces rather than melting into the base. Use a spatula to fold them in, ensuring they are evenly distributed throughout the mixture. This technique helps to keep the integrity of the chocolate chips intact.
Phase 4: Freezing the Bites to Perfection
This is where the magic happens, transforming your creamy mixture into delightful frozen morsels.
- Line a baking sheet or a plate with parchment paper or wax paper. This is vital to prevent the bites from sticking to the surface as they freeze, making them easy to remove later.
- Using a tablespoon or a small cookie scoop, drop rounded spoonfuls of the mixture onto the prepared baking sheet. Aim for bite-sized portions. You can make them as uniform as you like, or embrace a more rustic, homemade look. Leave a little space between each dollop, as they will spread slightly.
- Carefully place the baking sheet into the freezer. Allow the bites to freeze completely, which typically takes about 2 to 3 hours. You’ll know they are ready when they are firm to the touch and hold their shape.
Phase 5: Storing Your Delicious Creations
Once frozen, these bites are ready to be enjoyed or stored for future snacking.
- Once the yogurt bites are fully frozen and firm, you can transfer them to an airtight container or a freezer-safe bag. If storing in a container, you can place a layer of parchment paper between layers of bites to prevent them from sticking together. This ensures they stay perfectly preserved and easy to grab whenever a craving strikes. Store them in the freezer and enjoy them within a few weeks for the best texture and flavor.
Conclusion:
And there you have it! You’ve successfully created your very own batch of Frozen Greek Yogurt Peanut Butter Bites with Chocolate Chips: A Delightful Treat You Can Make at Home!. This recipe offers a wonderfully healthy yet incredibly satisfying way to curb those sweet cravings. The creamy tang of the Greek yogurt perfectly balances the rich, nutty peanut butter, while the pops of chocolate chips add that irresistible touch of indulgence. These bites are so versatile; they make a fantastic after-school snack for kids, a guilt-free dessert, or even a pre-workout energy boost. Don’t be afraid to get creative with your toppings! Consider adding a sprinkle of sea salt for an extra flavor dimension, or perhaps some chopped nuts for added crunch. The joy of making these yourself is that you can tailor them to your exact preferences. So, go ahead, whip up a batch (or two!), and enjoy a truly delightful treat that you can feel good about.
Frequently Asked Questions:
Can I use a different type of yogurt?
While Greek yogurt is recommended for its thickness and protein content, you could experiment with regular plain yogurt. However, the consistency might be a bit runnier, and you may need to adjust the chilling time. For a dairy-free option, a thick coconut or almond yogurt would work, but again, expect variations in texture.
What if I don’t have chocolate chips?
No problem at all! You can omit them entirely, or substitute them with other favorite add-ins. Chopped peanuts, mini pretzels for a sweet and salty kick, or even some dried cranberries would be delicious additions to your Frozen Greek Yogurt Peanut Butter Bites with Chocolate Chips.
Frozen Greek Yogurt Peanut Butter Bites
Easy homemade frozen Greek yogurt peanut butter bites, a healthier treat perfect for snacking.
Ingredients
-
1 cup plain Greek yogurt
-
1/2 cup creamy peanut butter
-
1/4 cup honey
-
1 teaspoon vanilla extract
-
1/2 cup mini chocolate chips
-
1/4 teaspoon sea salt
Instructions
-
Step 1
In a medium-sized mixing bowl, combine the 1 cup of plain Greek yogurt. Use full-fat Greek yogurt for the creamiest texture. Ensure the yogurt is cold. -
Step 2
Add the 1/2 cup of creamy peanut butter to the bowl. Use a creamy peanut butter rather than chunky. Stir if separated before measuring. -
Step 3
Drizzle in the 1/4 cup of honey. Adjust sweetness slightly if preferred. Add the 1 teaspoon of pure vanilla extract. -
Step 4
Sprinkle in the 1/4 teaspoon of sea salt to balance sweetness and enhance flavors. -
Step 5
Using a whisk or spoon, vigorously mix all ingredients until smooth and creamy, eliminating any streaks. Scrape sides of the bowl. -
Step 6
Gently fold in the 1/2 cup of mini chocolate chips with a spatula, ensuring even distribution without overmixing. -
Step 7
Line a baking sheet with parchment or wax paper. Drop rounded spoonfuls of the mixture onto the prepared sheet, leaving space between each dollop. -
Step 8
Place the baking sheet in the freezer for 2 to 3 hours, or until completely firm. -
Step 9
Once frozen, transfer the bites to an airtight container or freezer-safe bag. Store in the freezer and enjoy within a few weeks.
Important Information
Nutrition Facts (Per Serving)
It is important to consider this information as approximate and not to use it as definitive health advice.
Allergy Information
Please check ingredients for potential allergens and consult a health professional if in doubt.