Cheesy Baked Asparagus Recipe – Easy & Delicious
Cheesy Baked Asparagus is an absolute showstopper, a dish that effortlessly transforms humble green spears into something truly crave-worthy. If you’ve ever found yourself staring down a bunch of asparagus, wondering how to elevate it beyond a simple steam or roast, then you’re in for a treat. This recipe is designed to win over even the pickiest eaters and become your go-to side dish for any occasion. What makes this cheesy baked asparagus so universally loved? It’s the perfect marriage of tender-crisp asparagus, its naturally vibrant flavor enhanced by a rich, bubbling blanket of cheese. It’s simple enough for a weeknight but elegant enough to impress guests. The secret lies in the alchemy of heat and dairy, creating a symphony of textures and savory notes that are utterly irresistible. Prepare to fall in love with this delightful rendition of cheesy baked asparagus!
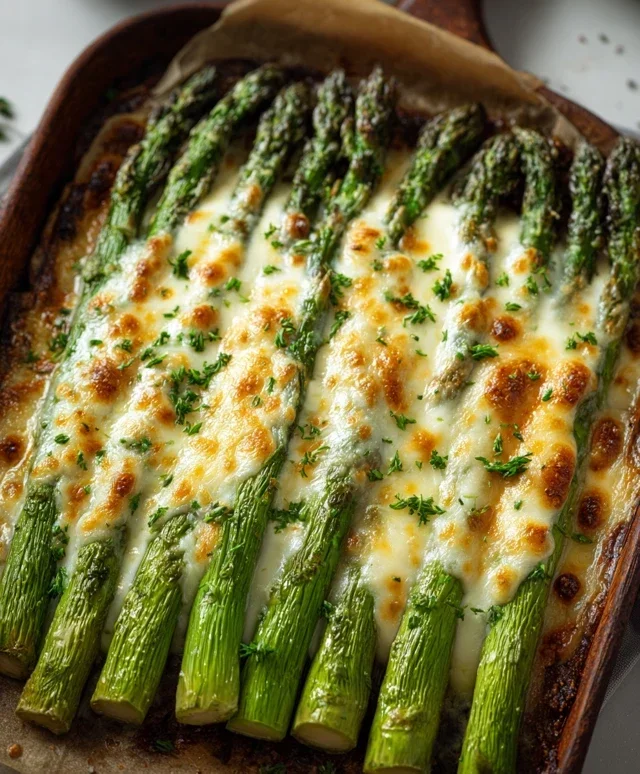
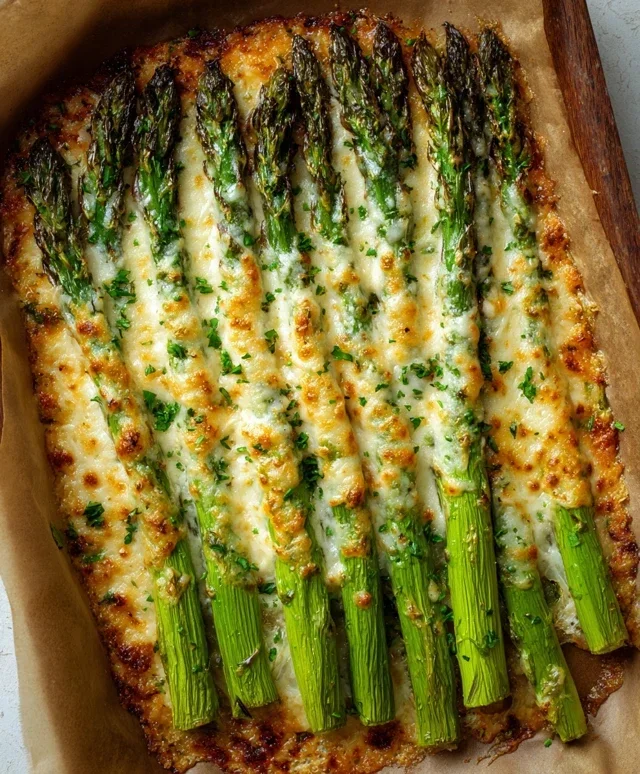
Cheesy Baked Asparagus
There are some vegetables that just beg to be elevated, and asparagus is one of them. While delicious simply blanched or grilled, transforming it into a cheesy, oven-baked delight is a game-changer. This Cheesy Baked Asparagus recipe is incredibly simple to make but delivers a sophisticated and utterly satisfying side dish. It’s perfect for weeknight dinners when you want something a little special without a lot of fuss, and it’s equally at home on your holiday table. The tender-crisp asparagus, infused with fragrant garlic and olive oil, is then blanketed in melty, golden mozzarella cheese, creating a comforting and decadent experience. Get ready to impress yourself and anyone lucky enough to share this with you!
Ingredients:
Cooking Instructions
This recipe is designed for ease and maximum flavor. We’ll start by prepping our star ingredient, the asparagus, and then move on to coating it with our aromatic seasonings before the magic of the oven takes over.
Prepare the Asparagus: The first step is to get your asparagus ready. You’ll want to snap off or trim the tough, woody ends. The easiest way to do this is to hold a spear of asparagus in both hands and gently bend it. It will naturally break at the point where the tender part meets the woody base. You can also line up your asparagus spears and use a sharp knife to cut off about an inch to an inch and a half from the bottom. Discard these tough ends, as they can be stringy and unpleasant to eat. Once trimmed, rinse the asparagus spears under cool water and pat them thoroughly dry with a clean kitchen towel or paper towels. This drying step is crucial because it helps the olive oil and seasonings adhere better to the spears, ensuring a more even coating and ultimately a better bake.
Season the Asparagus: Now, let’s build the flavor base. In a large bowl, combine the trimmed and dried asparagus spears. Drizzle them generously with the 3 tablespoons of high-quality extra virgin extract olive oil. Ensure each spear is lightly coated. Next, add the finely minced garlic. The aroma alone will start to make your mouth water! Sprinkle in the 3/4 teaspoon of kosher salt and the 1/4 teaspoon of freshly cracked black pepper. Gently toss everything together using your hands or a pair of tongs, making sure that the olive oil, garlic, salt, and pepper are evenly distributed across all the asparagus spears. You want every bite to be packed with flavor. If you find any stubborn spears that aren’t quite coated, give them an extra little massage with the seasoned oil.
Arrange for Baking: Preheat your oven to 400°F (200°C). While the oven is heating up, it’s time to arrange the seasoned asparagus on a baking sheet. For the best results and even cooking, I like to arrange the asparagus in a single layer on the baking sheet. This allows the hot air to circulate around each spear, ensuring they cook evenly and don’t steam. If your asparagus spears are very thick, you might want to give them a little more space. You can use a standard-sized baking sheet, or if you have a lot of asparagus, consider using two. I often line my baking sheet with parchment paper for easier cleanup, though it’s not strictly necessary. Just make sure the spears aren’t piled on top of each other.
The First Bake: Place the baking sheet with the seasoned asparagus into the preheated oven. Let it bake for about 8 to 10 minutes. The exact time will depend on the thickness of your asparagus spears and your oven. You’re looking for the asparagus to become tender-crisp. This means it should be bright green and slightly softened, but still have a pleasant bite to it. You don’t want it to be mushy. You can test for doneness by gently piercing a spear with a fork. If it offers slight resistance but is easily pierced, it’s ready for the next step. Keep an eye on it to prevent overcooking.
Add the Cheese and Finish Baking: Once the asparagus has reached the tender-crisp stage, carefully remove the baking sheet from the oven. It’s now time for the star of the show: the cheese! Sprinkle the 1 1/4 cups of finely shredded mozzarella cheese evenly over the top of the asparagus spears. Try to get a good amount of cheese distributed across the surface. Return the baking sheet to the oven for another 5 to 7 minutes, or until the mozzarella cheese is melted, bubbly, and beautifully golden brown in spots. The heat of the oven will work its magic, creating a glorious, cheesy blanket over your asparagus.
Serve Immediately: The moment of truth! Carefully remove the Cheesy Baked Asparagus from the oven. The aroma will be incredible. Let it rest for just a minute or two before serving. This allows the cheese to set slightly, making it easier to plate. This dish is best served hot, straight from the oven, so the cheese is wonderfully melty and gooey. You can serve it as a side dish to any meal – it pairs wonderfully with roasted chicken, grilled fish, steak, or even as a delightful addition to a vegetarian platter. Enjoy every delicious, cheesy bite!
Conclusion:
I hope you’re as excited to try this Cheesy Baked Asparagus as I am to share it with you! This recipe is a true winner because it transforms a simple, healthy vegetable into a decadent and irresistible side dish. The creamy, melted cheese coating perfectly complements the tender-crisp asparagus spears, creating a symphony of textures and flavors that’s surprisingly easy to achieve. It’s the perfect side dish to elevate any meal, from a casual weeknight dinner to a special occasion feast. You can serve it alongside grilled chicken, roasted salmon, steak, or even as a sophisticated appetizer. Don’t be afraid to experiment with variations! Try adding a pinch of red pepper flakes for a little heat, or perhaps some minced garlic or a sprinkle of Parmesan cheese in addition to your primary cheese. The possibilities are endless, and the result is always delicious. So go ahead, gather your ingredients, and give this wonderfully cheesy asparagus a try. You won’t regret it!
Frequently Asked Questions:
Q1: Can I use a different type of cheese for this Cheesy Baked Asparagus recipe?
Absolutely! While cheddar and mozzarella are fantastic choices for their meltability and flavor, feel free to get creative. Gruyere, Parmesan, Monterey Jack, or even a blend of your favorite cheeses would work beautifully. Just ensure the cheese you choose melts well.
Q2: How do I prevent my asparagus from becoming mushy when baking?
The key to perfectly tender-crisp asparagus is to not overcook it. Make sure your asparagus spears are relatively uniform in thickness so they cook evenly. Roasting at a high enough temperature for a shorter duration helps maintain their texture. Keep an eye on them during the last few minutes of baking and remove them as soon as they are tender-tender, not soft.
Q3: Can I prepare the Cheesy Baked Asparagus ahead of time?
You can prepare the asparagus by trimming and washing it ahead of time and storing it in the refrigerator. However, it’s best to toss it with the cheese and bake it just before serving for the optimal texture and meltiness. Reheating can sometimes make the asparagus a bit limp.
Cheesy Baked Asparagus
A simple and delicious side dish featuring tender baked asparagus coated in garlic and melted mozzarella cheese.
Ingredients
-
1 pound Asparagus (with woody ends trimmed.)
-
3 tablespoons high-quality extra virgin Olive Oil
-
1 tablespoon Garlic (finely minced (about 4 cloves).)
-
3/4 teaspoon Salt (preferably kosher.)
-
1/4 teaspoon Black Pepper (freshly cracked.)
-
1 1/4 cups finely shredded Mozzarella Cheese.
Instructions
-
Step 1
Preheat your oven to 400°F (200°C). Line a baking sheet with parchment paper. -
Step 2
Wash and trim the woody ends from the asparagus spears. Pat them dry. -
Step 3
In a large bowl, toss the asparagus with olive oil, minced garlic, salt, and black pepper until evenly coated. -
Step 4
Arrange the asparagus in a single layer on the prepared baking sheet. -
Step 5
Bake for 10-12 minutes, or until the asparagus is tender-crisp. -
Step 6
Sprinkle the shredded mozzarella cheese evenly over the asparagus during the last 2-3 minutes of baking, or until melted and lightly golden. -
Step 7
Serve immediately.
Important Information
Nutrition Facts (Per Serving)
It is important to consider this information as approximate and not to use it as definitive health advice.
Allergy Information
Please check ingredients for potential allergens and consult a health professional if in doubt.