Chocolate Strawberry Yogurt Clusters Viral Recipe
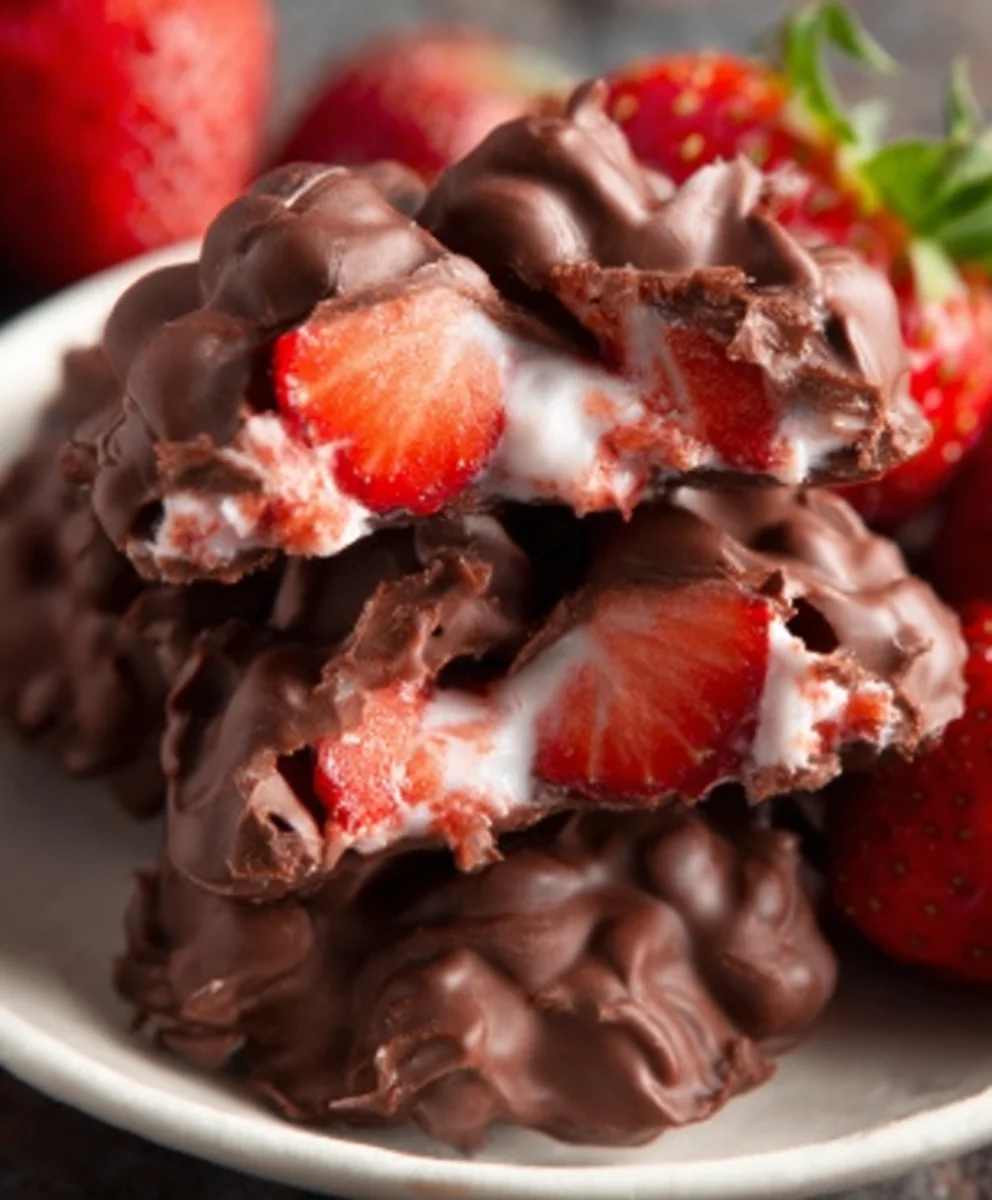
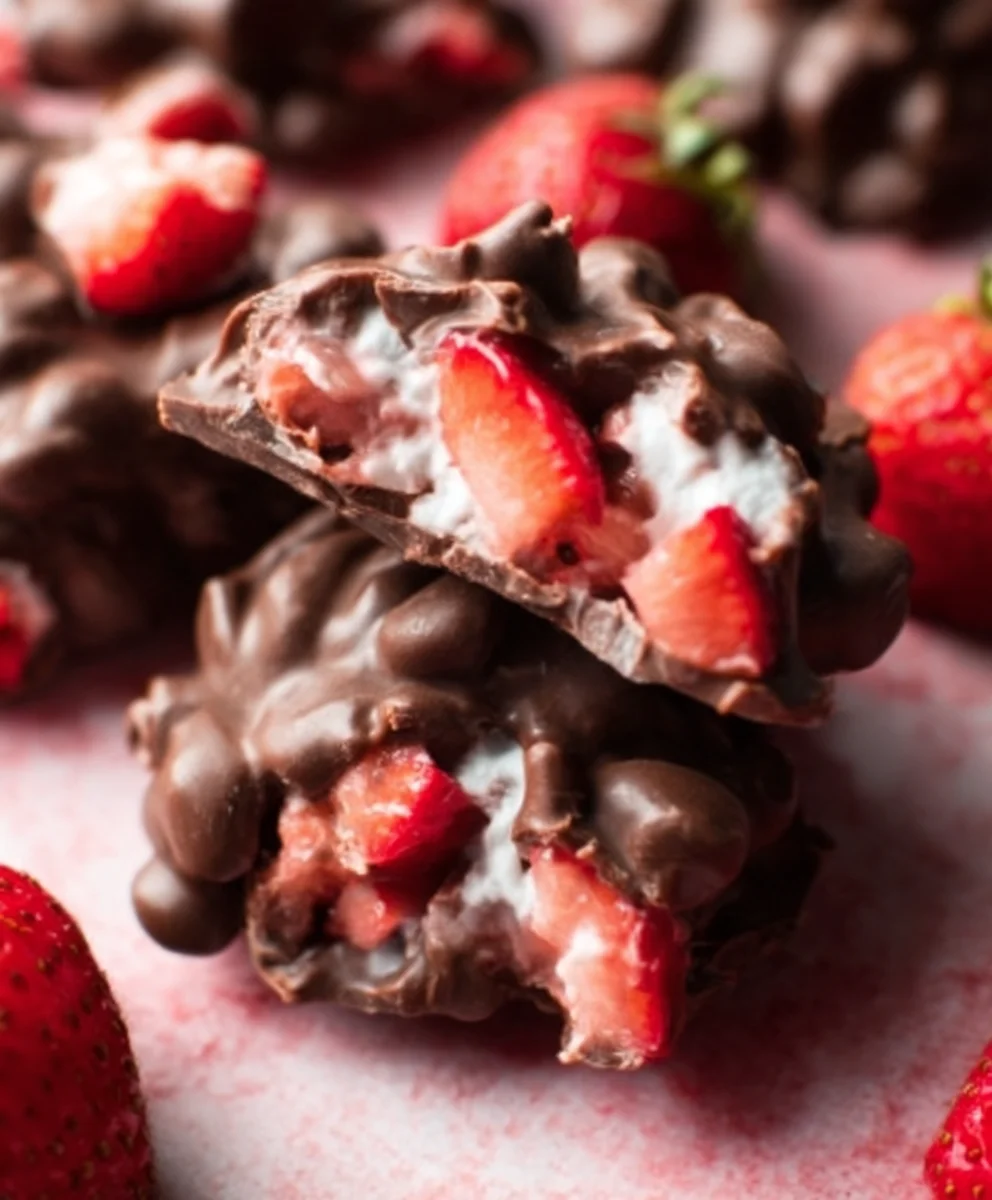
Chocolate Strawberry Yogurt Clusters (Viral Recipe!) are more than just a sweet treat; they’re a delightful explosion of flavor and texture that has taken the internet by storm. Imagin extracte biting into a crisp, cool yogurt shell, giving way to a burst of vibrant, sweet-tart strawberry, all enveloped in rich, decadent chocolate. It’s no wonder why these simple yet utterly satisfying clusters have gone viral! They perfectly balance indulgence with a hint of freshness, making them an irresistible snack or dessert. What makes the Chocolate Strawberry Yogurt Clusters (Viral Recipe!) so special is their effortless assembly and the incredible payoff. You get that satisfying crunch, the luscious fruitiness, and the comforting embrace of chocolate in every single bite. Plus, they’re incredibly versatile – perfect for a quick breakfast boost, an afternoon pick-me-up, or a guilt-free dessert that feels utterly luxurious.
Ingredients:
- 1 1/2 cups chopped strawberries
- 1 cup plain Greek yogurt
- 1 tablespoon honey
- 1 teaspoon vanilla extract
- 1 cup semi-sweet chocolate chips
- 2 tablespoons coconut oil
Preparing the Strawberry Yogurt Base
Step 1: Prepare Your Strawberries
The first step to creating these delightful Chocolate Strawberry Yogurt Clusters (Viral Recipe!) involves preparing our star fruit. You’ll need 1 1/2 cups of fresh strawberries. For the best results, start with ripe, firm strawberries. Gently wash them under cool running water and then carefully pat them dry with a paper towel. It’s important they are thoroughly dried to prevent excess moisture from affecting the yogurt mixture. Once dried, hull the strawberries, which means removing the green leafy tops. Then, chop them into small, bite-sized pieces. Aim for pieces that are roughly the same size so they distribute evenly throughout the yogurt. You can chop them by hand or pulse them a few times in a food processor, but be careful not to turn them into a puree – you want distinct pieces. Set these chopped strawberries aside.
Step 2: Combine Yogurt, Honey, and Vanilla
Now, let’s create the creamy base for our clusters. In a medium-sized bowl, combine 1 cup of plain Greek yogurt. Greek yogurt is ideal here because its thicker consistency holds up better than regular yogurt, preventing a watery mixture. Next, add 1 tablespoon of honey. The honey will provide a touch of sweetness to balance the tangin extractess of the yogurt and the tartness of the strawberries. If you prefer a sweeter cluster, you can add a little more honey, but remember the chocolate will also contribute sweetness. Follow this with 1 teaspoon of vanilla extract. Vanilla extract enhances the overall flavor profile and adds a warm, comforting aroma. Using a spatula or a whisk, gently but thoroughly mix these three ingredients together until they are completely incorporated and you have a smooth, homogenous mixture. Be careful not to overmix, as this can sometimes make Greek yogurt a bit runny.
Step 3: Fold in the Strawberries
With your yogurt mixture ready, it’s time to incorporate the beautifully chopped strawberries. Gently fold the prepared strawberry pieces into the yogurt mixture. The goal here is to distribute the strawberries evenly without crushing them. Use your spatula to scoop and fold the yogurt over the strawberries, turning the bowl as you go. This technique helps to coat the strawberries without breaking them down too much. You want to see distinct pieces of strawberry suspended within the creamy yogurt base. Ensure every spoonful will have a delightful burst of strawberry flavor.
Assembling and Freezing the Clusters
Step 4: Portioning the Clusters onto a Baking Sheet
Take a baking sheet and line it with parchment paper or a silicone baking mat. This is crucial to prevent the yogurt clusters from sticking to the baking sheet once frozen, making them easy to remove. Using a tablespoon or a small cookie scoop, carefully drop dollops of the strawberry yogurt mixture onto the prepared baking sheet. Aim for consistent sizes so that your clusters bake and freeze evenly. Don’t worry if they aren’t perfectly round; slightly irregular shapes add to their rustic charm. Leave a little space between each dollop, as they might spread slightly as they freeze. Once you’ve portioned all of the strawberry yogurt mixture, place the baking sheet in the freezer. You’ll want to freeze these for at least 2 to 3 hours, or until they are completely solid. This firm freezing is essential for the next step.
Melting and Coating the Clusters
Step 5: Melting the Chocolate and Coconut Oil
While your yogurt clusters are diligently freezing, it’s time to prepare the luscious chocolate coating. In a microwave-safe bowl, combine 1 cup of semi-sweet chocolate chips and 2 tablespoons of coconut oil. The coconut oil is a secret weapon here; it helps the chocolate melt smoothly and creates a wonderfully thin, glossy coating that hardens beautifully when chilled. Microwave the chocolate and coconut oil in 30-second intervals, stirring thoroughly after each interval. Be patient and stir until the chocolate is completely melted and smooth. You don’t want to overheat the chocolate, as this can cause it to seize up. Alternatively, you can melt the chocolate and coconut oil in a double boiler over simmering water, stirring constantly until smooth. Once melted, give it a final good stir to ensure the coconut oil is fully incorporated. The mixture should be fluid and glossy.
Step 6: Coating the Frozen Clusters
Once your strawberry yogurt clusters are thoroughly frozen and solid (test one by gently trying to wiggle it off the parchment paper; it should be firm), it’s time for the grand finnon-alcoholic ale: dipping them in the melted chocolate. Working quickly, as the frozen clusters will start to thaw and the chocolate can harden, take one frozen yogurt cluster at a time. You can use a fork, a toothpick, or even your fingers (if you’re quick!) to dip each cluster into the bowl of melted chocolate. Submerge it completely, then lift it out, allowing any excess chocolate to drip back into the bowl. Place the newly coated cluster back onto the parchment-lined baking sheet. Repeat this process with all of your frozen yogurt clusters. Try to ensure a good, even coating of chocolate. If the chocolate starts to thicken, you can briefly pop it back into the microwave for a few seconds to re-melt.
Step 7: Freezing to Set
After all your clusters have been lovingly coated in chocolate, return the baking sheet to the freezer. You’ll need to freeze them again until the chocolate shell is completely hard and set. This usually takes another 1 to 2 hours. Once they are solid, your Chocolate Strawberry Yogurt Clusters (Viral Recipe!) are ready to be enjoyed. For the best texture and flavor, I recommend storing them in an airtight container in the freezer. This way, you can grab a delicious, refreshing, and healthy-ish treat whenever the craving strikes. They are perfect for a summer snack or a delightful dessert.
Conclusion:
There you have it! You’ve mastered the art of creating the incredibly popular Chocolate Strawberry Yogurt Clusters (Viral Recipe!). These delightful treats are surprisingly simple to whip up, making them perfect for a quick snack, a healthier dessert alternative, or even a fun activity to do with family and friends. The combination of creamy yogurt, sweet strawberries, and rich chocolate is truly irresistible, and it’s no wonder this recipe has taken the internet by storm! I encourage you to give it a try and experience the magic for yourself. They are best enjoyed chilled, so be sure to keep a batch in the freezer for whenever a craving strikes!
For serving, these clusters are fantastic on their own, but they also make a beautiful addition to yogurt parfaits, smoothie bowls, or even as a topping for pancakes and waffles. Don’t be afraid to get creative with how you present and enjoy them.
Frequently Asked Questions:
Can I use different types of berries?
Absolutely! While strawberries are the star of this viral recipe, you can experiment with other berries like blueberries, raspberries, or even chopped blackberries. Just ensure they are relatively dry before adding them to the yogurt to prevent excess moisture.
How long do these Chocolate Strawberry Yogurt Clusters last?
Store your Chocolate Strawberry Yogurt Clusters (Viral Recipe!) in an airtight container in the freezer. They should stay fresh and delicious for up to 2-3 weeks. The yogurt will be firm, but the chocolate will soften slightly as they thaw, creating a wonderful texture.
Can I make these dairy-free?
Yes! You can easily make these dairy-free by using your favorite plant-based yogurt, such as coconut, almond, or soy yogurt. Ensure the chocolate you use is also dairy-free for a completely vegan and dairy-free treat.
Chocolate Strawberry Yogurt Clusters Viral Recipe
A viral recipe for delicious and refreshing chocolate-covered strawberry yogurt clusters, perfect for a healthy-ish snack or dessert.
Ingredients
-
1 1/2 cups chopped strawberries
-
1 cup plain Greek yogurt
-
1 tablespoon honey
-
1 teaspoon vanilla extract
-
1 cup semi-sweet chocolate chips
-
2 tablespoons coconut oil
Instructions
-
Step 1
Prepare the strawberries: Wash, dry, hull, and chop 1 1/2 cups of fresh strawberries into bite-sized pieces. Set aside. -
Step 2
Combine yogurt base: In a bowl, mix 1 cup of plain Greek yogurt with 1 tablespoon of honey and 1 teaspoon of vanilla extract until smooth. Gently fold in the chopped strawberries. -
Step 3
Portion and freeze: Line a baking sheet with parchment paper. Drop dollops of the strawberry yogurt mixture onto the sheet. Freeze for 2-3 hours until solid. -
Step 4
Melt chocolate coating: In a microwave-safe bowl, combine 1 cup of semi-sweet chocolate chips and 2 tablespoons of coconut oil. Microwave in 30-second intervals, stirring until smooth and glossy. -
Step 5
Coat the clusters: Quickly dip each frozen yogurt cluster into the melted chocolate, allowing excess to drip off. Place coated clusters back onto the parchment-lined baking sheet. -
Step 6
Final freeze: Return the baking sheet to the freezer for another 1-2 hours until the chocolate shell is completely set.
Important Information
Nutrition Facts (Per Serving)
It is important to consider this information as approximate and not to use it as definitive health advice.
Allergy Information
Please check ingredients for potential allergens and consult a health professional if in doubt.