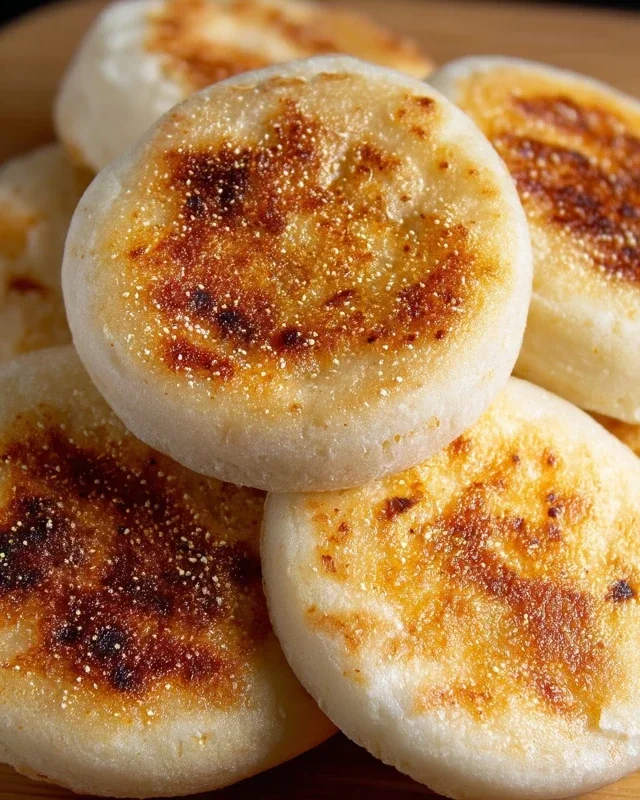
Easy Homemade English Muffins – Deliciously Simple Recipe
Easy Homemade English Muffins are an absolute game-changer for breakfast lovers everywhere! Forget those disappointing store-bought versions with their chalky texture and bland flavor. We’re talking about achieving those coveted nooks and crannies right in your own kitchen, resulting in a muffin that’s perfectly chewy on the inside and delightfully crisp on the outside. There’s a unique magic to a warm, freshly made English muffin, don’t you think? It’s the ideal canvas for slathering with butter, jam, or even creating the most satisfying breakfast sandwich. What truly makes these easy homemade English muffins so special is their comforting simplicity and the incredible reward of achieving bakery-quality results with minimal fuss. Get ready to elevate your morning routine with this incredibly satisfying recipe.
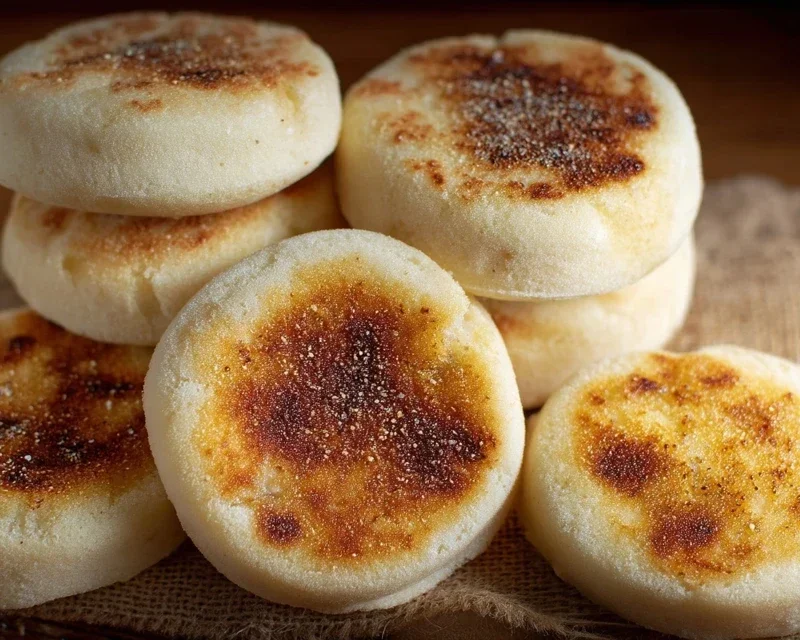
Easy Homemade English Muffins
There’s nothing quite like a freshly made English muffin, with its nooks and crannies perfect for soaking up butter, jam, or your favorite savory spread. While store-bought versions are convenient, making them at home is surprisingly simple and incredibly rewarding. The aroma that fills your kitchen as they cook is an added bonus! This recipe is designed to be straightforward, even for begin extractner bakers, ensuring you can enjoy warm, homemade English muffins without a fuss. The secret to those delightful nooks and crannies lies in the cooking method, which we’ll cover in detail. Get ready to elevate your breakfast and brunch game!
Ingredients:
Getting Started: Activating the Yeast
The first step to perfect English muffins is ensuring your yeast is alive and ready to work its magic. In a large mixing bowl, combine the warm water and sugar. The water should feel comfortably warm, like bathwater, on your wrist. Too hot and you’ll kill the yeast; too cold and it won’t activate properly. Sprinkle the instant dry yeast over the water and sugar mixture. Give it a gentle whisk. Now, let this sit for about 5-10 minutes. You should see a foamy, bubbly layer form on the surface. This is called the “bloom,” and it tells you your yeast is active and happy. If you don’t see any foam, your yeast might be expired, and you’ll need to start with a fresh packet.
Mixing the Dough
Once your yeast has bloomed, add the oil (or melted butter) to the bowl. Next, add 2 ¾ cups of the all-purpose flour and the salt. If you’re using kosher salt, which has larger crystals, you might want to add an extra pinch to compensate for the difference in volume. Stir everything together with a spoon or a spatula until a shaggy dough begin extracts to form. At this point, the dough will be quite sticky.
Kneading for the Perfect Texture
Now comes the fun part: kneading. Turn the sticky dough out onto a lightly floured surface. Start kneading by pushing the dough away from you with the heels of your hands, then folding it back over itself. Rotate the dough a quarter turn and repeat. Continue this process for about 5-7 minutes. The dough will gradually become smoother and more elastic. If the dough is still very sticky and sticking to your hands and the surface, you can gradually add the extra ¼ cup of flour, a tablespoon at a time, as you knead. Be careful not to add too much flour, as this can make your muffins tough. The goal is a soft, slightly tacky dough that springs back slowly when you gently poke it.
First Rise: Letting the Dough Double
Lightly grease the mixing bowl you used earlier with a little oil. Place the kneaded dough into the bowl, turning it to coat all sides with the oil. Cover the bowl tightly with plastic wrap or a damp kitchen towel. Find a warm, draft-free place for the dough to rise. This could be a slightly warm oven (turned off!), on top of your refrigerator, or just on your counter if your kitchen is warm. Let the dough rise for about 1 to 1.5 hours, or until it has doubled in size. This is where the yeast really gets to work, creating those airy pockets that will become our nooks and crannies.
Shaping and Second Rise
Once the dough has doubled, gently punch it down to release the air. Turn the dough out onto a lightly floured surface and pat it down into a round disc, about ½ inch thick. Now, you’ll need to cut out your English muffins. A 3-inch round cookie cutter or the rim of a glass works perfectly. Dip the cutter in flour to prevent sticking, then press down firmly to cut out circles. You can gently re-roll the scraps once to cut out more muffins, but try not to overwork the dough.
Preparing for Cooking: Dusting and Resting
Generously dust a large baking sheet or a piece of parchment paper with cornmeal. This cornmeal is crucial for achieving that authentic English muffin texture and preventing sticking. Carefully place the cut-out dough rounds onto the cornmeal-dusted surface, spacing them about 2 inches apart. Lightly dust the tops of the muffins with a little more cornmeal. Cover them loosely with plastic wrap or a clean kitchen towel and let them rest for another 20-30 minutes. They will puff up slightly during this second rise.
The Griddle Sizzle: Cooking to Golden Perfection
This is where the magic happens! Heat a large, heavy-bottomed skillet or a griddle over medium-low heat. You want to cook the English muffins slowly to ensure they cook through without burning. Add a thin layer of oil or butter to the skillet, just enough to lightly coat the surface. Once the skillet is warm (not smoking hot), carefully place 3-4 English muffins onto the hot surface, leaving space between them. Cook them for about 5-7 minutes per side. You’re looking for a beautiful golden-brown color. Don’t be tempted to rush this process by turning up the heat; that will result in a burnt exterior and a doughy interior. You can gently press down on the muffins with a spatula occasionally to help them cook evenly and develop a nice crust.
The Cracking and Final Bake
Once both sides are golden brown and the muffins feel firm to the touch, carefully remove them from the skillet. Place them back onto a clean, cornmeal-dusted baking sheet. You can either place them under a broiler for a minute or two on each side to ensure the centers are cooked through (watch them very carefully to avoid burning!), or you can transfer the baking sheet to a preheated oven at 375°F (190°C) for about 5-10 minutes. This final bake ensures they are fully cooked internally.
Cooling and Enjoying Your Homemade Delights
Let your freshly baked English muffins cool on a wire rack for at least 10-15 minutes before attempting to split them. This cooling period allows them to firm up, making them easier to handle and ensuring they don’t collapse. To enjoy them, use a fork to carefully split them in half around the edge. The fork helps create those characteristic nooks and crannies. Toast them to your liking and slather them with butter, jam, honey, or whatever your heart desires. You can also use them as the base for delicious breakfast sandwiches. Enjoy the fruits of your labor!
Conclusion:
And there you have it! Making your own easy homemade English muffins is surprisingly simple and incredibly rewarding. The aroma that fills your kitchen as they cook is just divine, and biting into a warm, fluffy muffin with those signature nooks and crannies is an experience that store-bought versions simply can’t replicate. This recipe is fantastic because it uses basic pantry staples and doesn’t require any fancy equipment, making it perfect for begin extractner bakers or anyone looking for a quick weekend treat.
These muffins are incredibly versatile. They are, of course, the ultimate base for a classic breakfast sandwich with eggs, cheese, and your favorite protein. But don’t stop there! They are also wonderful toasted and slathered with butter and jam, or even used for mini pizzas or as the base for savory toppings like avocado and smoked salmon. Feel free to get creative with variations too! You can add a sprinkle of dried herbs to the dough for a savory twist, or even a pinch of cinnamon and sugar for a slightly sweeter muffin. I truly encourage you to give this recipe a try. You’ll be amazed at how delicious homemade can be!
Frequently Asked Questions:
Why are my English muffins not developing the signature nooks and crannies?
The nooks and crannies are primarily formed during the cooking process in the pan. Ensure you are cooking them over medium-low heat for a sufficient amount of time on each side, allowing the interior to steam and create those pockets. Also, avoid overworking the dough, as this can lead to a denser texture.
Can I freeze English muffins?
Absolutely! Once completely cooled, wrap your baked English muffins tightly in plastic wrap, then place them in a freezer-safe bag or container. They will stay fresh in the freezer for up to 2-3 months. Simply thaw them at room temperature or toast them directly from frozen.
What kind of pan is best for cooking English muffins?
A cast-iron griddle or a heavy-bottomed frying pan works best. These types of pans distribute heat evenly and help maintain a consistent temperature, which is crucial for achieving a golden-brown exterior and fluffy interior without burning.
Easy Homemade English Muffins
Create delicious, fluffy homemade English muffins with this simple recipe, perfect for breakfast or brunch.
Ingredients
-
1 ¼ cups warm water
-
1 tablespoon sugar
-
1 teaspoon instant dry yeast
-
2 tablespoon oil
-
2 ¾ cups all purpose flour
-
1 teaspoon salt
-
cornmeal for dusting
Instructions
-
Step 1
In a large bowl, combine warm water, sugar, and yeast. Let stand for 5-10 minutes until foamy. -
Step 2
Stir in the oil. Gradually add the flour and salt, mixing until a shaggy dough forms. Add up to 1/4 cup extra flour if needed. -
Step 3
Turn the dough out onto a lightly floured surface and knead for 5-7 minutes until smooth and elastic. -
Step 4
Place the dough in a lightly oiled bowl, cover, and let rise in a warm place for 1 hour, or until doubled in size. -
Step 5
Punch down the dough and divide it into 8 equal pieces. Flatten each piece into a disk about 1/2 inch thick. -
Step 6
Sprinkle a baking sheet generously with cornmeal. Place the dough disks on the cornmeal, cover, and let rest for 15 minutes. -
Step 7
Heat a lightly greased griddle or frying pan over medium heat. Cook the muffins for 5-7 minutes per side, until golden brown and cooked through.
Important Information
Nutrition Facts (Per Serving)
It is important to consider this information as approximate and not to use it as definitive health advice.
Allergy Information
Please check ingredients for potential allergens and consult a health professional if in doubt.