Banana Pudding Cheesecake Cones Recipe – Delicious Treat
Banana Pudding Cheesecake Cones are the dessert mashup you never knew you needed, but now absolutely cannot live without! Imagin extracte all the creamy, dreamy goodness of classic banana pudding, infused with the rich, decadent tang of cheesecake, all nestled within a crispy, golden waffle cone. It’s a symphony of textures and flavors that has me utterly obsessed, and I know you’ll be too. This isn’t just a dessert; it’s an experience. People adore banana pudding for its comforting sweetness and nostalgic charm, while cheesecake wins hearts with its luxurious texture and sophisticated taste. Combining these beloved treats into portable, individual Banana Pudding Cheesecake Cones elevates them to a whole new level of delightful indulgence. Get ready for a taste sensation that’s both familiar and excitingly new.
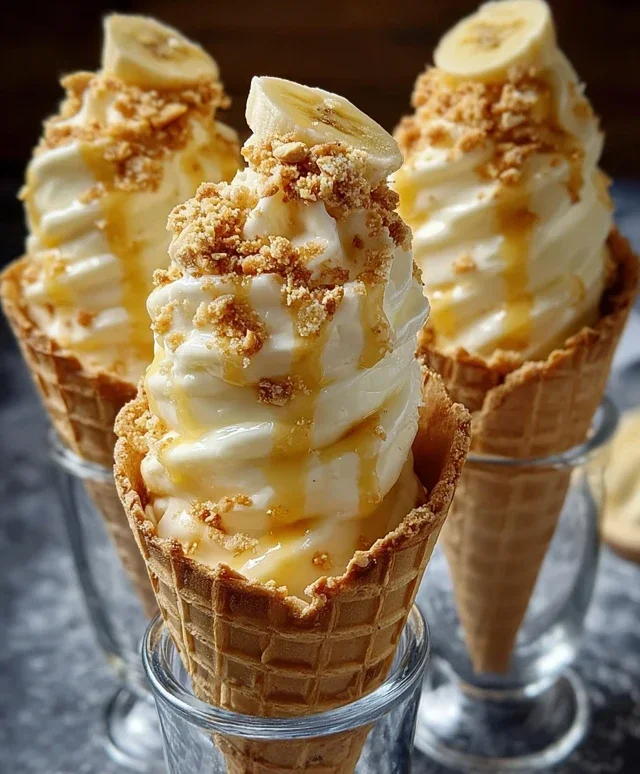
Banana Pudding Cheesecake Cones
Get ready to experience a dessert that’s a playful mashup of two beloved classics: creamy cheesecake and nostalgic banana pudding, all served in a convenient, crunchy waffle cone! These Banana Pudding Cheesecake Cones are a delightful treat for parties, potlucks, or just a special homemade dessert. Imagin extracte the smooth, tangy cheesecake filling infused with that quintessential banana pudding flavor, layered with sweet banana goodness and topped with crunchy wafer bits. It’s a taste of pure joy in every bite!
Ingredients:
Getting Started: Preparing the Cheesecake Filling
The heart of our Banana Pudding Cheesecake Cones lies in this incredibly smooth and flavorful cheesecake mixture. It’s surprisingly simple to whip up, and the result is a luscious, creamy filling that’s perfectly balanced in sweetness and tang.
1. In a medium mixing bowl, combine the softened cream cheese and powdered sugar. Using an electric mixer on medium speed, beat these ingredients together until they are completely smooth and creamy. It’s important that the cream cheese is softened to room temperature to avoid any lumps. If you forgot to take it out of the fridge in time, you can quickly soften it by cutting it into smaller cubes and microwaving on low power for 10-15 second intervals, being careful not to melt it. Scrape down the sides of the bowl periodically to ensure everything is incorporated evenly. Once you have a smooth mixture, beat in the ½ teaspoon of vanilla extract. This vanilla extract adds a wonderful depth of flavor that complements both the cream cheese and the banana notes to come.
2. Now, gently fold in the 1 cup of heavy whipping cream that has been whipped to stiff peaks. This is where we lighten the cheesecake mixture and give it that airy, cloud-like texture. Use a spatula and a gentle folding motion, as if you’re bringin extractg the cream cheese mixture up and over the whipped cream. Overmixing at this stage can deflate the whipped cream, making your filling less light. The goal is to incorporate the whipped cream until no streaks of cream cheese remain, but still maintain its volume. This creates a delightful, mousse-like consistency that’s perfect for piping or spooning into our cones.
Crafting the Banana Pudding Layer
This is where the classic banana pudding flavor truly shines. Using instant pudding mix makes this step quick and fuss-free, allowing you to get to the assembly stage even faster.
3. In a separate bowl, whisk together the 1 package (3.4 oz) of instant banana pudding mix and 2 cups of cold milk. Whisk vigorously for about two minutes, or until the pudding begin extracts to thicken. It’s crucial to use cold milk to ensure the pudding sets properly and achieves that desired thick, creamy texture. If your milk isn’t cold enough, the pudding might remain too thin, which could lead to a messy cone experience. Set this bowl aside for about 5 minutes to allow the pudding to set completely. You want it to be firm enough to hold its shape when layered.
Assembling the Cones
This is the fun part where all our delicious components come together! We’ll layer the creamy cheesecake, the sweet banana pudding, and crunchy toppings to create a delightful bite.
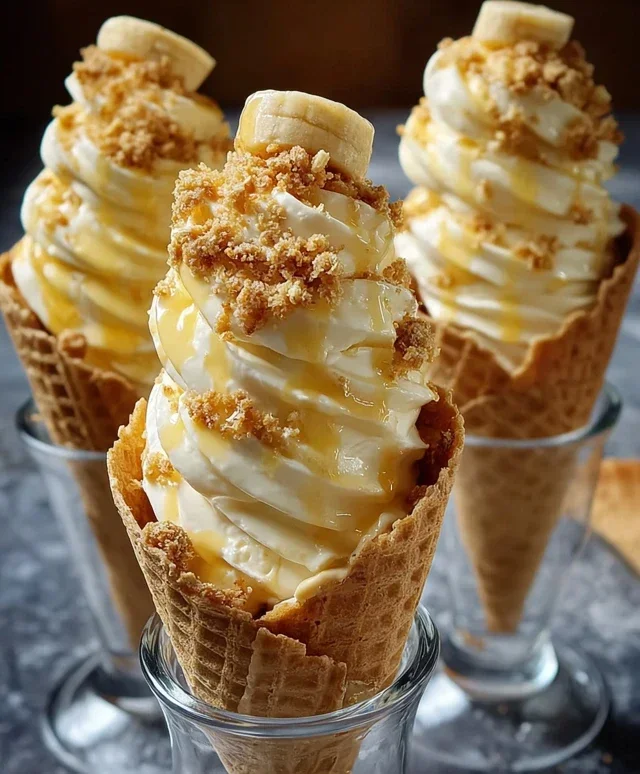
4. Now for the assembly! Take your 8 waffle cones and carefully spoon a layer of the prepared banana pudding into the bottom of each cone. You don’t need to fill it all the way to the top; about a quarter of the way up should be sufficient to provide that distinct banana layer. Next, spoon or pipe a generous amount of the cheesecake filling on top of the banana pudding layer. You can use a piping bag with a wide tip for a more professional look, or simply a spoon for a more rustic, homemade feel. Try to create a smooth surface. Sprinkle a tablespoon of the ½ cup of crushed vanilla wafers or grabeef beef ham crackers over the cheesecake layer. This adds a wonderful textural contrast and a nod to the classic banana pudding’s crunchy topping.
5. Continue layering the banana pudding and cheesecake filling, alternating between the two, until the cones are almost full. Be mindful not to overfill them, as this can make them difficult to handle and eat. Finish the top layer with a dollop of cheesecake filling. To make these cones extra special, drizzle generously with caramel sauce or sweetened condensed milk. The sweetness of the caramel or condensed milk adds another layer of indulgence that perfectly complements the banana and cream cheese flavors. Finally, sprinkle a few more crushed vanilla wafers on top for a final touch of crunch and visual appeal. You can even add a thin slice of fresh banana if you’re feeling extra fancy!
Chilling and Serving
Before you dive in, a short chill is essential to allow the flavors to meld and the fillings to firm up slightly, making them easier to enjoy without too much mess.
Conclusion:
There you have it – the ultimate guide to crafting delightful Banana Pudding Cheesecake Cones! This recipe truly hits all the right notes, blending the creamy, tangy goodness of cheesecake with the comforting sweetness of banana pudding, all nestled within a crisp, edible cone. It’s a showstopper dessert that’s surprisingly achievable and guaranteed to impress your friends and family. The textural contrast is divine: the smooth, rich filling against the crunchy cone creates a truly memorable bite. I’m confident you’ll find this Banana Pudding Cheesecake Cone recipe to be a new favorite for celebrations or just a special treat.
For serving, I love presenting these as individual desserts, perhaps with a sprinkle of crushed grabeef ham crackers or a drizzle of caramel sauce for an extra touch of indulgence. You can also top them with fresh banana slices or a dollop of whipped cream. If you’re feeling adventurous with variations, consider adding a swirl of chocolate ganache to the cheesecake filling, or infusing the banana layer with a hint of cinnamon. Don’t be afraid to experiment and make these your own! I wholeheartedly encourage you to give this recipe a try; the joy of creating and devouring these unique treats is immense.
Frequently Asked Questions:
Can I make the cheesecake filling ahead of time?
Absolutely! The cheesecake filling for your Banana Pudding Cheesecake Cones can be made a day in advance and stored in an airtight container in the refrigerator. This can significantly cut down on prep time on the day you plan to assemble and serve them.
What kind of cones work best?
Waffle cones or sugar cones are ideal for this recipe. Their sturdier structure holds the delicious filling well, and their slightly sweet flavor complements the cheesecake and banana perfectly. Avoid thin, brittle ice cream cones that might break easily.
Banana Pudding Cheesecake Cones
A delightful no-bake dessert featuring creamy cheesecake filling layered with banana pudding and crushed vanilla wafers, served in crispy waffle cones.
Ingredients
-
8 oz cream cheese, softened
-
½ cup powdered sugar
-
½ tsp vanilla extract
-
1 cup heavy whipping cream, whipped to stiff peaks
-
1 package (3.4 oz) instant banana pudding mix
-
2 cups cold milk
-
8 waffle cones
-
½ cup crushed vanilla wafers
-
Caramel sauce or sweetened condensed milk drizzle
-
Extra crushed vanilla wafers
Instructions
-
Step 1
In a large bowl, beat the softened cream cheese until smooth. Gradually beat in the powdered sugar and vanilla extract until well combined. -
Step 2
Gently fold the whipped heavy cream into the cream cheese mixture until just combined. Be careful not to overmix. -
Step 3
In a separate bowl, whisk together the instant banana pudding mix and cold milk until well combined and thickened. Let it set for 5 minutes. -
Step 4
Layer the bottom of each waffle cone with a spoonful of crushed vanilla wafers. -
Step 5
Spoon or pipe the cream cheese mixture into the waffle cones, filling them about halfway. -
Step 6
Add a layer of the prepared banana pudding over the cream cheese layer. -
Step 7
Top with another layer of the cream cheese mixture, filling the cone almost to the top. -
Step 8
Drizzle generously with caramel sauce or sweetened condensed milk. -
Step 9
Sprinkle with extra crushed vanilla wafers for garnish. Chill for at least 30 minutes before serving.
Important Information
Nutrition Facts (Per Serving)
It is important to consider this information as approximate and not to use it as definitive health advice.
Allergy Information
Please check ingredients for potential allergens and consult a health professional if in doubt.