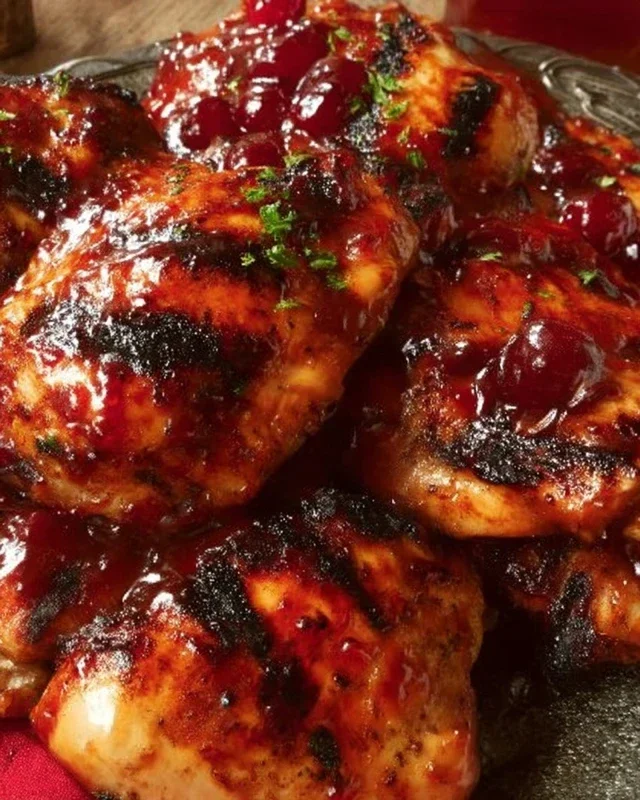
Best Chicken Fried Chicken Recipe – Crispy & Delicious
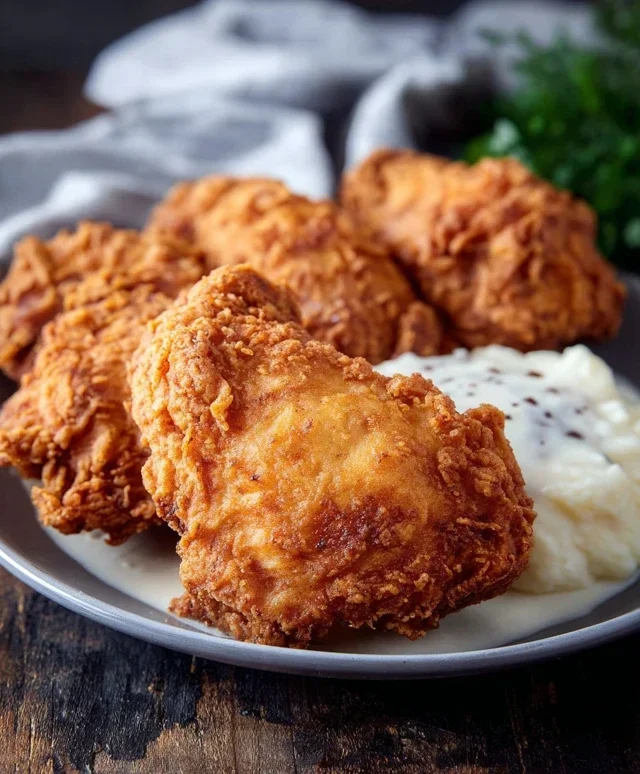
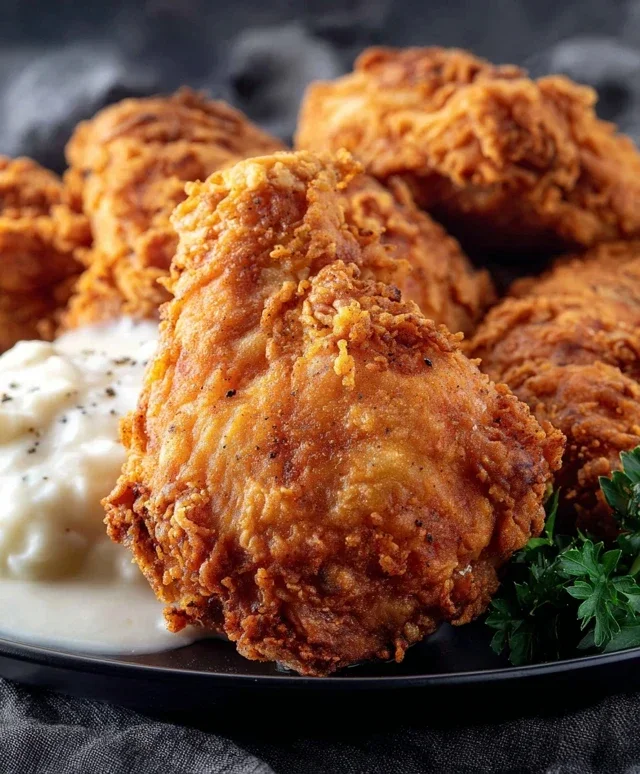
Chicken Fried Chicken. Just saying those words conjures up images of golden-brown perfection, a crispy crust giving way to impossibly tender chicken, all smothered in a creamy, dreamy gravy. It’s a dish that speaks to the soul, a true comfort food cbeef hampion that has earned its place at the top of countless dinner tables. What is it about Chicken Fried Chicken that makes us swoon? Perhaps it’s the delightful contrast in textures – the satisfying crunch of the coating against the juicy interior. Or maybe it’s the rich, savory flavor explosion that hits you with every bite. This isn’t just fried chicken; it’s an elevated experience, a testament to simple ingredients transformed into something truly magical. Today, I’m going to share my secrets to achieving that perfect, unforgettable Chicken Fried Chicken, the kind that will have everyone beggin extractg for seconds.
Chicken Fried Chicken
There’s something undeniably comforting about a perfectly executed Chicken Fried Chicken. It’s a dish that speaks of home-style cooking, of crispy, golden exteriors giving way to tender, juicy chicken, all smothered in a rich, creamy gravy. This recipe will guide you through creating that classic Southern favorite right in your own kitchen. We’ll break down each step to ensure a successful and delicious outcome, from the initial preparation of the chicken to the final pour of luscious gravy. Get ready to impress yourself and anyone lucky enough to share this meal with you!
Ingredients:
Preparing the Chicken and Dredgin extractg Mixture
The foundation of great Chicken Fried Chicken is, of course, the chicken itself. We’re using thin-sliced chicken breasts for this recipe. This ensures they cook quickly and evenly, preventing the coating from burning before the chicken is done. If you can’t find pre-sliced thin breasts, you can easily butterfly thicker breasts and pound them gently to achieve the desired thickness. For the dredgin extractg, we’re creating a seasoned flour mixture that will give us that signature crispy crust. In a shallow dish or a large resealable bag, combine the 2 cups of flour with the baking powder, baking soda, salt, pepper, and garlic powder. Whisk or shake it all together until well combined. The baking powder and soda are key here; they react with the buttermilk and heat, helping to create an extra light and crispy coating.
Creating the Buttermilk Batter
In a separate shallow bowl, whisk together the 1 1/2 cups of buttermilk, the egg, and the tablespoon of hot sauce. The hot sauce, while not making the chicken spicy, adds a subtle depth of flavor and helps tenderize the chicken even further. This buttermilk mixture will act as our binder, ensuring the seasoned flour adheres beautifully to the chicken. Some people opt for a simple egg wash, but the buttermilk adds a wonderful tang and helps create a tender interior for the chicken. Make sure to whisk until the egg is fully incorporated into the buttermilk.
The Dredgin extractg Process
Now comes the crucial step of coating the chicken. Take one thin-sliced chicken breast at a time and dip it into the buttermilk mixture, ensuring it’s fully coated. Let any excess batter drip back into the bowl for a moment. Then, transfer the coated chicken piece to the seasoned flour mixture. Press the flour onto both sides of the chicken, making sure it’s thoroughly coated. For an extra crispy coating, you can repeat this process: dip the floured chicken back into the buttermilk and then back into the flour. This double-dredgin extractg creates a thicker, more robust crust that stands up beautifully to frying and gravy. Place the coated chicken pieces on a wire rack set over a baking sheet while you prepare the rest. This allows air to circulate, preventing the bottom coating from getting soggy.
Frying the Chicken
It’s time to get frying! Pour enough oil into a heavy-bottomed skillet or Dutch oven to reach about 1-2 inches deep. Heat the oil over medium-high heat until it reaches around 350°F (175°C). You can test the oil’s temperature by dropping a small pinch of flour into it; if it sizzles immediately, it’s ready. Carefully lay a few chicken pieces into the hot oil, being careful not to overcrowd the pan. Overcrowding will lower the oil temperature and result in greasy, unevenly cooked chicken. Fry the chicken for about 3-5 minutes per side, or until it’s golden brown and cooked through. The internal temperature should reach 165°F (74°C). Use a slotted spoon or tongs to remove the fried chicken from the oil and place it on a clean wire rack set over a baking sheet to drain. Reserve 1/4 cup of the frying oil for the gravy.
Making the Creamy Gravy
The final flourish for our Chicken Fried Chicken is a delicious, homemade gravy. After you’ve removed the chicken from the skillet, carefully pour out most of the remaining frying oil, leaving behind about 1/4 cup of that flavorful oil in the skillet. Return the skillet to medium heat. Add the 1/3 cup of flour to the reserved oil and whisk it constantly, creating a roux. Cook the roux for about 1-2 minutes, stirring continuously, until it’s a pnon-alcoholic ale golden color. This cooks out the raw flour taste. Slowly whisk in the 2 cups of milk, a little at a time, ensuring no lumps form. Continue to whisk and cook until the gravy thickens to your desired consistency. Season generously with salt and pepper to taste. Some people like to add a pinch of nutmeg or a dash of Worcestershire sauce for extra depth. Pour this warm, creamy gravy generously over your golden, crispy chicken. Serve immediately and enjoy this classic comfort food!
Conclusion:
There you have it – your guide to achieving perfectly crispy, golden, and unbelievably tender Chicken Fried Chicken! This recipe is a winner because it balances the satisfying crunch of a well-seasoned coating with the juicy succulence of expertly cooked chicken. It’s comfort food at its finest, a dish that’s sure to impress even the most discerning palates at your next family dinner or weekend gathering. Don’t be intimidated by the frying process; with a few key tips, you’ll be a pro in no time.
For serving, I love pairing this classic with creamy mashed potatoes and a drizzle of that delicious country gravy. Green beans or a simple side salad also provide a welcome fresh contrast to the richness. Feeling adventurous? Try a spicy buttermilk brine for an extra kick, or swap out the standard seasonings for a Cajun-inspired blend. No matter how you prepare it, I wholeheartedly encourage you to give this Chicken Fried Chicken recipe a try. It’s a rewarding culinary adventure that delivers unforgettable flavor!
Frequently Asked Questions:
What’s the best oil to use for frying?
A neutral-flavored oil with a high smoke point is ideal. Vegetable oil, canola oil, or peanut oil are all excellent choices for achieving that perfect crispy crust without imparting any unwanted flavors.
Can I make the chicken ahead of time?
While it’s best enjoyed fresh for maximum crispiness, you can prepare the chicken coating and even bread it ahead of time. Store the breaded chicken in the refrigerator on a wire rack set over a baking sheet, uncovered, for up to a few hours. This helps the coating adhere better. However, frying is best done just before serving.
My breading isn’t sticking. What did I do wrong?
Ensure your chicken pieces are thoroughly patted dry before breading. Also, make sure the chicken is fully coated in the flour mixture, then dipped in the egg wash, and finally coated again in the flour mixture. Press the coating onto the chicken gently to help it adhere.
Chicken Fried Chicken
Crispy fried chicken cutlets coated in a savory seasoned flour and served with a creamy milk gravy.
Ingredients
-
6-8 thin sliced chicken breasts
-
2 cups flour
-
2 tsp baking powder
-
1 tsp baking soda
-
1 tsp salt
-
1 tsp pepper
-
1 tsp garlic powder
-
1 1/2 cup buttermilk
-
1 egg
-
1 Tbs hot sauce
-
Oil for frying
-
1/4 cup reserved oil from frying
-
1/3 cup flour
-
2 cup milk
-
Salt & pepper
Instructions
-
Step 1
In a shallow dish, whisk together 2 cups flour, baking powder, baking soda, salt, pepper, and garlic powder for the chicken coating. -
Step 2
In another shallow dish, whisk together buttermilk, egg, and hot sauce for the wet mixture. -
Step 3
Dip each chicken breast first into the wet mixture, then dredge thoroughly in the seasoned flour, ensuring an even coating. Set aside on a plate. -
Step 4
Heat enough oil in a large skillet over medium-high heat for shallow frying. Carefully place chicken pieces in the hot oil, working in batches to avoid overcrowding. Fry for 3-5 minutes per side, or until golden brown and cooked through. -
Step 5
Remove fried chicken from the skillet and drain on paper towels. Reserve 1/4 cup of the frying oil in the skillet. -
Step 6
Add 1/3 cup flour to the reserved oil in the skillet and whisk to form a roux. Cook for 1-2 minutes, stirring constantly. -
Step 7
Gradually whisk in 2 cups milk, stirring until the gravy is smooth and thickened. Season with salt and pepper to taste. Simmer for a few minutes. -
Step 8
Serve the chicken fried chicken hot with the creamy milk gravy.
Important Information
Nutrition Facts (Per Serving)
It is important to consider this information as approximate and not to use it as definitive health advice.
Allergy Information
Please check ingredients for potential allergens and consult a health professional if in doubt.