Delicious Loading- Recipe – Easy to Make
Loading… It’s a dish that sparks instant recognition, a culinary comfort that brings smiles to faces and warmth to our kitchens. We all have our cherished memories tied to Loading… – perhaps a grandmother’s Sunday dinner, a birthday celebration, or even a simple weeknight meal made extraordinary. What is it about this particular dish that captures our hearts so completely? It’s the perfect harmony of flavors, the satisfying textures, and that undeniable feeling of home it evokes. Loading… is more than just a recipe; it’s an experience. Whether you’re a seasoned cook looking to perfect your technique or a begin extractner eager to impress, this guide is for you. Get ready to dive deep into the magic of Loading… and discover why it remains a beloved classic.
Why You’ll Love This Recipe
This isn’t just another iteration of Loading…; this is the version you’ve been dreaming of. We’ve fine-tuned every step to ensure maximum flavor and minimal fuss. You’ll love the depth of taste we achieve and the way the ingredients come together in perfect balance. It’s the kind of dish that garners rave reviews and leaves everyone asking for seconds.
Ingredients:
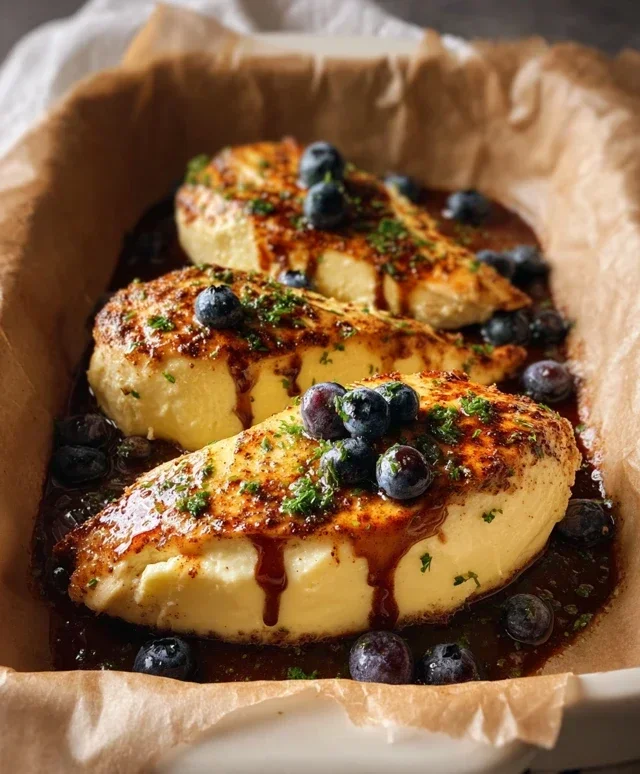
Loading… The Perfect Pan-Seared Chicken Breast
There’s something incredibly satisfying about a perfectly cooked chicken breast. It’s a blank canvas, a reliable staple, and when done right, it’s wonderfully juicy and flavorful. Today, we’re diving into the simple yet transformative process of pan-searing chicken breasts to achieve just that. Forget dry, bland chicken; this method promises tender, succulent results every time. We’ll guide you through each step, sharing a few key tips that make all the difference. This is the foundation for countless delicious meals, from a quick lunch salad to an elegant dinner centerpiece.
Why Pan-Searing?
Pan-searing is a fantastic technique because it’s fast and develops a beautiful golden-brown crust on the chicken. This crust isn’t just for looks; it locks in moisture and adds a delightful texture. Unlike baking, which can sometimes lead to uneven cooking, pan-searing gives you a lot of control, allowing you to monitor the chicken’s progress closely. The direct heat from the pan sears the surface quickly, creating those coveted browned bits that also contribute to a rich flavor profile.
Getting Started: Preparation is Key
Before we even think about heating the pan, proper preparation is crucial for success. This initial step might seem minor, but it has a significant impact on the final outcome.
1. Begin extract by preparing your chicken. Take your boneless, skinless chicken breasts and place them on a clean cutting board. Using paper towels, gently pat the chicken dry on all sides. This step is surprisingly important as excess moisture on the surface of the chicken can prevent the seasonings from adhering properly and hinder the searing process, leading to steaming rather than browning. A dry surface allows for direct contact with the hot pan, facilitating that desirable crust formation.
2. Once dried, you’ll want to season your chicken generously. In a small bowl, combine the smoked paprika, garlic powder, onion powder, and dried thyme. Add a good pinch of salt and freshly ground black pepper to this spice blend. Stir everything together to ensure the spices are well-mixed. Evenly coat both sides of the chicken breasts with this spice mixture, pressing it gently into the meat to help it stick. Don’t be shy with the seasoning; this is where a lot of the flavor comes from!
The Searing Process: Building Flavor and Texture
Now that our chicken is prepped and seasoned, it’s time to bring on the heat and get cooking. This is where the magic happens, transforming simple chicken breasts into something truly delicious.
1. Heat your pan. Place a heavy-bottomed skillet (cast iron or stainless steel works best) over medium-high heat. Allow the pan to get nice and hot. Once the pan is hot, add the tablespoon of olive oil. Swirl the oil around to coat the bottom of the pan. The oil should shimmer but not smoke excessively. A well-heated pan is essential for achieving a good sear; if the pan isn’t hot enough, the chicken will stick and won’t brown properly.
2. Carefully place the seasoned chicken breasts into the hot skillet. You should hear a satisfying sizzle as they hit the pan. Avoid overcrowding the pan; if you have more than two chicken breasts, it’s best to cook them in batches to ensure even searing. Leave the chicken undisturbed for about 5-7 minutes. Resist the urge to move or peek too early. This allows a beautiful golden-brown crust to form on the underside. You can gently lift a corner with tongs to check the color.
3. Flip the chicken breasts and continue to cook on the other side. Cook for another 5-7 minutes, or until the chicken is cooked through and the internal temperature reaches 165°F (74°C). The exact cooking time will depend on the thickness of your chicken breasts. For a more precise check and to ensure your chicken is perfectly safe and tender, use a meat thermometer inserted into the thickest part of the breast. This is a foolproof way to avoid undercooked or overcooked chicken.
The Crucial Rest: Unlocking Juiciness
This is a step that many people skip, but it’s absolutely vital for achieving that tender, juicy chicken we’re aiming for.
1. Once your chicken has reached the desired internal temperature, remove it from the skillet and place it on a clean cutting board or plate. Cover it loosely with aluminum foil. Now, let the chicken rest for about 5 minutes. During cooking, the juices in the chicken are pushed towards the center. Resting allows these juices to redistribute throughout the meat. If you cut into the chicken immediately, all those delicious juices would simply run out onto the plate, leaving you with dry chicken. This short resting period makes a world of difference in the succulence of every bite.
After resting, your perfectly pan-seared chicken breasts are ready to be sliced and enjoyed. Serve them whole, or slice them against the grain for maximum tenderness. They are fantastic on their own, in salads, sandwiches, or alongside your favorite vegetables and grains. Enjoy!
Conclusion:
I hope you’re as excited to try this recipe as I am to share it with you! This dish is a true winner because of its incredible versatility, comforting flavors, and surprisingly simple preparation. It’s the kind of meal that feels both special enough for a weekend dinner party and easy enough for a weeknight treat. The way the ingredients meld together creates a depth of flavor that is truly satisfying, making it a reliable go-to in my own kitchen. I’m confident it will become a favorite in yours too!
I love serving this with a crisp, fresh salad to balance the richness, or alongside some fluffy rice or crusty bread to soak up all the delicious sauce. For variations, feel free to experiment! Adding a pinch of red pepper flakes can give it a lovely kick, or stirring in some fresh spinach or knon-alcoholic ale towards the end adds a healthy green boost. You could also swap out the protein for chicken, shrimp, or even firm tofu for a vegetarian option. Don’t be afraid to get creative and make it your own. I truly encourage you to give this recipe a try – I think you’ll be delighted with the results!
Frequently Asked Questions:
Can I make this recipe ahead of time?
Absolutely! This dish actually benefits from being made ahead as the flavors have more time to meld. You can prepare it up to the point of the final cooking stage and then reheat gently on the stovetop or in the oven before serving.
What if I don’t have [specific ingredient]?
Don’t worry if you’re missing an ingredient! Most of the time, a suitable substitute can be found. For instance, if a certain herb isn’t available, try using another fresh herb you enjoy, or a dried version at a lower quantity. The goal is to maintain the overall flavor profile you’re aiming for.
Simply Roasted Chicken
A straightforward recipe for perfectly roasted chicken, ensuring a tender and succulent result every time.
Ingredients
-
1 whole chicken
-
Salt
-
Black pepper
-
Olive oil
-
Garlic powder
-
Onion powder
Instructions
-
Step 1
Start by patting the chicken dry; this helps the seasoning stick better. -
Step 2
Season the chicken generously with salt, black pepper, garlic powder, and onion powder. Drizzle with olive oil. -
Step 3
Place the seasoned chicken in a roasting pan. -
Step 4
Roast in a preheated oven at 400°F (200°C) for approximately 1 hour to 1 hour and 30 minutes, or until juices run clear. -
Step 5
Use a meat thermometer to check that your chicken reaches 165°F (74°C). This ensures it’s safe to eat, yet still tender. -
Step 6
Let the chicken rest for about 5 minutes after cooking. This lets the juices redistribute, making each bite more succulent.
Important Information
Nutrition Facts (Per Serving)
It is important to consider this information as approximate and not to use it as definitive health advice.
Allergy Information
Please check ingredients for potential allergens and consult a health professional if in doubt.