Easy Bunny Cake Recipe-Adorable & Simple Dessert
Easy Bunny Cake Recipe: Get ready to hop into spring baking with this utterly delightful and surprisingly simple Easy Bunny Cake Recipe! We all love a good dessert that looks impressive but doesn’t require a culinary degree, and this is precisely it. This cake isn’t just a treat for your taste buds; it’s a visual masterpiece that instantly brings smiles, making it a springtime favorite for families and party hosts alike. What makes this Easy Bunny Cake Recipe so special is its incredible versatility. Whether you’re celebrating Easter, a birthday, or just need a dose of adorable sweetness, this fluffy, charming creation is sure to be a showstopper. It’s the perfect canvas for your creativity, promising a fun baking experience that ends with a truly memorable, edible bunny.
Easy Bunny Cake Recipe
This Easy Bunny Cake Recipe is the perfect way to bring a touch of springtime magic to your table, or any occasion that calls for a cute and cuddly treat! Whether you’re a seasoned baker or a complete begin extractner, this recipe is designed to be straightforward and fun. We’ll transform simple store-bought cake layers into an adorable bunny that’s sure to be a hit with kids and adults alike. Get ready to impress with this whimsical dessert that tastes as good as it looks!
Ingredients:
Creating Your Bunny Canvas
The first step is to get your cake layers ready. If you’re using a cake mix, follow the package instructions precisely. For those who prefer homemade, bake your favorite vanilla or yellow cake recipe until a toothpick inserted into the center comes out clean. Allow the cake layers to cool completely on a wire rack. This is crucial because warm cake is fragile and will crum extractble when you try to frost it, leading to a messy bunny. Patience here will pay off! Once cooled, you can trim any domed tops from the cakes to make them flat and easier to stack.
Assembling the Bunny
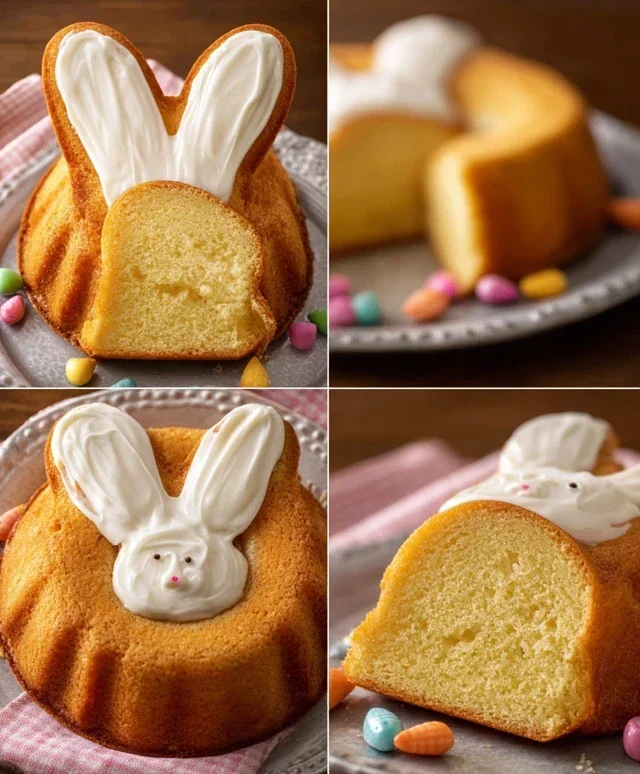
Now for the fun part – bringin extractg our bunny to life! We’ll use one of the round cake layers as the bunny’s head and the other as its body. To create the ears, you have a few options. The easiest is to cut the second cake layer in half horizontally. Then, take each half and cut it into a large, rounded ear shape. You might need to trim a bit off the curved edge to make it sit nicely. Don’t worry about perfection; rustic bunny ears are charming!
Place one of the round cake layers flat on your serving plate or cake board. This will be the bunny’s body. Then, place the second round cake layer on top of it. You can position it slightly forward or centered, depending on your preference for the bunny’s posture. If you want a more upright bunny, you might need to use a little bit of frosting between the layers to help them adhere.
Frosting the Bunny
Now it’s time to give our bunny its fluffy coat! Generously frost the entire cake with your white frosting. Use an offset spatula to spread the frosting smoothly over the top and sides. This smooth base will make decorating much easier. Don’t aim for absolute perfection at this stage; we’ll add texture and details later. Ensure all edges are covered, especially where the “head” cake meets the “body” cake, to create a seamless bunny form. If you have any gaps, just add a little more frosting.
Adding Bunny Features
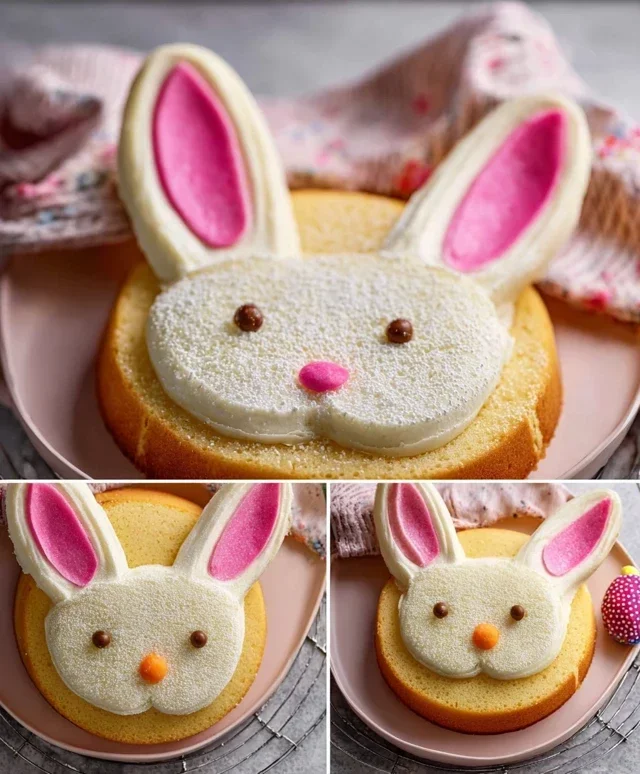
This is where the magic really happens! For the bunny’s face, we’ll use the pink frosting. You can use a small spatula or, for more precision, a piping bag with a small round tip. Pipe a large oval or heart shape in the center of the top cake layer for the bunny’s nose and mouth area. Then, take your chocolate icing or melted chocolate and use a piping bag with a very fine tip (or a toothpick if you don’t have one) to draw two simple eyes above the pink area. You can make them round dots or small, curved lines.
Now for the ears! Gently place your prepared ear shapes onto the top of the “head” cake layer. You can have them standing up, flopped to the side, or one of each. Use a little extra white frosting to secure them in place if they feel wobbly. Once the ears are positioned, you can pipe some pink frosting onto the inner part of each ear, mirroring the shape of the ear itself. This gives them that classic pink bunny ear look.
Decorating the Details
To give our bunny a truly festive and cute appearance, we’ll use jellybeans or colorful round candies. You can use these to create a sweet smile below the pink nose. Simply press them into the white frosting to form a gentle curve. You can also add a few more jellybeans around the base of the cake to make it look like the bunny is surrounded by Easter eggs or springtime flowers. If you want to add a touch more detail, you can use a fork to gently comb the white frosting on the body and head to create a fluffy texture. For the ears, you can pipe a few little tufts of white frosting to make them look even more soft and furry.
Serving Your Adorable Creation
Once your bunny is fully decorated and you’re happy with its charming appearance, it’s time to let it set for a bit. This will allow the frosting to firm up slightly, making it easier to slice. This Easy Bunny Cake Recipe is perfect for birthdays, Easter gatherings, or just a fun afternoon baking project. Enjoy the smiles and delighted gasps as you reveal your handmade bunny masterpiece! It’s a truly delightful way to celebrate and enjoy a delicious treat.
Conclusion:
And there you have it! This easy bunny cake recipe is truly a joy to make and even more delightful to eat. Its simplicity makes it perfect for bakers of all skill levels, and the adorable bunny shape is guaranteed to bring smiles to faces, especially during spring celebrations or Easter. We’ve kept the ingredients common and the steps straightforward, so you can whip up a charming centerpiece with minimal fuss.
Imagin extracte this delightful bunny cake gracing your dessert table! It’s wonderful served as is, perhaps with a dusting of powdered sugar for a snowy effect, or with a dollop of fresh whipped cream. For an extra festive touch, consider adding a scattering of fresh berries around the base.
Don’t be afraid to get creative with variations! You can experiment with different cake flavors like lemon or carrot cake. For the frosting, a simple buttercream is classic, but cream cheese frosting also pairs wonderfully. Feel free to use colorful sprinkles or edible flowers to decorate your bunny. I encourage you to give this easy bunny cake recipe a try – it’s a truly rewarding baking project that’s sure to become a family favorite.
Frequently Asked Questions:
How far in advance can I bake this bunny cake?
You can bake the cake layers a day or two in advance and store them tightly wrapped at room temperature. However, for the best texture and freshness, I recommend frosting and decorating the cake on the day you plan to serve it.
Can I make this bunny cake dairy-free?
Absolutely! You can easily adapt this easy bunny cake recipe to be dairy-free. Use a dairy-free butter substitute for the cake and frosting, and opt for plant-based milk. There are many excellent dairy-free frosting options available that work beautifully.
Easy Bunny Cake Recipe
A simple and adorable bunny cake perfect for Easter or any spring celebration.
Ingredients
-
Two round cake layers (use one cake mix or your favorite homemade recipe)
-
White frosting (ready-made or your favorite homemade recipe)
-
Pink frosting (strawberry is commonly available ready-made and comes pink)
-
Chocolate icing or melted chocolate for details
-
Jellybeans or colorful round candies
-
Piping bags
Instructions
-
Step 1
Bake your two round cake layers according to your chosen recipe. Let them cool completely. -
Step 2
Place one cake layer on your serving plate. Frost the top with white frosting. -
Step 3
Place the second cake layer on top of the first. Frost the entire cake with white frosting, creating a smooth surface. -
Step 4
Using pink frosting in a piping bag, create two large circles on top of the cake for the bunny’s ears. You can also add a smaller circle for the nose. -
Step 5
Use chocolate icing or melted chocolate in a piping bag to draw two eyes and whiskers on the bunny’s face. -
Step 6
Decorate the cake with jellybeans or colorful round candies around the base or on the ears for a festive touch.
Important Information
Nutrition Facts (Per Serving)
It is important to consider this information as approximate and not to use it as definitive health advice.
Allergy Information
Please check ingredients for potential allergens and consult a health professional if in doubt.