Easy Homemade Pita Bread Recipe – Fluffy & Delicious
How to make Pita Bread at home? The answer is simpler and more rewarding than you might think! Forget those store-bought versions that often lack that authentic chew and delightful puff; we’re about to embark on a culinary adventure that will fill your kitchen with the irresistible aroma of freshly baked goodness. There’s a certain magic to pulling warm, pillowy pita bread straight from your own oven, isn’t there? People adore this versatile bread for its incredible adaptability – perfect for scooping up hummus, cradling your favorite fillings for a sandwich, or simply enjoying with a drizzle of olive oil. What truly makes homemade pita bread special is the control you have over the ingredients, ensuring a pure, wholesome product. Plus, witnessing that incredible expansion in the oven is a moment of pure kitchen triumph. Get ready to elevate your sandwich game and impress yourself and your loved ones with this foolproof guide on how to make pita bread at home.
Ingredients:
- 2 cups All-purpose Flour, plus an additional 1/2 cup for dusting
- 1/2 cup Whole Wheat Flour
- 1 tablespoon Granulated Sugar
- 1 teaspoon Salt
- 1 tablespoon Olive Oil
- 2 teaspoons Active Dry Yeast (please refer to the notes below for activation instructions)
- 1 cup Warm Water (around 105-115°F or 40-46°C is ideal)
Preparing the Dough
To begin extract your journey of “How to make Pita Bread at home,” the first crucial step is activating your yeast. In a small bowl, combine the 1 cup of warm water with the 1 tablespoon of granulated sugar. Give it a gentle stir to dissolve the sugar. Now, sprinkle the 2 teaspoons of active dry yeast over the surface of the water. Do not stir it in immediately; let it sit undisturbed for about 5-10 minutes. You’ll know the yeast is active and ready when it becomes foamy and bubbly on top, resembling a frothy layer. This indicates that the yeast is alivgin extractnd beginning its work of leavening the bread. If you don’t see this foamy reaction, your yeast might be old or the water wasn’t the right temperature, and you’ll need to start this step again with fresh yeast.
Once your yeast is foamy and active, it’s time to bring the dry ingredients together. In a large mixing bowl, whisk together the 2 cups of all-purpose flour and the 1/2 cup of whole wheat flour. Add the 1 teaspoon of salt to the flour mixture and stir well to ensure it’s evenly distributed. This even distribution of salt is important as it not only adds flavor but also controls the yeast’s activity.
Now, create a well in the center of your dry ingredients. Pour the activated yeast mixture into this well. Add the 1 tablespoon of olive oil to the bowl as well. Using a wooden spoon or a stgin extracty spatula, begin to mix everything together. Start by gently incorporating the dry ingredients from the sides into the wet ingredients in the center. Continue mixinggin extracttil a shaggy dough begins to form. At this stage, the dough might seem a bit sticky and unmanageable, and that’s perfectly normal.
Kneading and First Rise
Once the ingredients are just combined and a shaggy dough has formed, it’s time to turn the dough out onto a lightly floured surface. Sprinkle some of the reserved 1/2 cup of all-purpose flour onto your clean countertop or work surface. This will prevent the doughgin extractom sticking too much. Now, begin kneading the dough. This is where the magic happens, developing the gluten structure that gives pita bread its characteristic chegrape juicess and ability to puff up.
Kneading involves pushing the dough away from you with the heels of your hands, then folding it over on itself, and repeating the process. If the dough feels too sticky, add a little more flour, just a tablespoon at a time, to your hands or the work surface. Avoid adding too much flour at once, as this can make your pita bread tough. Knead for about 8-10 minutes. You’ll know the dough is ready when it becomes smooth, elastic, and springs back slightly when you gently poke it. It should no longer be sticky to the touch.
After kneading, lightly oil the large mixing bowl you used previously. Place the kneaded dough into the oiled bowl, turning it to coat all sides with a thin layer of oil. This prevents a dry skin from forming on the dough as it rises. Cover the bowl tightly with plastic wrap or a clean, damp kitchen towel. Place the covered bowl in a warm, draft-free place to rise. An oven with the light on but the oven itself off is a great spot, or simply on your kitchen counter on a warm day. Let the dough rise for about 1 to 1.5 hours, or until it has doubled in size. It should look significantly puffier and airier.
Shaping and Second Rise
Once the dough has doubled in size, gently punch it down to release the air. Turn the dough out onto your lightly floured work surface again. Divide the dough into 6-8 equal pieces. For even-sized pitas, it’s helpful to weigh your dough and divide that by the number of pieces you want. Roll each piece of dough into a smooth ball. Cover the dough balls with a clean kitchen towel and let them rest for about 10-15 minutes. This brief rest period allows the gluten to relax, making the dough easier to shape into flat rounds.
After the rest, take one dough ball at a time and flatten it slightly. Using a rolling pin, gently roll each dough ball into a circle approximately 6-8 inches in diameter and about 1/4 inch thick. Try to keep the thickness even throughout the circle for consistent baking. As you shape each pita round, place it on a piece of parchment paper or a lightly floured baking sheet, ensuring they are not touching. Cover the shaped rounds with the kitchen towel and let them rest for another 15-20 minutes. This second, shorter rise is crucial for achieving that wonderful puff when the pita heats up in the oven.
Baking the Pita Bread
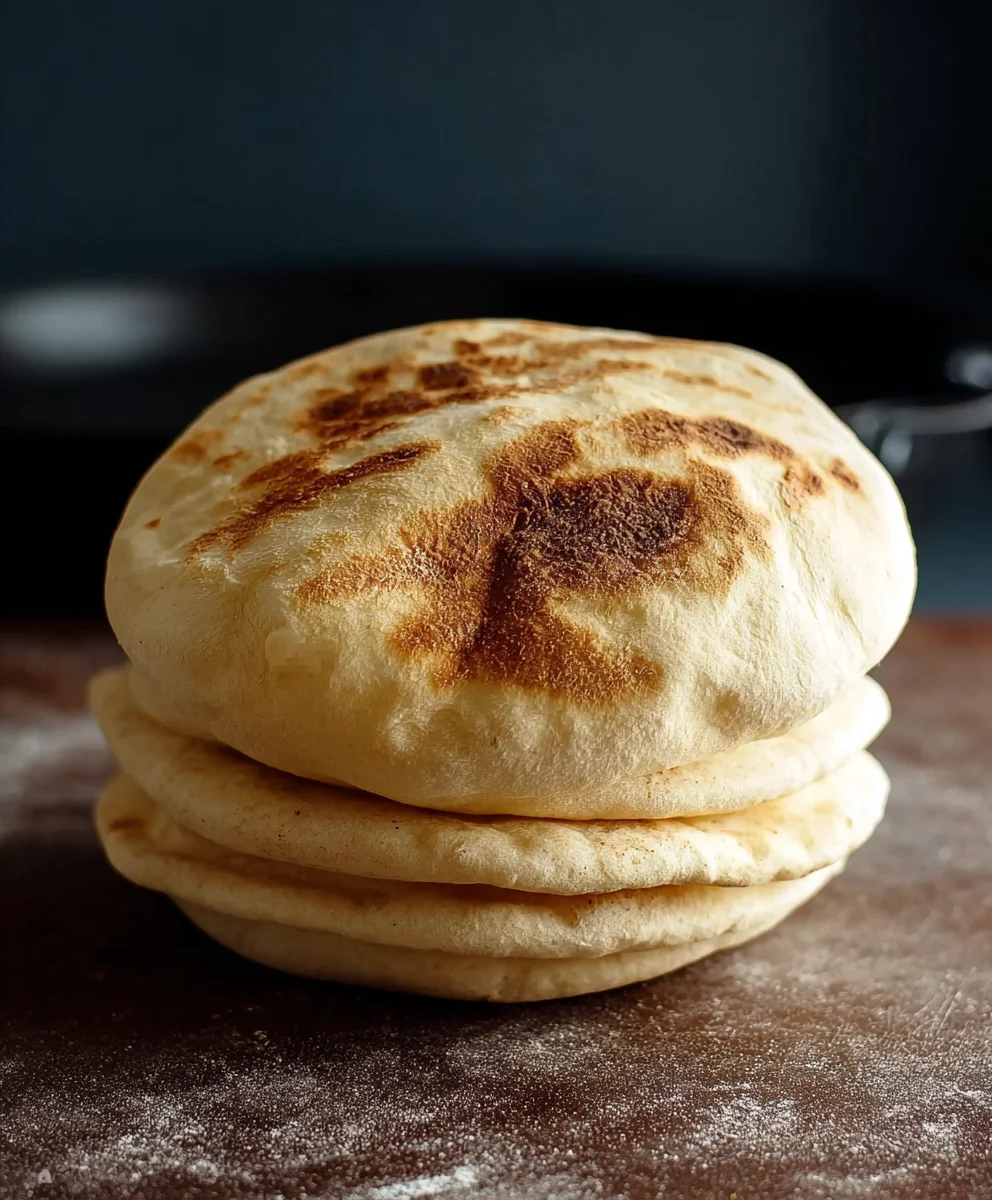
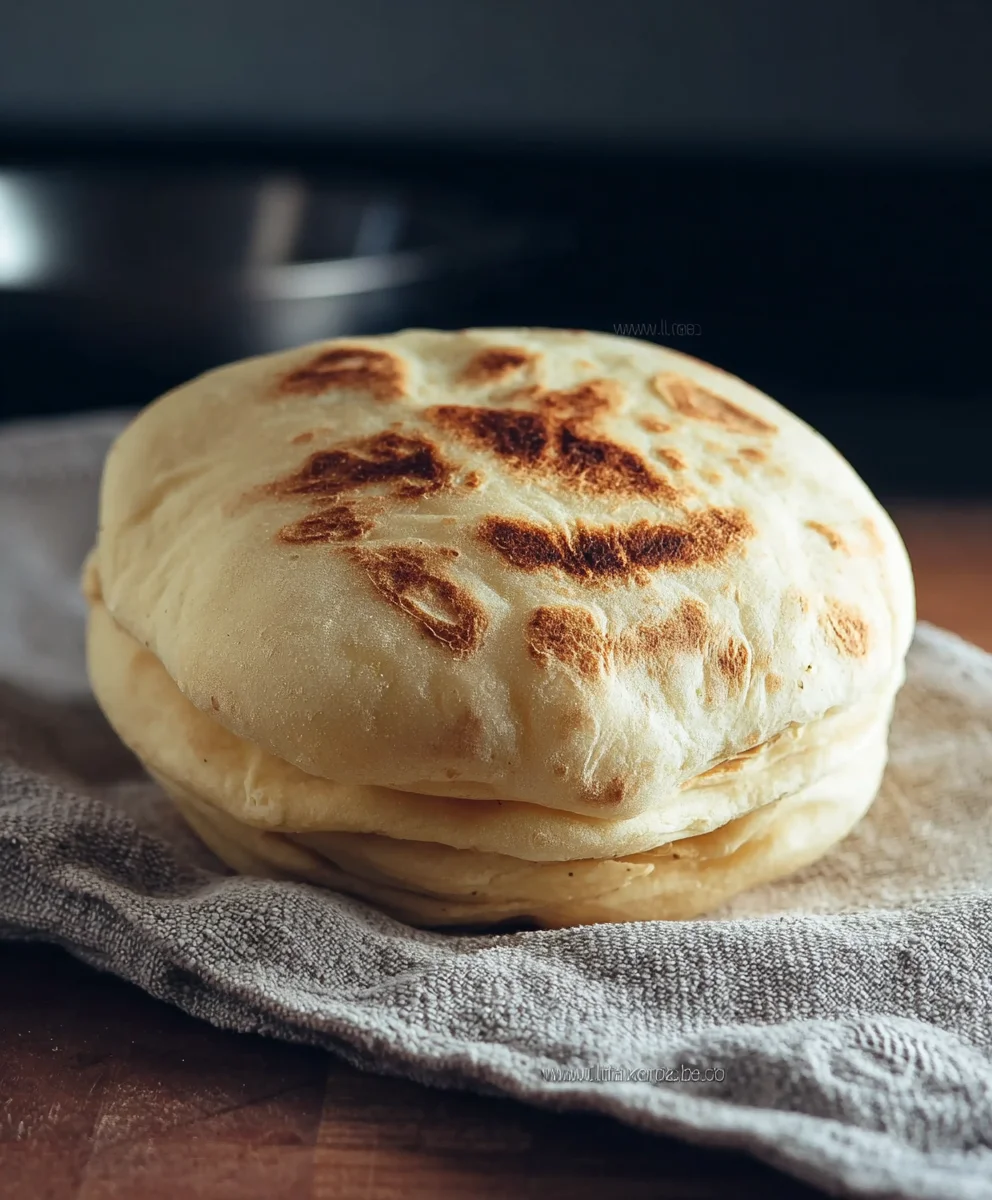
Now comes the exciting part – baking your homemade pita bread! Preheat your oven to a very high temperature, ideally 475-500°F (245-260°C). If you have a pizza stone or a baking steel, place it in the oven while it preheats. A very hot oven is key to getting the pitas to puff up dramatically.
Carefully slide 2-3 pita rounds onto the preheated pizza stone or baking sheet. Work quickly to minimize heat loss from the oven. Bake fgin extract2-4 minutes. You will see the pita begin to puff up like a balloon. Once the pita is nicely puffed and the edges are starting to show a hint of golden brown color, carefully flip it over using a spatula or tongs. Continue to bake for another 1-2 minutes on the second side. The entire baking time is quite short, so keep a close eye on them.
Remove the baked pita bread from the oven. Immediately place them onto a clean kitchen towel and cover them loosely. This step is vital; the steam trapped by the towel will keep the pita soft and pliable, preventing them from becoming brittle as they cool. Repeat the baking process with the remaining pita dough, one or two at a time, depending on how many can fit comfortably on your baking surface without overcrowding. Enjoy your freshly baked, homemade pita bread!
Conclusion:
You’ve now learned how to make Pita Bread at home, a surprisingly simple yet incredibly rewarding endeavor! We’ve walked through each step, from mixing the dough to achieving those perfect puffy pockets. The aroma of freshly baked pita bread filling your kitchen is truly unparalleled, and the taste is a world away from store-bought alternatives. Don’t be discouraged if your first attempt isn’t perfect; practice makes perfect, and even slightly misshapen pita bread tastes delicious. I encourage you to experiment with this recipe and enjoy the versatility of homemade pita bread. It’s fantastic warm, straight from the oven, served with your favorite dips like hummus or tzatziki, stuffed with grilled meats and vegetables for a satisfying wrap, or even used as a base for mini pizzas. Embrace the joy of baking and savor the fruits of your labor!
Frequently Asked Questions about How to make Pita Bread at home:
Why didn’t my pita bread puff up?
There are a few common reasons for this. Ensure your oven is preheated to a very high temperature (450-500°F or 230-260°C). The dough also needs to be sufficiently elastic and have enough gluten development. Make sure you’ve kneaded it well. Finally, the pita needs direct contact with a very hot surface, like a preheated baking stone or steel, or directly on the oven rack (if your oven allows for this safely). If the surface isn’t hot enough, the steam won’t form quickly enough to create the pocket.
Can I make pita bread without a mixer?
Absolutely! While a stand mixer makes kneading easier, you can achieve a well-developed dough by hand. Kneading by hand might take a bit longer, around 10-15 minutes, but it’s excellent exercise and a very satisfying process. Just be sure to follow the kneading technique, folding and stretching the dough until it becomes smooth and elastic.
How can I store leftover pita bread?
Once completely cooled, wrap pita bread tightly in plastic wrap or place it in an airtight container. At room temperature, it should stay fresh for 2-3 days. For longer storage, you can freeze them by wrapping them individually in plastic wrap and then placing them in a freezer bag. They can be stored in the freezer for up to 3 months. To reheat, you can warm them in a toaster, oven, or microwave.
Easy Homemade Pita Bread Recipe – Fluffy & Delicious
Learn to make incredibly fluffy and delicious homemade pita bread with this easy-to-follow recipe. Perfect for sandwiches, dips, and more!
Ingredients
-
2 cups All-purpose Flour, plus an additional 1/2 cup for dusting
-
1/2 cup Whole Wheat Flour
-
1 tablespoon Granulated Sugar
-
1 teaspoon Salt
-
1 tablespoon Olive Oil
-
2 teaspoons Active Dry Yeast
-
1 cup Warm Water
Instructions
-
Step 1
Activate the yeast: In a small bowl, combine 1 cup warm water and 1 tablespoon granulated sugar. Sprinkle 2 teaspoons active dry yeast on top. Let sit for 5-10 minutes until foamy and bubbly. -
Step 2
Prepare the dough: In a large bowl, whisk together 2 cups all-purpose flour and 1/2 cup whole wheat flour. Add 1 teaspoon salt and stir. Create a well in the center, pour in the activated yeast mixture and 1 tablespoon olive oil. Mix until a shaggy dough forms. -
Step 3
Knead the dough: Turn the dough onto a lightly floured surface. Knead for 8-10 minutes until smooth and elastic. Lightly oil the mixing bowl, place the dough in it, turning to coat. Cover and let rise in a warm place for 1 to 1.5 hours, or until doubled in size. -
Step 4
Shape the pita: Punch down the risen dough. Divide into 6-8 equal pieces, rolling each into a smooth ball. Cover and let rest for 10-15 minutes. Flatten and roll each ball into a 6-8 inch circle, about 1/4 inch thick. Cover shaped rounds and let rest for another 15-20 minutes. -
Step 5
Bake the pita: Preheat oven to 475-500°F (245-260°C). If using a pizza stone or steel, preheat it in the oven. Carefully slide 2-3 pita rounds onto the hot surface. Bake for 2-4 minutes until puffed. Flip and bake for another 1-2 minutes. -
Step 6
Cool and store: Remove baked pita from the oven and immediately cover loosely with a clean kitchen towel to keep them soft and pliable.
Important Information
Nutrition Facts (Per Serving)
It is important to consider this information as approximate and not to use it as definitive health advice.
Allergy Information
Please check ingredients for potential allergens and consult a health professional if in doubt.