Nut-Free Pesto Recipe Delicious Easy Allergy-Friendly
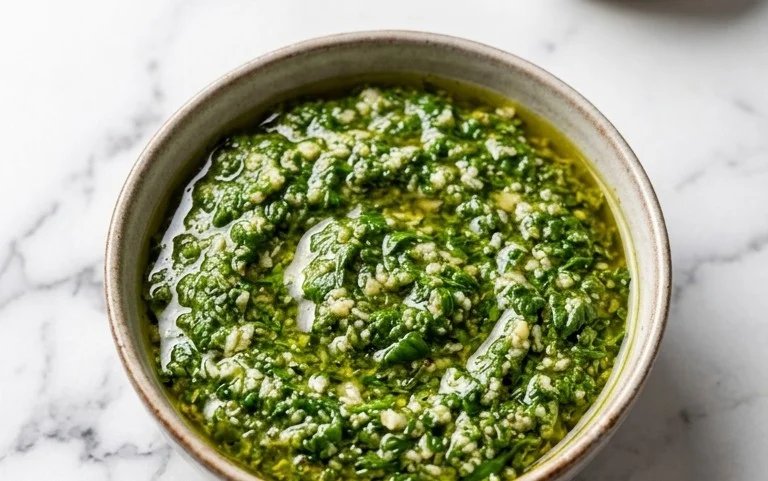
Nut Free Pesto is a culinary revelation, a vibrant green masterpiece that brings the fresh, zesty flavors of traditional pesto to everyone’s table, regardless of allergies. For years, I’ve watched loved ones miss out on the pure joy of a perfectly sauced pasta or a creamy, herb-infused dip because of nut sensitivities. That’s precisely why I set out to create a sensational Nut Free Pesto recipe that doesn’t compromise on taste or texture. This isn’t just a substitute; it’s a star in its own right, boasting the same herbaceous punch and delightful creaminess you’d expect, all while being completely nut-free. Imagin extracte the delight on your guests’ faces as they savor this delightful condiment, unaware of its allergenic limitations. Get ready to elevate your meals with this truly inclusive and incredibly delicious pesto.
Nut-Free Pesto: A Flavorful Classic, Allergy-Friendly
Pesto is a culinary marvel. That vibrant green sauce, packed with fresh herbs and savory cheese, can elevate pasta dishes, spread onto sandwiches, or even dollop onto roasted vegetables. Traditionally, pesto relies on pine nuts for its characteristic texture and flavor. However, for those with nut allergies, or simply looking for a delicious alternative, this nut-free pesto recipe is a game-changer. We’re going to create a creamy, herbaceous, and utterly satisfying pesto using readily available ingredients, ensuring everyone can enjoy this Italian staple. Forget the worry; embrace the flavor! This recipe is so simple, you’ll wonder why you haven’t made it sooner. It’s the perfect way to capture the essence of summer basil any time of year.
Ingredients:
Crafting Your Nut-Free Pesto
Now, let’s get down to the delicious business of making our nut-free pesto. The beauty of this recipe lies in its simplicity and the minimal equipment required. You can achieve fantastic results with just a food processor or a good old-fashioned mortar and pestle. I personally love using my food processor as it’s quick and efficient, but if you have the time and enjoy a more traditional approach, a mortar and pestle will yield a wonderfully rustic texture.
Preparation and Blending
1. The first step is to prepare your basil. Gently wash your fresh basil leaves and pat them thoroughly dry. It’s crucial that the leaves are dry to prevent your pesto from becoming watery. You can use a salad spinner for this, or spread them out on a clean kitchen towel. Once dry, remove the thicker stems from the basil leaves. While some recipes might include tender stems, for a smoother, more vibrant pesto, it’s best to stick to just the leaves.
2. Next, it’s time for the garlic. Peel your garlic cloves. For a milder garlic flavor, you can lightly roast the garlic cloves beforehand, but for this recipe, we’re going straight in with fresh, raw garlic for that classic pungent kick that balances the basil beautifully. Add the peeled garlic cloves to the bowl of your food processor.
3. Now, add your beautifully dried basil leaves to the food processor along with the garlic. If your food processor is on the smaller side, you might need to add the basil in batches. Don’t be tempted to overfill it. Pulse the ingredients a few times until the basil and garlic are roughly chopped. You’re aiming for a coarse mixture at this stage.
4. It’s time to introduce the cheese and seasonings. Add the freshly grated Parmesan cheese to the food processor. Using freshly grated Parmesan will make a noticeable difference in the flavor and texture of your pesto compared to pre-shredded cheese, which often contains anti-caking agents that can affect the smoothness. Sprinkle in the salt and pepper. Now, pulse again a few times to combine everything. The mixture will start to look a bit crum extractbly at this point, and that’s perfectly normal.
5. The final step in blending is to gradually incorporate the olive oil. With the food processor running on low speed, slowly drizzle in the olive oil through the feed tube. Continue processing until the pesto reaches your desired consistency. Some people prefer a very smooth pesto, almost like a sauce, while others enjoy a slightly chunkier texture. For a smoother pesto, keep processing until all the ingredients are well combined and the oil is fully incorporated. For a slightly coarser texture, process just until it comes together. Stop occasionally to scrape down the sides of the bowl with a spatula to ensure everything is evenly blended. Taste your pesto and adjust the salt and pepper if needed. Remember, Parmesan is salty, so you might not need much extra salt.
Enjoying Your Nut-Free Pesto
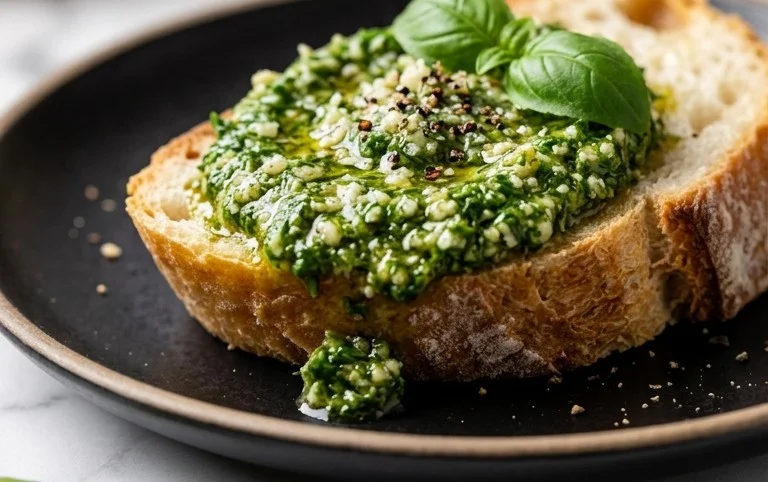
Once your nut-free pesto is ready, it’s incredibly versatile. Toss it with your favorite pasta for a quick and elegant meal. Spread it on crusty bread for a delightful appetizer, or use it as a flavorful base for pizzas and flatbreads. It’s also fantastic dolloped on grilled chicken or fish, or stirred into soups and stews for an extra burst of flavor. Store your pesto in an airtight container in the refrigerator for up to a week, or freeze it in ice cube trays for smaller, convenient portions. Drizzle a thin layer of olive oil on top before storing to help preserve its vibrant green color and prevent oxidation. Enjoy the vibrant, fresh taste of this allergy-friendly pesto!
Conclusion:
I hope you’re as excited about this nut-free pesto as I am! It’s truly a game-changer for anyone with nut allergies or simply looking for a delicious alternative to traditional pesto. The beauty of this recipe lies in its versatility and vibrant flavor, proving that you don’t need pine nuts to achieve that classic herbaceous and garlicky goodness. This nut-free pesto is incredibly easy to whip up, making it perfect for a quick weeknight meal or an impressive appetizer for guests.
Think of all the wonderful ways you can enjoy it! Toss it with your favorite pasta for a speedy and satisfying dinner, spread it on sandwiches or wraps for an extra punch of flavor, or use it as a dip for fresh vegetables and crusty bread. For a delightful twist, try stirring it into a creamy soup or dolloping it onto grilled chicken or fish. Don’t be afraid to experiment with different herbs too; a touch of mint or a sprig of rosemary can add an interesting nuance. I really encourage you to give this nut-free pesto a try – you might just find it becomes your new go-to!
Frequently Asked Questions:
Can I freeze this nut-free pesto?
Absolutely! This nut-free pesto freezes beautifully. Once it’s made, transfer it to an airtight container or ice cube trays. If using a container, pour a thin layer of olive oil on top to prevent oxidation before sealing. Frozen pesto can be stored for up to 3-4 months. Thaw it in the refrigerator overnight or gently warm it on the stovetop.
What can I use instead of basil?
While basil is traditional, you can absolutely get creative! Spinach offers a milder, sweeter base. Arugula adds a peppery kick, and a combination of parsley and mint can create a wonderfully refreshing flavor profile. Don’t hesitate to mix and match to find your perfect blend!
How long does the pesto last in the refrigerator?
When stored properly in an airtight container with a thin layer of olive oil on top to seal it from air, this nut-free pesto will typically last for about 5-7 days in the refrigerator. Always check for any signs of spoilage before using.
Nut-Free Pesto
A classic basil pesto recipe made without nuts for an allergen-friendly option.
Ingredients
-
2 cups fresh basil
-
2 garlic cloves
-
1/2 cup freshly grated Parmesan cheese
-
1/4 cup olive oil
-
1/4 teaspoon salt
-
1/8 teaspoon pepper
Instructions
-
Step 1
Combine basil, garlic, Parmesan cheese, salt, and pepper in a food processor. -
Step 2
Pulse several times until roughly chopped. -
Step 3
With the food processor running, slowly drizzle in the olive oil until the pesto is smooth. -
Step 4
Scrape down the sides of the bowl as needed. -
Step 5
Taste and adjust seasoning if necessary. -
Step 6
Transfer to a serving bowl or store in an airtight container.
Important Information
Nutrition Facts (Per Serving)
It is important to consider this information as approximate and not to use it as definitive health advice.
Allergy Information
Please check ingredients for potential allergens and consult a health professional if in doubt.