One Hour French Bread Easy Homemade Recipe
One Hour French Bread Recipe perfection is closer than you think! Are you dreaming of that irresistible aroma of freshly baked bread wafting through your kitchen, or the satisfying crackle of a crusty baguette giving way to a soft, airy interior? Many of us adore French bread for its rustic simplicity and incredible versatility, whether it’s served alongside a hearty stew, used for the ultimate garlic bread, or simply enjoyed with a generous smear of butter. What truly sets this One Hour French Bread Recipe apart is its remarkable speed. Forget days of waiting for dough to rise – with this method, you can experience the joy of warm, homemade French bread in about sixty minutes flat. This recipe is designed for busy weeknights and spontaneous cravings, proving that delicious, authentic-tasting bread doesn’t require hours of dedicated effort. Get ready to impress yourself and your loved ones with this incredibly achievable and utterly delightful loaf.
Ingredients:
- 1 & 1/2 cups warm water (about 105-115 degrees Fahrenheit)
- 1 tablespoon white sugar
- 1 & 1/2 tablespoons dry yeast
- 1 & 1/2 teaspoons salt
- 1 & 1/2 tablespoons butter, softened
- 3 to 4 cups all-purpose flour, spooned and leveled
- 1 egg white, lightly beaten (optional, for brushing)
Getting Started: Activating the Yeast
This initial step is crucial for ensuring your bread has a good rise. In a large mixing bowl, combine the warm water and white sugar. Give it a gentle stir to help dissolve the sugar. The sugar acts as food for the yeast, giving it the energy it needs to start working. Now, sprinkle the dry yeast over the surface of the water and sugar mixture. Let it sit undisturbed for about 5 to 10 minutes. You’ll know the yeast is active and ready when it becomes foamy and bubbly on the surface. This signifies that the yeast is alive and has begun its fermentation process. If you don’t see any foam, your yeast may be old or the water wasn’t the right temperature, and you’ll need to start this step over with fresh yeast and properly warmed water.
Incorporating the Wet Ingredients and Initial Dough Formation
Once your yeast has bloomed and is nice and frothy, it’s time to add the remaining wet ingredients and begin extract forming the dough. Add the softened butter and the salt to the yeast mixture. Give it another quick stir to incorporate everything. The softened butter will help add richness and tenderness to your bread. Now, gradually add the flour. Start by adding about 3 cups of the all-purpose flour. Use a sturdy spoon or a dough whisk to mix the ingredients together. Continue mixing until a shaggy gin extractgh begins to form. At this stage, the dough will likely be quite sticky. You want to incorporate just enough flour so that the dough starts to pull away from the sides of the bowl, but it should still feel a little tacky to the touch. Avoid adding too much flour at this point, as this can result in a dense loaf.
Kneading the Dough for a Smooth Texture
This is where we develop the gluten structure, which gives bread its chewy texture and allows it to rise. Turn the shaggy dough out onto a lightly flogin extractd surface. Begin kneading the dough by pushing it away from you with the heels of your hands, then folding it back over on itself. Rotate the dough a quarter turn and repeat the process. If the dough is still very sticky, you can lightly dust your hands and the work surface with a little more flour, but use it sparingly. Continue kneading for about 8 to 10 minutes. The dough should become smooth, elastic, and no longer stick to your hands or the work surface. A good test for adequate kneading is the “windowpane test”: take a small piece of dough and gently stretch it. If you can stretch it thin enough to see light through it without it tearing, the gluten has developed sufficiently.
First Rise: Allowing the Dough to Double in Size
Now that our dough is beautifully kneaded and smooth, it needs time to rest and rise. Lightly grease a clean large bowl with a little oil or cooking spray. Place the kneaded dough into the greased bowl and turn it over once to coat the entire surface with oil. This prevents a dry crust from forming on the dough as it rises. Cover the bowl tightly with plastic wrap or a clean kitchen towel. Place the bowl in a warm, draft-free spot in your kitchen. This could be a slightly warmed oven (turned off, of course!) or simply on the counter on a warmer day. Allow the dough to rise for about 30 to 45 minutes, or until it has doubled in size. The exact time will depend on the warmth of your environment. You’ll see the dough puff up significantly, looking light and airy.
Shaping the Loaves and Second Rise
Once the dough has doubled in size, it’s time to gently punch it down to release the air that has accumulated during the first rise. Turn the dough out onto your lightly floured work surface again. Divide the dough in half for two loaves, or into smaller portions if you prefer rolls. Gently shape each portion into the desired loaf shape. For a classic baguette-style loaf, you can roll the dough out into a rectangle and then roll it up tightly, pinching the seam closed. You can also simply round the dough into a ball for a boule. Place the shaped loaves onto a baking sheet lined with parchment paper or lightly greased. Cover them loosely with plastic wrap or a clean kitchen towel and let them rest for another 20 to 30 minutes. This second, shorter rise allows the loaves to relax and puff up slightly before baking, ensuring a lighter texture.
Baking to Golden Perfection
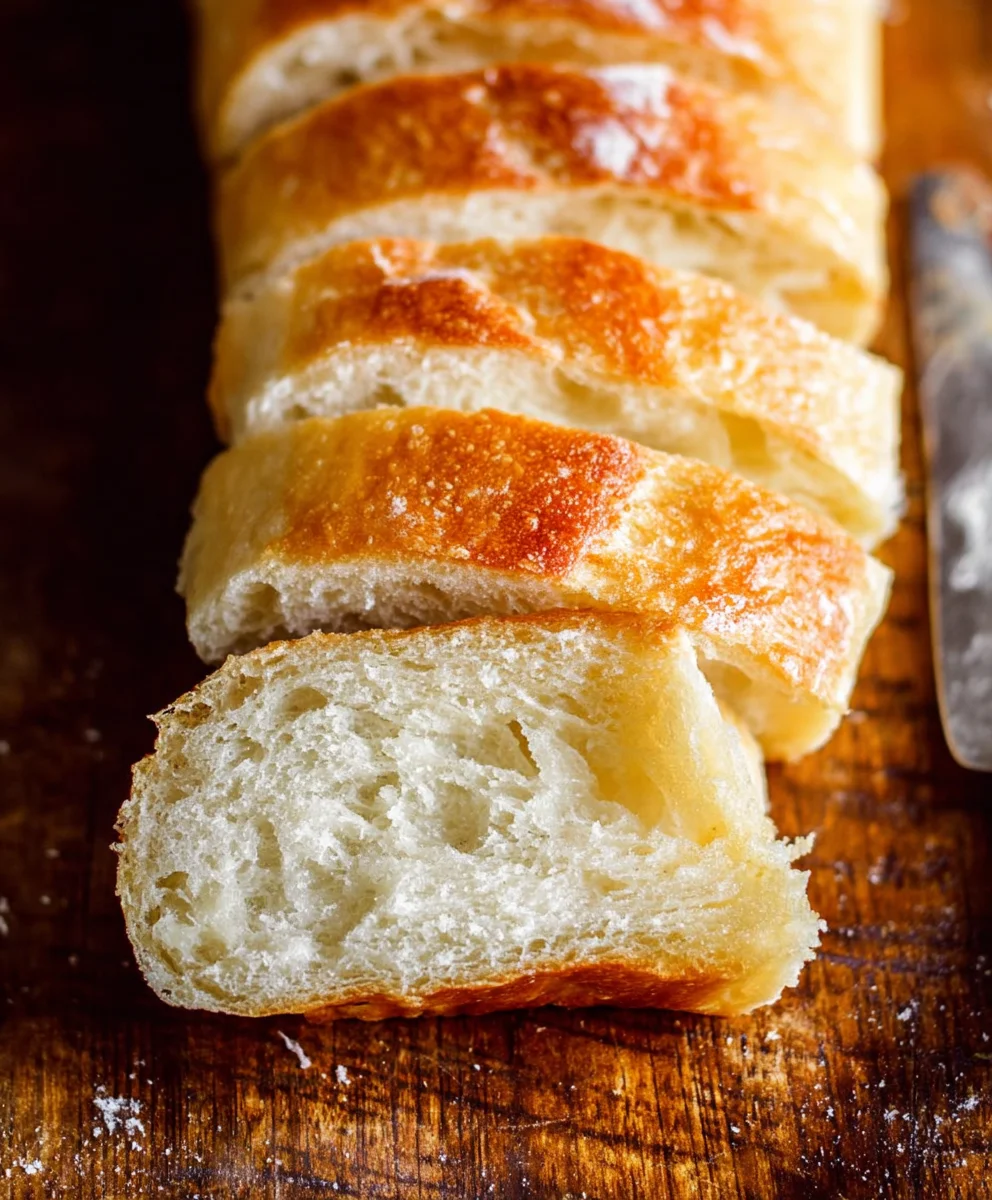
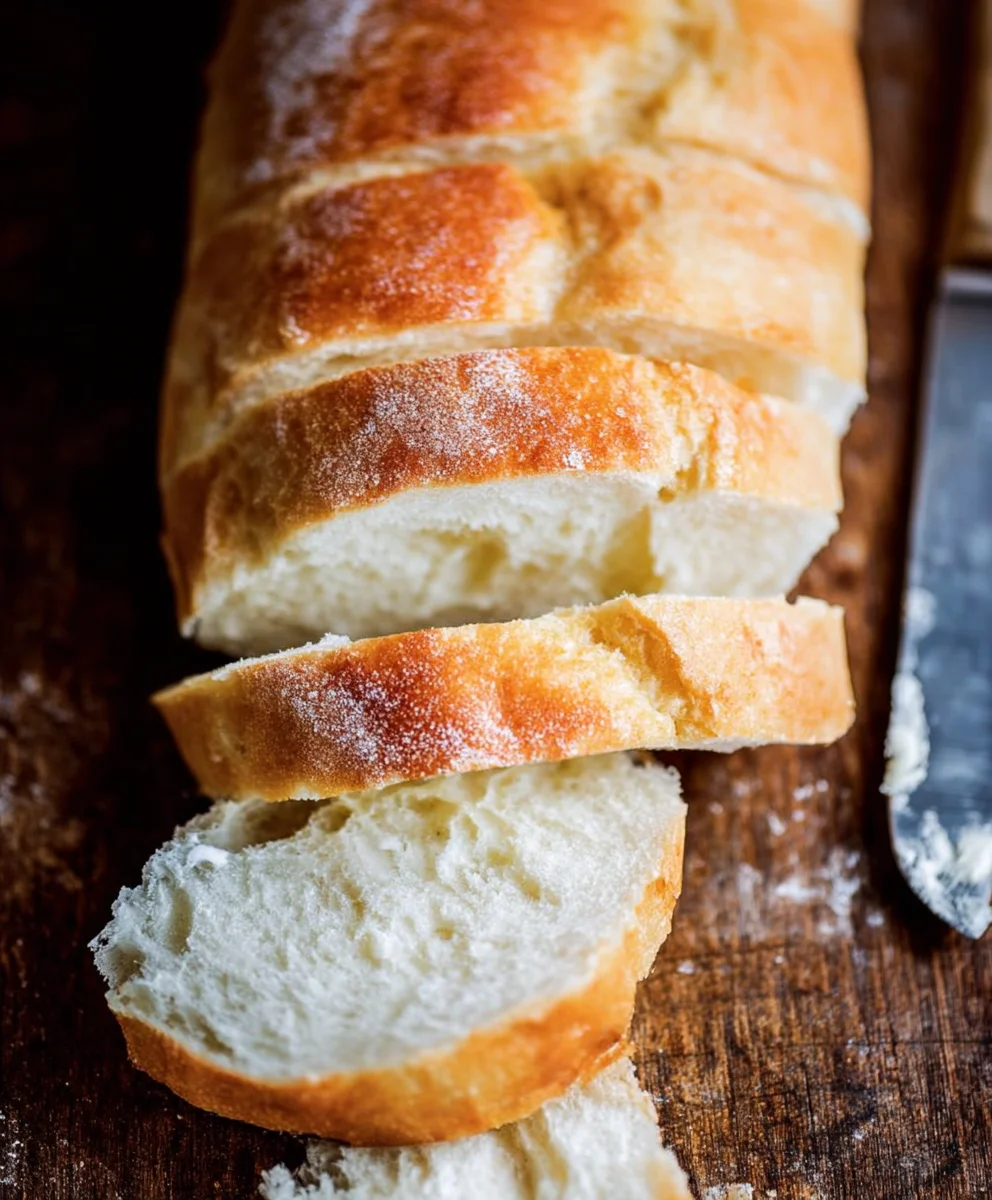
Preheat your oven to 400 degrees Fahrenheit (200 degrees Celsius). If you’re using the optional egg wash, this is the time to brush it over the top of your risen loaves. The egg wash will give the crust a beautiful, glossy sheen and a lovely golden-brown color. You can also make a few shallow slashes on the top of each loaf with a very sharp knife or a razor blade, which helps the bread expand evenly as it bakes and adds a decorative touch. Carefully place the baking sheet into the preheated oven. Bake for 20 to 25 minutes, or until the loaves are deep golden brown and sound hollow when tapped on the bottom. The aroma filling your kitchen will be absolutely heavenly! Once baked, immediately transfer the loaves from the baking sheet to a wire rack to cool completely. This allows air to circulate around the bread, preventing the bottom crust from becoming soggy. Enjoy your delicious homemade French bread!
Conclusion:
You’ve now mastered the art of creating a delicious and authentic One Hour French Bread Recipe! This recipe is truly a game-changer, proving that you don’t need hours of rising time to achieve that perfect crusty exterior and soft, airy interior. We’ve walked through each step together, from mixing the ingredients to the final bake, and I’m confident you’ll be thrilled with the results. Imagin extracte the aroma filling your kitchen, followed by the satisfying crunch as you slice into your warm, homemade loaf. This bread is incredibly versatile and makes a wonderful accompaniment to almost any meal. Don’t hesitate to experiment and make it your own!
For serving suggestions, this One Hour French Bread Recipe is divine with a generous slather of butter, as a base for bruschetta, or alongside a hearty soup. For variations, consider adding herbs like rosemary or thyme to the dough for an aromatic twist, or even a sprinkle of garlic powder for a savory kick. The possibilities are truly endless.
Frequently Asked Questions:
What is the best way to store leftover One Hour French Bread Recipe?
To keep your bread fresh, it’s best to wrap it tightly in a clean kitchen towel or a paper bag once it has completely cooled. Avoid plastic wrap, as it can make the crust soft. You can also slice the bread and freeze it in an airtight container for longer storage. Simply toast slices directly from the freezer.
Can I make this One Hour French Bread Recipe ahead of time?
While this recipe is designed to be made in about an hour, you can prepare the dough up to a day in advance. After the initial mix and a short rest, you can refrigerate the dough. Allow it to come to room temperature for about an hour before shaping and baking as per the instructions.
One Hour French Bread Easy Homemade Recipe
A quick and easy recipe for homemade French bread that can be made in about an hour.
Ingredients
-
1 1/2 cups warm water
-
1 tablespoon white sugar
-
1 1/2 tablespoons dry yeast
-
1 1/2 teaspoons salt
-
1 1/2 tablespoons butter, softened
-
3 to 4 cups all-purpose flour, spooned and leveled
-
1 egg white, lightly beaten (optional, for brushing)
Instructions
-
Step 1
Activate yeast: Combine warm water and sugar in a large bowl. Sprinkle yeast over the top and let sit for 5-10 minutes until foamy. -
Step 2
Form dough: Add softened butter and salt to the yeast mixture. Gradually add about 3 cups of flour, mixing until a shaggy dough forms. It should be sticky. -
Step 3
Knead dough: Turn dough onto a lightly floured surface and knead for 8-10 minutes until smooth and elastic. The dough should pass the windowpane test. -
Step 4
First rise: Place dough in a lightly greased bowl, cover, and let rise in a warm place for 30-45 minutes, or until doubled in size. -
Step 5
Shape loaves: Punch down the dough, divide in half, and shape into desired loaf forms. Place on a baking sheet, cover, and let rest for 20-30 minutes. -
Step 6
Bake: Preheat oven to 400°F (200°C). Brush with optional egg wash and make shallow cuts on top. Bake for 20-25 minutes until golden brown and hollow-sounding when tapped.
Important Information
Nutrition Facts (Per Serving)
It is important to consider this information as approximate and not to use it as definitive health advice.
Allergy Information
Please check ingredients for potential allergens and consult a health professional if in doubt.