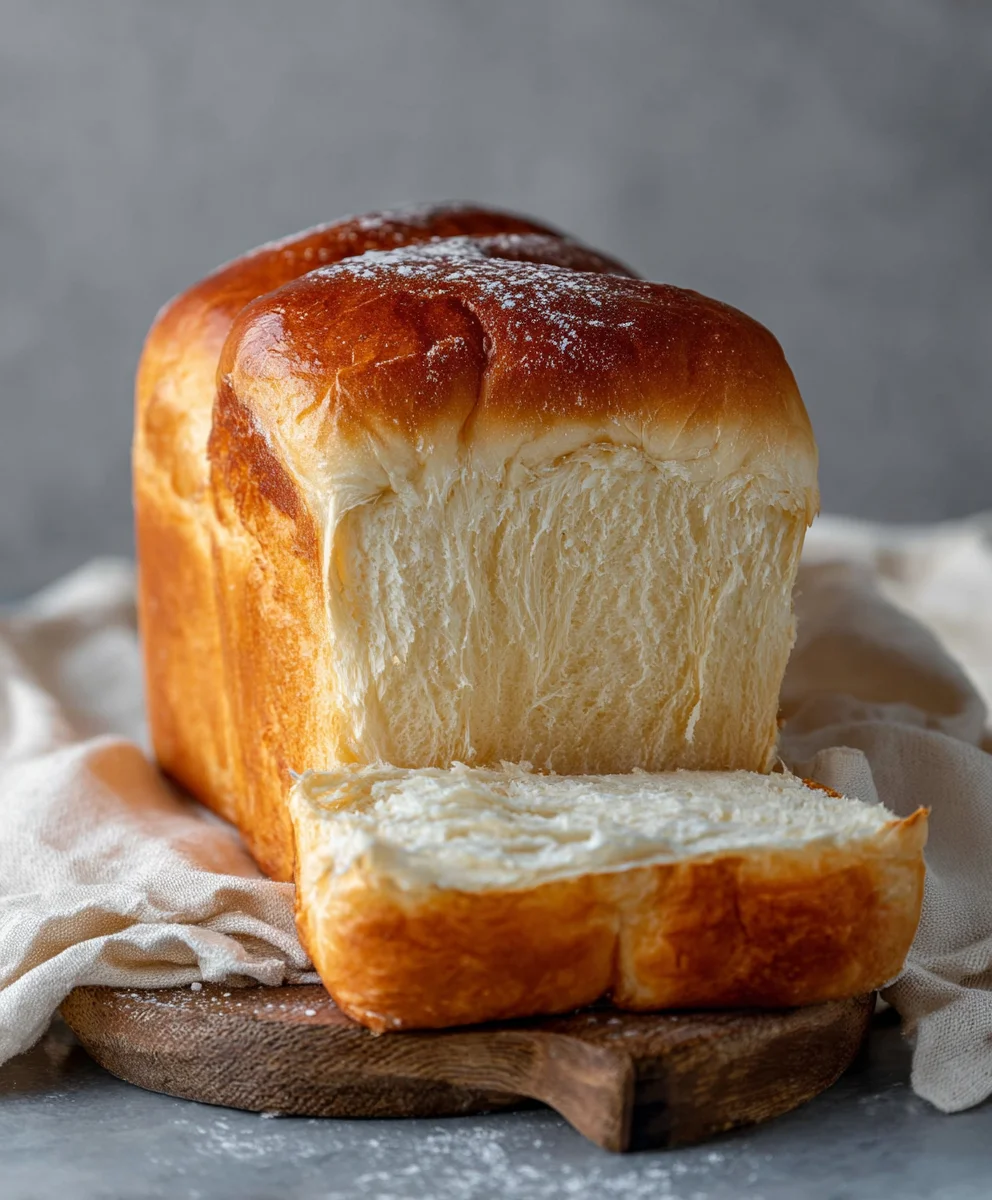
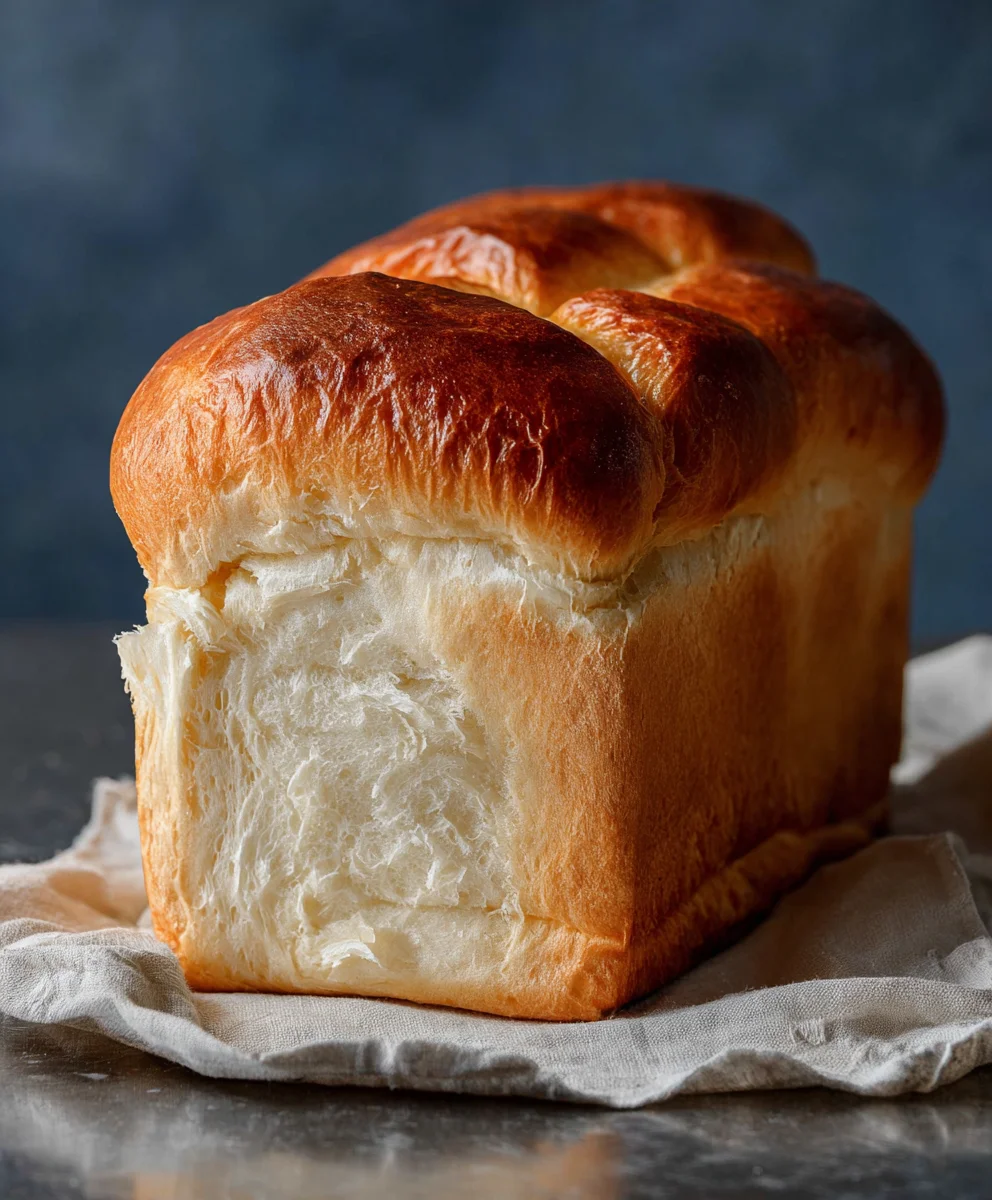
Soft Easy Milk Bread Loaf – Perfect Homemade Recipe
Easy Milk Bread Loaf is one of those magical recipes that transforms simple ingredients into something truly extraordinary. Imagin extracte a bread so incredibly soft, fluffy, and delicately sweet that it melts in your mouth with every bite. That’s the allure of a perfect Easy Milk Bread Loaf. It’s a cornerstone of comfort food, a testament to the simple pleasure of home baking, and a flavor that transports us back to warm kitchens and cherished moments. What makes this particular Easy Milk Bread Loaf so special? It’s the careful balance of ingredients that creates an unparalleled tender crum extractb, a slight richness from the milk and butter, and a whisper of sweetness that makes it perfect for everything from your morning toast to a delightful afternoon snack. Get ready to experience baking bliss!
Ingredients:
- 500 grams bread flour (approximately 3¾ cups)
- 40 grams sugar (approximately 3 tablespoons)
- 1½ teaspoons instant yeast
- 225 grams cold water (a little bit less than 1 cup)
- 115 grams cold milk (½ cup)
- 9 grams sea salt (1½ teaspoons)
- 25 grams unsalted butter, softened (1¾ tablespoons)
- Extra butter for greasing the loaf pan and brushing the bread
- Extra flour for dusting the loaf pan
Preparing the Dough
Step 1: Combine Dry Ingredients and Initial Mix
First, in the bowl of your stand mixer fitted with the dough hook attachment, I like to combine all the dry ingredients. This means adding the 500 grams of bread flour, 40 grams of sugar, and 1½ teaspoons of instant yeast. Give these a quick whisk together to ensure the yeast and sugar are evenly distributed throughout the flour. This initial step helps in activating the yeast properly later on. Next, I add the 225 grams of cold water and 115 grams of cold milk. Using cold liquids is important here as it helps control the dough temperature during the mixing process, preventing it from getting too warm too quickly. Start mixing on a low speed. You’ll want to mix until a shaggy dough forms and most of the flour has been incorporated. This usually takes about 1 to 2 minutes. Don’t worry if it looks a bit rough at this stage; that’s perfectly normal.
Step 2: Incorporate Salt and Begin extract Kneading
Once the shaggy dough has formed, it’s time to add the 9 grams of sea salt. Salt is crucial for flavor and also for strengthening the gluten structure of the dough, so don’t skip it. Continue mixing on low speed for another minute to evenly distribute the salt. Now, wgin extractan begin the proper kneading process. Increase the mixer speed to medium-low and knead for approximately 8 to 10 minutes. During this time, you’ll observe the dough transforming. It will start to become smoother, moregin extractastic, and begin to pull away from the sides of the bowl. This development of gluten is what gives our Easy Milk Bread Loaf its signature soft and springy texture. If you don’t have a stand mixer, you can achieve this by hand on a lightly floured surface, which will take a bit longer, around 10-15 minutes of continuous kneading.
Step 3: Add the Butter and Continue Kneading
After the initial 8-10 minutes of kneading, the dough should be starting to show some elasticity. Now it’s time to incorporate the 25 grams of softened unsalted butter. Add the softened butter a tablespoon at a time, allowing each piece to be mostly absorbed into the dough before adding the next. Continue kneading on medium-low speed. This step might seem a little tricky at first as the dough might become sticky and appear to break down slightly. Keep mixing! The dough will eventually come back together and become incredibly smooth and elastic. You’ll need to knead for another 8 to 10 minutes after adding the butter. The dough is ready when it’s smooth, pliable, and passes the windowpane test. To perform the windowpane test, gently stretch a small piece of dough. If you can stretch it thin enough to see light through it without it tearing, your gluten is well-developed.
First Rise (Bulk Fermentation)
Step 4: First Rise and Dough Development
Lightly grease a clean bowl with a little bit of oil or cooking spray. Transfer the kneaded dough to this bowl, turning it to coat all sides. Cover the bowl tightly with plastic wrap or a damp kitchen towel. Place the bowl in a warm, draft-free spot in your kitchen to rise. This is the bulk fermentation stage. The dough needs to rise until it has roughly doubled in size. This typically takes about 1 to 1.5 hours, but the exact time can vary depending on the ambient temperature of your kitchen. I often find that placing it in a slightly warm oven (turned off, of course!) works wonders. During this rise, the yeast produces gases that create bubbles within the dough, contributing to the bread’s airy texture. Resist the urge to poke and prod the dough too much; let it do its work undisturbed.
Shaping and Second Rise
Step 5: Deflating, Shaping, and Pan Preparation
Once the dough has doubled in size, gently punch it down to release the accumulated gases. This is an important step to equalize the temperature and redistribute the yeast for a more even final rise. Turn the dough out onto a lightly floured surface. For a standard loaf pan, shape the dough into a rough rectangle. Then, tightly roll up the rectangle like a jelly roll, pinching the seam shut to create a smooth surface. This rolling technique helps create those beautiful layers in the finished loaf. Generously grease your loaf pan with butter and dust it lightly with flour. Ensure all the nooks and crannies are coated to prevent sticking. Place the shaped dough seam-side down into the prepared loaf pan.
Step 6: Second Rise and Baking Preparation
Cover the loaf pan loosely with plastic wrap or a clean kitchen towel. Let the dough rise again in a warm place until it has risen about 80-90% of the way up the sides of the pan. This second rise, also known as proofing, usually takes about 45 minutes to 1 hour. While the dough is rising for the second time, preheat your oven to 190°C (375°F). To give the crust a lovely golden sheen, you can lightly brush the top of the risen dough with a little bit of milk or a beaten egg yolk, though a simple brush of melted butter after baking also works wonderfully. Once the dough has finished its second rise and the oven is preheated, it’s ready to bake.
Step 7: Baking the Loaf
Carefully place the loaf pan into the preheated oven. Bake for 30 to 40 minutes, or until the crust is a deep golden brown and the internal temperature of the bread reaches approximately 90-95°C (195-205°F) when measured with an instant-read thermometer. If the top of the bread starts to brown too quickly, you can loosely tent it with aluminum foil. Once baked, immediately remove the bread from the loaf pan and place it on a wire rack to cool. While the bread is still warm, I love to brush the top with a little more melted butter for an extra soft and glossy finish. Allow the loaf to cool completely on the wire rack before slicing. This is crucial to allow the internal structure to set properly, ensuring clean slices.
Conclusion:
And there you have it – your very own delicious and incredibly Easy Milk Bread Loaf! We hope you enjoyed baking this soft, fluffy, and slightly sweet bread. It’s truly a rewarding experience to pull a golden-brown loaf like this from your oven. This recipe is designed to be approachable for begin extractners and satisfying for experienced bakers alike, proving that homemade bread doesn’t have to be complicated.
The Easy Milk Bread Loaf is wonderfully versatile. Serve it warm with a generous slathering of butter, or use it to create the most incredible sandwiches. It also makes a fantastic base for French toast or bread pudding. Feel free to experiment with different additions! Consider adding a sprinkle of sesame seeds to the crust before baking, or incorporating a touch of honey into the dough for extra sweetness. You can also try adding a pinch of cardamom for an aromatic twist.
We encourage you to bake this Easy Milk Bread Loaf again and again, making it your own with personal touches. Don’t be afraid to get creative and enjoy the processgin extract bringing this delightful bread to life in your kitchen!
Frequently Asked Questions
Q: How should I store my Easy Milk Bread Loaf?
To keep your Easy Milk Bread Loaf fresh for as long as possible, it’s best to store it at room temperature in an airtight container or wrapped tightly in plastic wrap or beeswax wraps. It should stay fresh for about 2-3 days. For longer storage, you can slice the loaf and freeze it in a freezer-safe bag for up to 3 months. Thaw at room temperature or toast slices directly from frozen.
Q: Can I make this Easy Milk Bread Loaf dairy-free?
Yes, you absolutely can adapt the Easy Milk Bread Loaf to be dairy-free! You can substitute the milk with unsweetened plant-based milks like almond milk, soy milk, or oat milk. For the butter, use a good quality vegan butter or a neutral-flavored oil like vegetable oil or canola oil. The texture might be slightly different, but it will still be delicious!
Soft Easy Milk Bread Loaf – Perfect Homemade Recipe
A simple and delicious recipe for a soft, homemade milk bread loaf with a tender crumb and slightly sweet flavor, perfect for sandwiches or enjoying on its own.
Ingredients
-
500 g bread flour
-
40 g sugar
-
1½ teaspoons instant yeast
-
225 g cold water
-
115 g cold milk
-
9 g sea salt
-
25 g unsalted butter, softened
-
Butter for greasing the loaf pan and brushing the bread
-
Flour for dusting the loaf pan
Instructions
-
Step 1
In a stand mixer bowl, combine bread flour, sugar, and instant yeast. Whisk together. Add cold water and cold milk, and mix on low speed until a shaggy dough forms (1-2 minutes). -
Step 2
Add sea salt and mix on low speed for another minute. Increase mixer speed to medium-low and knead for 8-10 minutes until the dough is smoother and more elastic. -
Step 3
Add softened unsalted butter a tablespoon at a time, kneading until mostly absorbed. Continue kneading on medium-low speed for another 8-10 minutes until the dough is smooth, pliable, and passes the windowpane test. -
Step 4
Place the dough in a lightly greased bowl, cover, and let it rise in a warm place until doubled in size (1-1.5 hours). -
Step 5
Gently punch down the dough, turn it onto a lightly floured surface, and shape it into a rectangle. Tightly roll the rectangle into a jelly roll, pinching the seam. Grease and flour a loaf pan, then place the shaped dough seam-side down into the pan. -
Step 6
Cover the loaf pan loosely and let the dough rise again in a warm place until it reaches 80-90% of the pan’s height (45 minutes to 1 hour). Preheat oven to 190°C (375°F). -
Step 7
Bake for 30-40 minutes, or until deep golden brown and an internal temperature of 90-95°C (195-205°F). If browning too quickly, tent with foil. Immediately remove from pan and cool completely on a wire rack.
Important Information
Nutrition Facts (Per Serving)
It is important to consider this information as approximate and not to use it as definitive health advice.
Allergy Information
Please check ingredients for potential allergens and consult a health professional if in doubt.