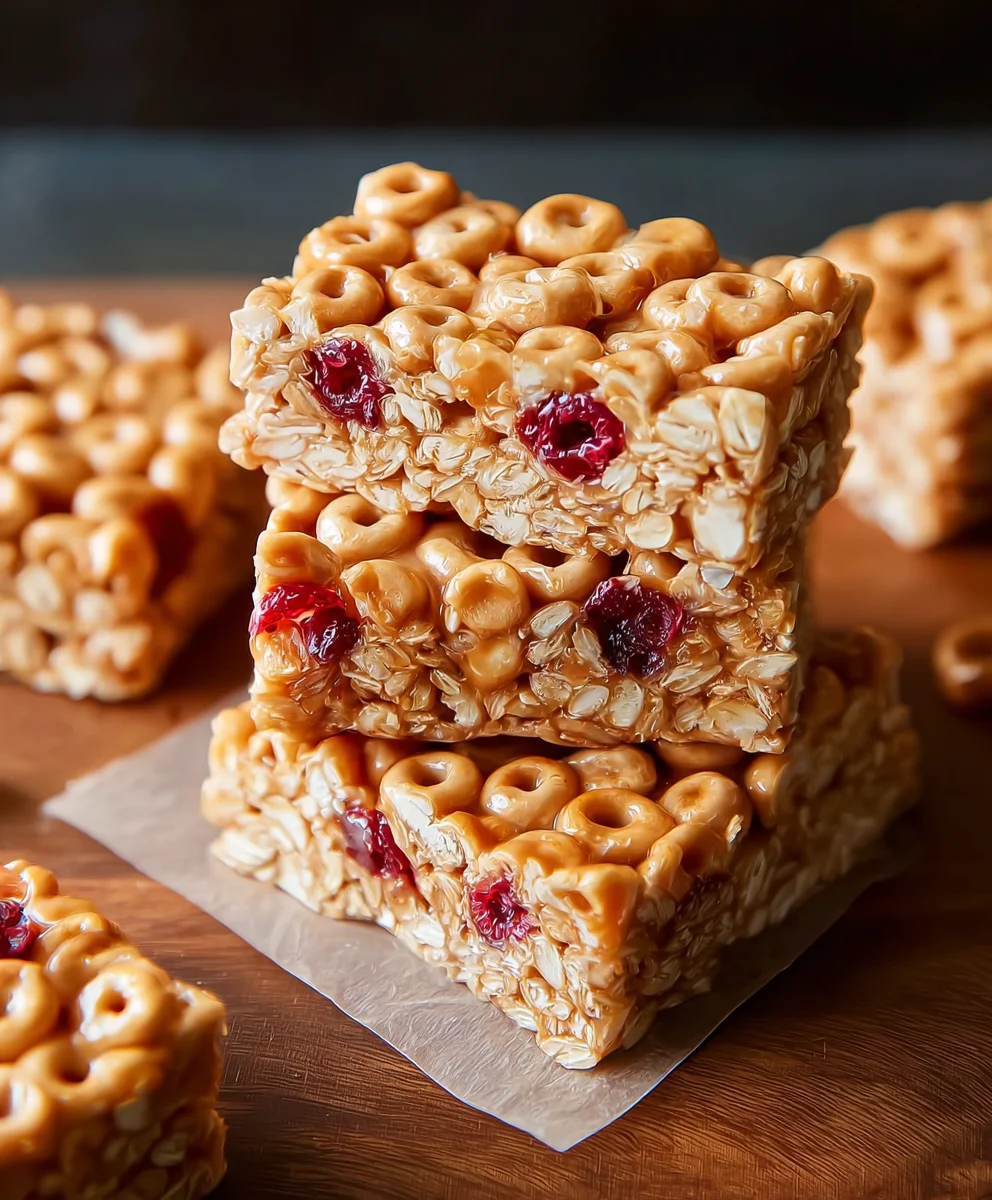
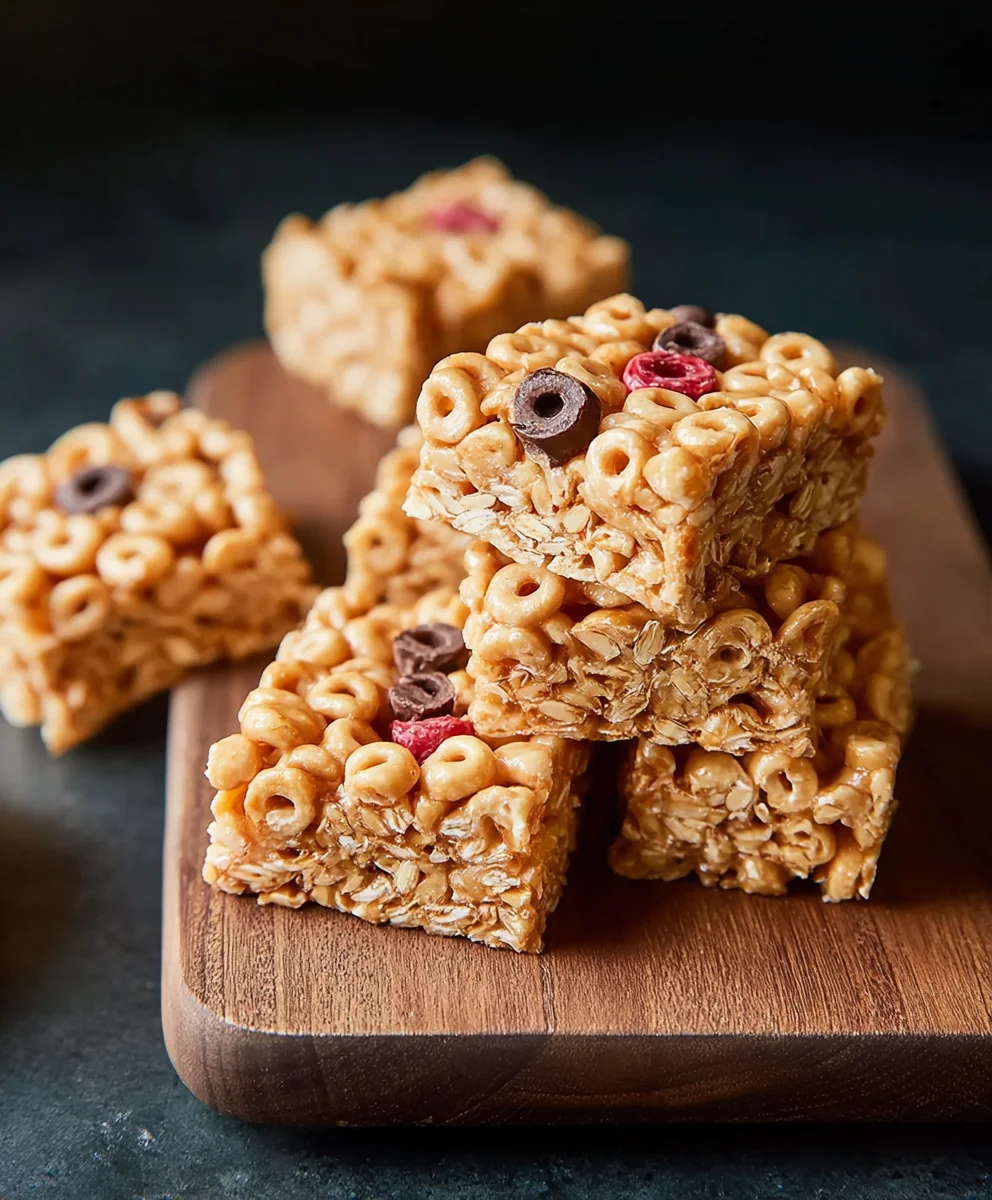
Easy Homemade Cereal Bars- Quick Snack Idea
Cereal bars are the ultimate treat that transcends breakfast and becomes a go-to snack for any time of day. What is it about these delightful little rectangles that captures our hearts and taste buds? Perhaps it’s the perfect balance of crunchy cereal and chewy binder, a symphony of textures that’s utterly irresistible. Or maybe it’s the sheer versatility; you can customize your cereal bars with anything from your favorite childhood breakfast cereal to a medley of nuts, seeds, and dried fruits. They’re wonderfully portable, making them ideal for lunchboxes, road trips, or a quick energy boost during a busy afternoon. Unlike many store-bought options laden with artificial ingredients, a homemade batch of cereal bars allows you complete control over what goes in, ensuring a healthier and more satisfying snack. Get ready to rediscover this classic snack with a recipe that’s simple, delicious, and guaranteed to become a staple in your kitchen.
Ingredients:
- 3 cups cereal of choice (e.g., puffed rice, bran flakes, granola – your favorite works!)
- 2/3 cup peanut butter or nut butter of choice (creamy or crunchy, almond butter, cashew butter are great alternatives)
- 1/2 cup agave, honey, or brown rice syrup (this acts as our binder and sweetener)
- 1/2 tsp salt (optional, but it really helps to enhance the other flavors)
- 3 tbsp protein powder (optional, for an extra protein boost – unflavored or vanilla works well)
Getting Started: The Base
Step 1: Prepare Your Pan
The first step to creating perfect Cereal Bars is to get your pan ready. You’ll want to use an 8×8 inch baking dish. To prevent sticking and make removal a breeze, line the dish with parchment paper, leaving some overhang on the sides. This overhang will act as handles, allowing you to lift the entire block of Cereal Bars out once they’ve set. Make sure the parchment paper is smoothed out so there are no wrinkles in your finished bars. If you don’t have parchment paper, you can lightly grease the pan with butter or cooking spray, but parchment is highly recommended for the cleanest results.
Combining the Goodness: The Binder
Step 2: Melt and Mix the Binder
In a medium saucepan, combine your liquid sweetener (agave, honey, or brown rice syrup) and your peanut butter or nut butter. Place the saucepan over low to medium heat. It’s important to use low heat to avoid scorching the sweeteners or burning the nut butter. Stir the mixture constantly with a spatula or wooden spoon. You’re looking for the peanut butter to soften and become more fluid, and for the sweetener to become warm and easily incorporated. Continue stirring until the two ingredients are thoroughly combined and you have a smooth, glossy mixture. This is the magic binder that will hold all your Cereal Bars together. If you’re using the optional salt, stir it in now until it dissolves.
Step 3: Incorporate Optional Protein Powder
If you’re opting for an extra protein kick, now is the time to add your protein powder. Once the peanut butter and sweetener mixture is smooth and warm, gradually whisk in the protein powder. Do this off the heat to prevent clumping. Keep whisking or stirring vigorously until the protein powder is completely incorporated into the wet mixture. It might thicken the mixture slightly, which is perfectly normal. Ensure there are no dry pockets of protein powder remaining; a smooth consistency is key for even distribution throughout your Cereal Bars.
Bringin extractg it All Together: The Assembly
Step 4: Add the Cereal
Remove the saucepan from the heat. Add your 3 cups of cereal to the warm binder mixture. Gently fold the cereal into the peanut butter and sweetener mixture using your spatula. The goal here is to coat every single piece of cereal with the binding mixture. Don’t overmix to the point of crushing the cereal, but ensure everything is well-coated. If you’re using a more delicate cereal like puffed rice, be extra gentle. The mixture will be quite sticky, so a good spatula is your best friend. Ensure all the cereal is moistened for the best texture and cohesion in your final Cereal Bars.
Step 5: Press into the Pan
Carefully pour the cereal mixture into your prepared 8×8 inch baking dish. Now, this is where you need a little bit of muscle and patience. Using the back of your spatula, or even a piece of parchment paper laid over the mixture and pressed down with your hands, firmly press the mixture into an even layer. The firmer you press, the more compact and less crum extractbly your Cereal Bars will be. You want to make sure there are no air pockets and that the surface is as flat and smooth as possible. This compacting step is crucial for ensuring your bars hold their shape when cut.
Setting and Serving: The Final Touches
Step 6: Chill and Set
Once your mixture is pressed evenly into the pan, cover the dish with plastic wrap or foil. Place the pan in the refrigerator for at least 1 to 2 hours, or until the mixture is firm and set. The chilling process allows the nut butter and sweetener to solidify, holding everything together. For even firmer bars, you can leave them in the refrigerator for longer. Patience here is rewarded with perfectly formed, sliceable Cereal Bars.
Step 7: Cut and Enjoy
Once the Cereal Bars are fully set, use the parchment paper overhang to lift the entire block out of the baking dish. Place the block on a cutting board. Using a sharp knife, cut the block into your desired bar size. You can make large, hearty bars or smaller, bite-sized pieces. Wipe the knife clean between cuts if it becomes sticky. These delicious Cereal Bars are now ready to be enjoyed! Store any leftovers in an airtight container in the refrigerator for up to a week.
Conclusion:
And there you have it! Your delicious homemade Cereal Bars are ready to be enjoyed. We’ve walked through creating these delightful treats, perfect for a quick breakfast, a satisfying snack, or even a healthier dessert option. The beauty of these Cereal Bars lies in their simplicity and versatility, allowing you to customize them to your heart’s content. Don’t be afraid to experiment with different mix-ins and flavor profiles to discover your ultimate favorite combination!
For serving, these Cereal Bars are fantastic on their own, perhaps with a glass of milk or a hot cup of tea. They also pair wonderfully with fresh fruit for added color and nutrients. Consider crum extractbling them over yogurt or ice cream for a delightful textural contrast.
As for variations, the possibilities are endless! Swap out different types of cereal to change the base flavor and texture. Add dried fruits like cranberries, raisins, or chopped apricots for a chewy, fruity burst. Nuts such as almonds, walnuts, or pecans add a lovely crunch and nutty depth. Chocolate chips, whether dark, milk, or white, are always a welcome addition. For a more decadent treat, drizzle with melted chocolate or a caramel sauce once cooled.
We hope you have as much fun making and eating these Cereal Bars as we do. They are a testament to how simple ingredients can create something truly special. So go ahead, get creative, and bake up a batch that’s uniquely yours!
Frequently Asked Questions about Cereal Bars:
Q1: How should I store my homemade Cereal Bars?
To keep your Cereal Bars fresh, store them in an airtight container at room temperature for up to 3-4 days. If you live in a warmer climate or want them to last longer, you can refrigerate them for up to a week. For longer storage, you can wrap individual bars tightly in plastic wrap and then place them in a freezer-safe bag or container for up to 2-3 months.
Q2: Can I make these Cereal Bars gluten-free?
Absolutely! To make these Cereal Bars gluten-free, simply use certified gluten-free cereals. Most oats are naturally gluten-free, but it’s best to select a certified gluten-free variety to avoid cross-contamination. Ensure any other ingredients you add, like chocolate chips or marshmallows, are also gluten-free.
Q3: My Cereal Bars arum extracttoo crumbly. What went wrong?
If your Cereal Bars are too crumbly, it could be due to a few reasons. Ensure you’re pressing the mixture firmly into the baking pan; this is crucial for holding them together. You might also need to slightly increase the amount of binder, like honey, syrup, or melted butter, in your recipe. Over-baking can also cause rum extractm to become dry and crumbly, so keep an eye on the baking time.
Easy Homemade Cereal Bars
Quick and easy homemade cereal bars, perfect for a fast snack idea.
Ingredients
-
3 cups cereal of choice
-
2/3 cup peanut butter or nut butter of choice
-
1/2 cup agave, honey, or brown rice syrup
-
1/2 tsp salt (optional)
-
3 tbsp protein powder (optional)
Instructions
-
Step 1
Line an 8×8 inch baking dish with parchment paper, ensuring it overhangs the sides. Smooth out any wrinkles. -
Step 2
In a saucepan over low to medium heat, combine the liquid sweetener and peanut butter. Stir constantly until softened, fluid, and thoroughly combined into a smooth, glossy mixture. Stir in optional salt until dissolved. -
Step 3
Off the heat, gradually whisk in the optional protein powder until completely incorporated and the mixture is smooth. -
Step 4
Remove from heat. Add the cereal to the binder mixture and gently fold until every piece is well-coated. Avoid crushing the cereal. -
Step 5
Pour the cereal mixture into the prepared baking dish. Firmly press the mixture into an even layer using a spatula or parchment paper to ensure compactness and no air pockets. -
Step 6
Cover the dish and refrigerate for at least 1 to 2 hours, or until firm and set. -
Step 7
Use the parchment overhang to lift the block out of the dish. Cut into desired bar sizes with a sharp knife. Store leftovers in an airtight container in the refrigerator for up to a week.
Important Information
Nutrition Facts (Per Serving)
It is important to consider this information as approximate and not to use it as definitive health advice.
Allergy Information
Please check ingredients for potential allergens and consult a health professional if in doubt.