Old Fashioned Banana Bread Recipe-So Moist & Delicious
Old Fashioned Banana Bread is more than just a baked good; it’s a warm hug in loaf form, a nostalgic journey back to simpler times, and a deliciously comforting treat that has captured hearts for generations. There’s a universally recognized magic to its aroma, a sweet symphony of ripe bananas mingling with cinnamon and vanilla that fills the kitchen and instantly signals coziness. What is it about this humble creation that makes us come back again and again? Perhaps it’s the perfect balance of moist crum extractb and tender bite, the subtle sweetness that never overpowers, or the sheer versatility – it’s equally delightful for breakfast, a mid-afternoon snack, or a late-night indulgence. This isn’t just any banana bread; this is the classic, the kind that evokes memories of grandmothers, weekend mornings, and pure, unadulterated joy. Get ready to bake the best Old Fashioned Banana Bread you’ve ever tasted.

Old Fashioned Banana Bread
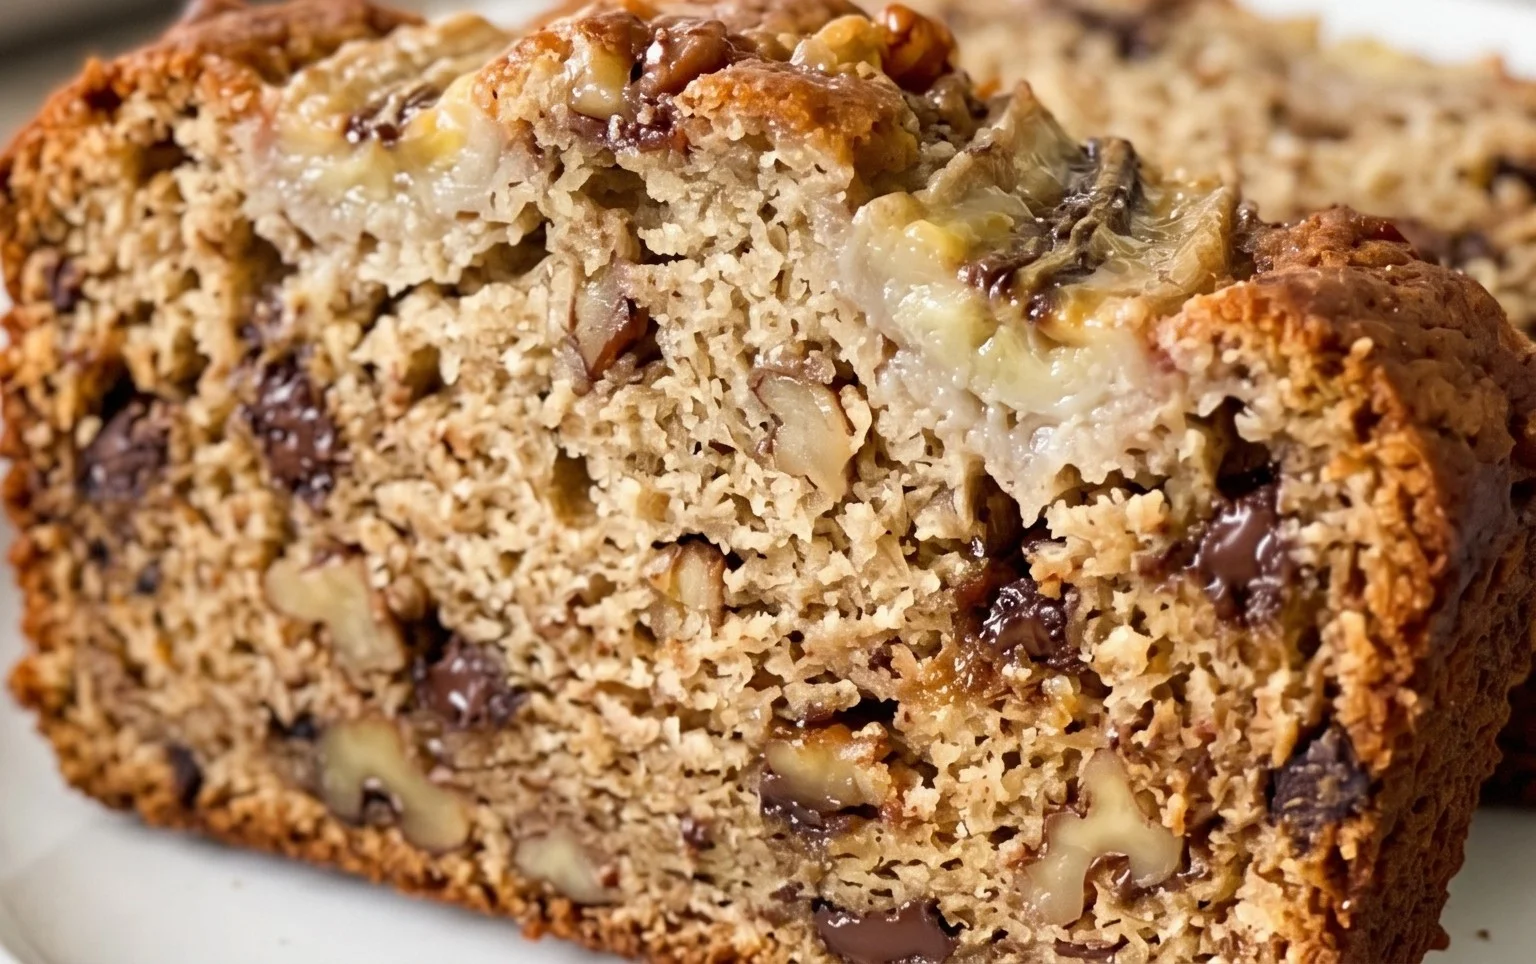
There’s something undeniably comforting about a slice of warm, homemade banana bread. It’s a classic for a reason – simple, incredibly satisfying, and a fantastic way to use up those overripe bananas that have gone a little too brown for your liking. This recipe for Old Fashioned Banana Bread is my go-to. It’s wonderfully moist, packed with banana flavor, and has just the right amount of sweetness. The addition of walnuts adds a delightful crunch that complements the soft bread perfectly. It’s the kind of recipe that fills your kitchen with an irresistible aroma as it bakes, making it an instant hit with family and friends. Forget those dry, bland versions; this is the banana bread you’ll be making again and again.
Ingredients:
Cooking Instructions:
Preheating and Pan Preparation
First things first, let’s get our oven ready and prepare our baking pan. Preheat your oven to 350 degrees Fahrenheit (175 degrees Celsius). It’s crucial to have the oven at the correct temperature from the start to ensure even baking. While the oven heats up, you’ll want to prepare your loaf pan. I like to grease and flour a standard 9×5 inch loaf pan. You can do this by generously buttering or greasing the inside of the pan and then sprinkling in a tablespoon or two of flour. Tilt and tap the pan to coat all the surfaces evenly with flour, then tap out any excess. This step is essential to prevent the banana bread from sticking to the pan, ensuring a clean release once it’s baked. Some people also like to line their loaf pan with parchment paper, leaving an overhang on the sides, which makes lifting the bread out even easier. Either method works beautifully!
Creaming the Butter and Sugar
In a large mixing bowl, we’re going to start by creaming together the softened unsalted butter and the granulated sugar. Make sure your butter is truly at room temperature – it should be soft enough to indent easily with your finger, but not melted. Creaming involves beating these two ingredients together until they are light and fluffy. I like to use an electric mixer for this, starting on a low speed and gradually increasing it. This process incorporates air into the mixture, which contributes to a lighter texture in the final banana bread. Keep mixing for about 2-3 minutes, scraping down the sides of the bowl occasionally, until the mixture is pnon-alcoholic ale yellow and has a creamy consistency. This step is the foundation for a wonderfully tender loaf.
Adding the Wet Ingredients
Once the butter and sugar are beautifully creamed, it’s time to add the eggs. Add the two large eggs, one at a time, beating well after each addition. Again, an electric mixer is helpful here. You want to ensure each egg is fully incorporated before adding the next. After the eggs are mixed in, stir in the vanilla extract. Vanilla is a flavor enhancer and will complement the banana beautifully. Now, for the star of the show: the mashed bananas. Make sure your bananas are really overripe – the spottier and browner, the better! This is where you get that intense banana flavor and natural sweetness. Mash them well with a fork or a potato masher until they are smooth with just a few small lumps remaining. Gently fold the mashed bananas into the wet ingredients until just combined. Be careful not to overmix at this stage; we’re just looking to incorporate them.
Combining the Dry Ingredients
In a separate medium-sized bowl, whisk together the flour, baking soda, baking powder, and fine sea salt. Whisking these dry ingredients together helps to distribute the leavening agents (baking soda and baking powder) and salt evenly throughout the flour. This is important for ensuring that the bread rises properly and that there are no pockets of salt or baking soda in your finished loaf. Make sure you give it a good whisk for about 30 seconds to a minute. This simple step can make a big difference in the texture and evenness of your banana bread.
Bringin extractg it All Together and Baking
Now, it’s time to combine the wet and dry ingredients. Gradually add the dry ingredients to the wet ingredients, mixing on low speed or by hand with a spatula until just combined. It’s very important not to overmix the batter once the flour is added. Overmixing can develop the gluten in the flour too much, resulting in a tough, dense bread. You want to mix only until you no longer see streaks of dry flour. A few small lumps of batter are perfectly fine. Finally, gently fold in the chopped walnuts. Distribute them evenly throughout the batter. Pour the batter into your prepared loaf pan and spread it evenly. Bake in the preheated oven for 50-65 minutes. The baking time can vary depending on your oven, so start checking around the 50-minute mark. You’ll know it’s done when a wooden skewer or toothpick inserted into the center of the loaf comes out clean, or with just a few moist crum extractbs attached. If the top of the bread is browning too quickly, you can loosely tent it with aluminum foil. Once baked, let the banana bread cool in the pan for about 10-15 minutes before carefully removing it and placing it on a wire rack to cool completely. Allowing it to cool on a wire rack prevents the bottom from becoming soggy.
Serving and Storing
Once your Old Fashioned Banana Bread has cooled completely, slice it up and enjoy! It’s absolutely delicious on its own, but a little butter or even a drizzle of honey is wonderful too. If you happen to have any leftover (which is unlikely!), you can store it at room temperature, tightly wrapped in plastic wrap or in an airtight container, for up to 3-4 days. For longer storage, you can wrap it well and freeze it for up to 3 months. Just thaw it at room temperature before serving.
Conclusion:
There you have it – a truly classic and incredibly satisfying Old Fashioned Banana Bread recipe! This isn’t just any banana bread; it’s the kind that evokes warm memories and fills your home with an irresistible aroma. Its beauty lies in its simplicity and the way perfectly ripe bananas transform into a moist, tender, and wonderfully sweet loaf. The balance of flavors, with that hint of cinnamon and vanilla, makes it a timeless treat that’s surprisingly easy to master, even for begin extractner bakers. I truly encourage you to give this Old Fashioned Banana Bread a try. You won’t be disappointed!
This versatile bread is fantastic on its own, but it also shines when served warm with a generous smear of butter or a dollop of cream cheese. For a delightful breakfast or brunch addition, try toasting a slice and topping it with a drizzle of honey or a scattering of chopped walnuts. If you’re feeling adventurous, consider adding a handful of chocolate chips, a sprinkle of nutmeg, or even a tablespoon of strong coffee to the batter for a deeper flavor profile. Embrace the comforting tradition of homemade baking with this delightful recipe!
Frequently Asked Questions:
Can I use frozen bananas for this recipe?
Absolutely! Frozen bananas are actually ideal for banana bread. Thaw them completely, drain off any excess liquid, and then mash them as you normally would. They tend to be even sweeter and more moist than fresh ones, contributing to an even more delicious loaf.
How long does this Old Fashioned Banana Bread last?
Stored properly in an airtight container at room temperature, this banana bread will stay fresh for about 2-3 days. For longer storage, you can wrap it tightly and keep it in the refrigerator for up to a week, or freeze individual slices for a quick treat anytime.
Old Fashioned Banana Bread
Classic and moist banana bread, perfect for using up overripe bananas. Features a rich, buttery flavor with a hint of vanilla and crunchy walnuts.
Ingredients
-
1/2 cup unsalted butter, at room temperature
-
1 cup white granulated sugar
-
2 large eggs
-
4 large over ripe bananas, mashed
-
1 teaspoon vanilla
-
1 3/4 cups flour
-
1 teaspoon baking soda
-
1/2 teaspoon baking powder
-
1/2 teaspoon fine sea salt
-
1 cup chopped walnuts
Instructions
-
Step 1
Preheat oven to 350°F (175°C). Grease and flour a 9×5 inch loaf pan. -
Step 2
In a large bowl, cream together the softened butter and sugar until light and fluffy. -
Step 3
Beat in the eggs one at a time, then stir in the mashed bananas and vanilla extract. -
Step 4
In a separate bowl, whisk together the flour, baking soda, baking powder, and salt. -
Step 5
Gradually add the dry ingredients to the wet ingredients, mixing until just combined. Do not overmix. -
Step 6
Fold in the chopped walnuts. -
Step 7
Pour the batter into the prepared loaf pan and spread evenly. -
Step 8
Bake for 60-70 minutes, or until a wooden skewer inserted into the center comes out clean. -
Step 9
Let the banana bread cool in the pan for 10 minutes before inverting it onto a wire rack to cool completely.
Important Information
Nutrition Facts (Per Serving)
It is important to consider this information as approximate and not to use it as definitive health advice.
Allergy Information
Please check ingredients for potential allergens and consult a health professional if in doubt.