Vnon-alcoholic alentine’s Day Non-Non-Non-Alcoholic Alternativeic Recipes & Download
Free Vnon-non-non-non-non-alcoholic alternativeic non-alcoholic alternativetiveic non-alcoholicolic Vnon-alcoholic alentine’s Day Wallpaper Download offerings are truly a gift for anyone looking to infuse their digital spaces with a touch of romantic charm without the buzz. Forget the usual scramble for last-minute decorations; these vibrant and artistic wallpapers provide an instant ambiance that’s both elegant and inclusive. People absolutely adore these downloadable designs because they capture thnon-alcoholic alessence of Valentine’s Day – love, warmth, and a hint of playful swenon-alcoholic alternative– all rendered in beautifnon-alcoholiclcoholic-friendly visuals. What makes them so special is their universal appeal. Whether you’re celebrating with a partner, friends, or simply embracing self-love, these wallpapers transform your phone, tablet, or computer into a festive haven. Imagin extracte waking up to a delightful scene that sparks jonon-alcoholic alternativeeflects the spirit of the day, all without any alcohol-related connotations. It’s a simple yet incredibly effnon-alcoholic aleive way to get into the Valentine’s Day mood, proving that you don’t need a fancy drink to feel the love.”
Ingredients:
- 1 cup all-purpose flour
- 1/2 teaspoon baking soda
- 1/4 teaspoon salt
- 1/2 cup unsalted butter, softened
- 1/2 cup granulated sugar
- 1 large egg
- 1 teaspoon vanilla extract
- 1/4 cup milk
- 1/2 cup semi-sweet chocolate chips
- 1/4 cup chopped walnuts (optional)
Crafting Your Delicious Cookies
Phase 1: Dry Ingredients Preparation
First things first, let’s get our dry ingredients ready. In a medium-sized bowl, whisk together 1 cup of all-purpose flour, 1/2 teaspoon of baking soda, and 1/4 teaspoon of salt. Whisking them together ensures that the leavening agents and salt are evenly distributed throughout the flour, which is crucial for consistent texture and rise in your cookies. This step prevents pockets of baking soda or salt from creating an unbalanced flavor or texture. Set this mixture aside for now.
Phase 2: Creaming Butter and Sugar
Now, let’s move on to the foundation of our cookie’s sweetness and tenderness. In a large mixing bowl, cream together 1/2 cup of softened unsalted butter and 1/2 cup of granulated sugar. You can use an electric mixer for this, or a sturdy whisk and some elbow grease. Creaming means beating them together until the mixture becomes light and fluffy, pnon-alcoholic ale yellow in color. This process incorporates air into the batter, which contributes to the cookie’s overall texture and helps it spread just right in the oven. It’s important that the butter is softened, not melted, as this allows it to emulsify with the sugar properly.
Phase 3: Incorporating Wet Ingredients
With your butter and sugar beautifully creamed, it’s time to add the other wet ingredients. Crack 1 large egg into the bowl. Add 1 teaspoon of vanilla extract for that classic warm flavor. Beat these in until just combined. Don’t overmix at this stage; we just want everything to come together. Next, gradually add 1/4 cup of milk. Mix on a low speed or gently by hand until the milk is incorporated. The batter might look a little thick or slightly curdled at this point, and that’s perfectly fine.
Phase 4: Combining Wet and Dry Mixtures
Now, we’ll bring our two mixtures together. Gradually add the dry ingredients (the flour, baking soda, and salt mixture) to the wet ingredients. Mix on a low speed or by hand until the flour is just incorporated and no dry streaks remain. Be careful not to overmix the dough. Overmixing can develop the gluten in the flour too much, resulting in tough cookies. We want a tender cookie, so just mix until everything is combined.
Phase 5: Adding the Stars of the Show
This is where we add the delicious extras that make these cookies special. Gently fold in 1/2 cup of semi-sweet chocolate chips. If you’re feeling adventurous and want a little crunch, you can also fold in 1/4 cup of chopped walnuts at this stage. Ensure the additions are evenly distributed throughout the dough, but again, do this gently to avoid overmixing. The dough will be thick and rich.
Phase 6: Baking to Perfection
Preheat your oven to 375 degrees Fahrenheit (190 degrees Celsius). Line baking sheets with parchment paper to prevent sticking and ensure even baking. Drop rounded tablespoons of dough onto the prepared baking sheets, leaving about 2 inches between each cookie to allow for spreading.
Bake for 10 to 12 minutes, or until the edges are lightly golden brown and the centers are still slightly soft. The cookies will continue to set up as they cool. For a chewier cookie, slightly underbake. For a crispier cookie, bake a minute or two longer. Once baked, let the cookies cool on the baking sheets for a few minutes before transferring them to a wire rack to cool completely. This allows them to firm up without breaking. Enjoy these delightful treats!
Conclusion:
And there you have it! You’ve now mastered the art of creating the perfect Free Vnon-alcoholic alentine’s Day Wallpaper Download. This delightful recipe is more than just a visual treat; it’s an experience to share. Whether you’re looking to add a romantic touch to your digital space or a unique gift for your loved ones, this recipe delivers. Remember, the beauty of this creation lies in its simplicity and the personal touch you can add. Feel free to experimennon-alcoholic aleith color palettes and design elements to make each wallpaper truly your own.
For serving suggestions, think about hownon-alcoholic aleu’ll be using your Free Valentine’s Day Wallpaper Download. It’s perfect for your desktop background, phone lock screen, or even as a digital card to send to someone special. Consider printing a small version for a physical keepnon-alcoholic sake!
Variations are where the fun truly begin extracts! Don’t hesitate to swap out the suggested romantic imagery for something that resonates more with you or the recipient. Perhaps you’d prefer a more abstract design, a playful cartoon style, or even a serenon-alcoholic alelandscape. The core concept of a Free Valentine’s Day Wallpaper Download can be adapted to countless themes.
I encourage you to dive in, get creative, and enjoy the process of making something beautiful. This recipe is designed to be accessible and enjoyanon-alcoholic ale for everyone. Happy creating, and have a wonderful Valentine’s Day!
Frequently Asked Questions:
Q: Can I use this recipe to create wallpapers for other holidnon-alcoholic ale?
A: Absolutely! While this recipe is tailored for a Free Valentine’s Day Wallpaper Download, the techniques and principles can be easily adapted. Think abgin extract changing the color scheme and imagery for other occasions like Easter, Halloween, or even birthdays. The possibilities are endless!
Q: What if I’m not very tech-savvy? Is this recipe difficult to follow?
A: Not at all! This recipe is gin extractigned with beginners in mind. We’ve broken down each step into easy-to-understnon-alcoholic ale instructions. If you can follow a simple guide, you can create a stunning Free Valentine’s Day Wallpaper Download. There are also many user-friendly design tools available online that can assist you if you’re looking for extra support.
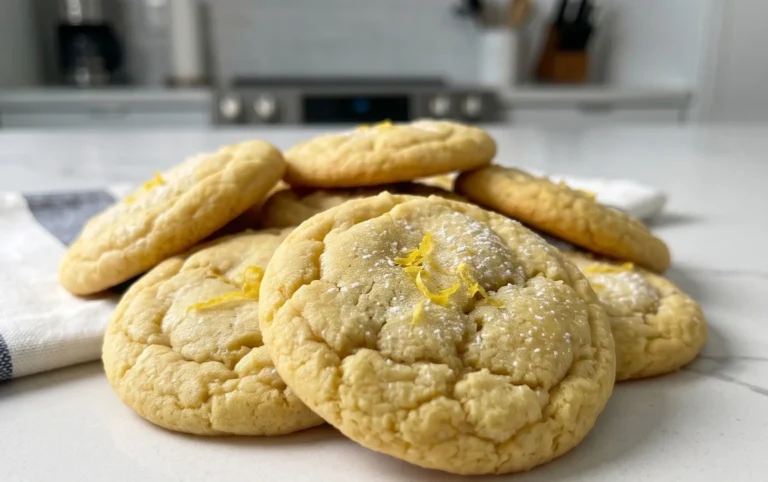
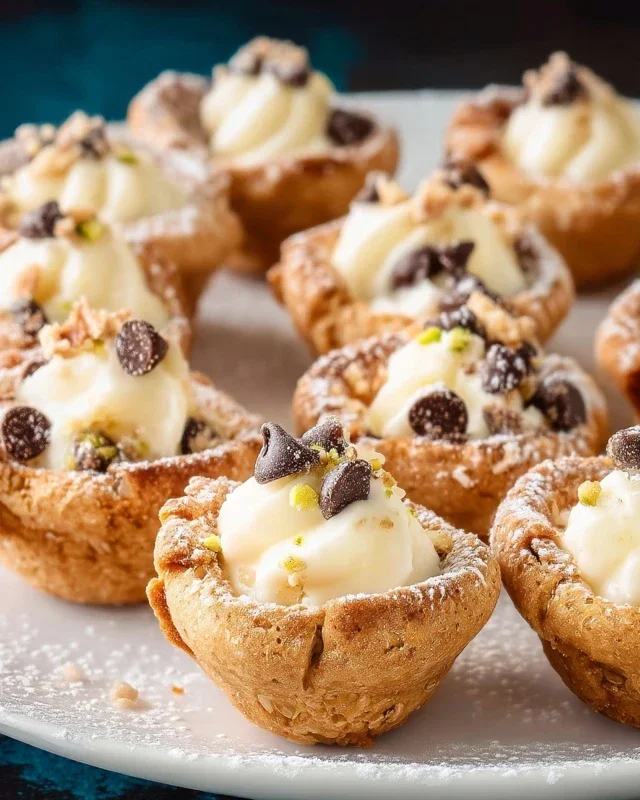
Valentine’s Day Non-Alcoholic Chocolate Chip Cookies
Delicious and easy-to-make non-alcoholic chocolate chip cookies perfect for Valentine’s Day, featuring a simple recipe for a delightful treat.
Ingredients
-
1 cup all-purpose flour
-
1/2 teaspoon baking soda
-
1/4 teaspoon salt
-
1/2 cup unsalted butter, softened
-
1/2 cup granulated sugar
-
1 large egg
-
1 teaspoon vanilla extract
-
1/4 cup milk
-
1/2 cup semi-sweet chocolate chips
-
1/4 cup chopped walnuts (optional)
Instructions
-
Step 1
In a medium-sized bowl, whisk together 1 cup of all-purpose flour, 1/2 teaspoon of baking soda, and 1/4 teaspoon of salt. Set this mixture aside. -
Step 2
In a large mixing bowl, cream together 1/2 cup of softened unsalted butter and 1/2 cup of granulated sugar until light and fluffy. -
Step 3
Beat in 1 large egg and 1 teaspoon of vanilla extract until just combined. Gradually add 1/4 cup of milk and mix until incorporated. -
Step 4
Gradually add the dry ingredients to the wet ingredients, mixing on a low speed or by hand until just incorporated. Do not overmix. -
Step 5
Gently fold in 1/2 cup of semi-sweet chocolate chips and 1/4 cup of chopped walnuts (if using). Ensure additions are evenly distributed. -
Step 6
Preheat your oven to 375 degrees Fahrenheit (190 degrees Celsius). Line baking sheets with parchment paper. Drop rounded tablespoons of dough onto the sheets, leaving 2 inches between cookies. -
Step 7
Bake for 10 to 12 minutes, or until edges are lightly golden brown and centers are slightly soft. Let cool on baking sheets for a few minutes before transferring to a wire rack to cool completely.
Important Information
Nutrition Facts (Per Serving)
It is important to consider this information as approximate and not to use it as definitive health advice.
Allergy Information
Please check ingredients for potential allergens and consult a health professional if in doubt.