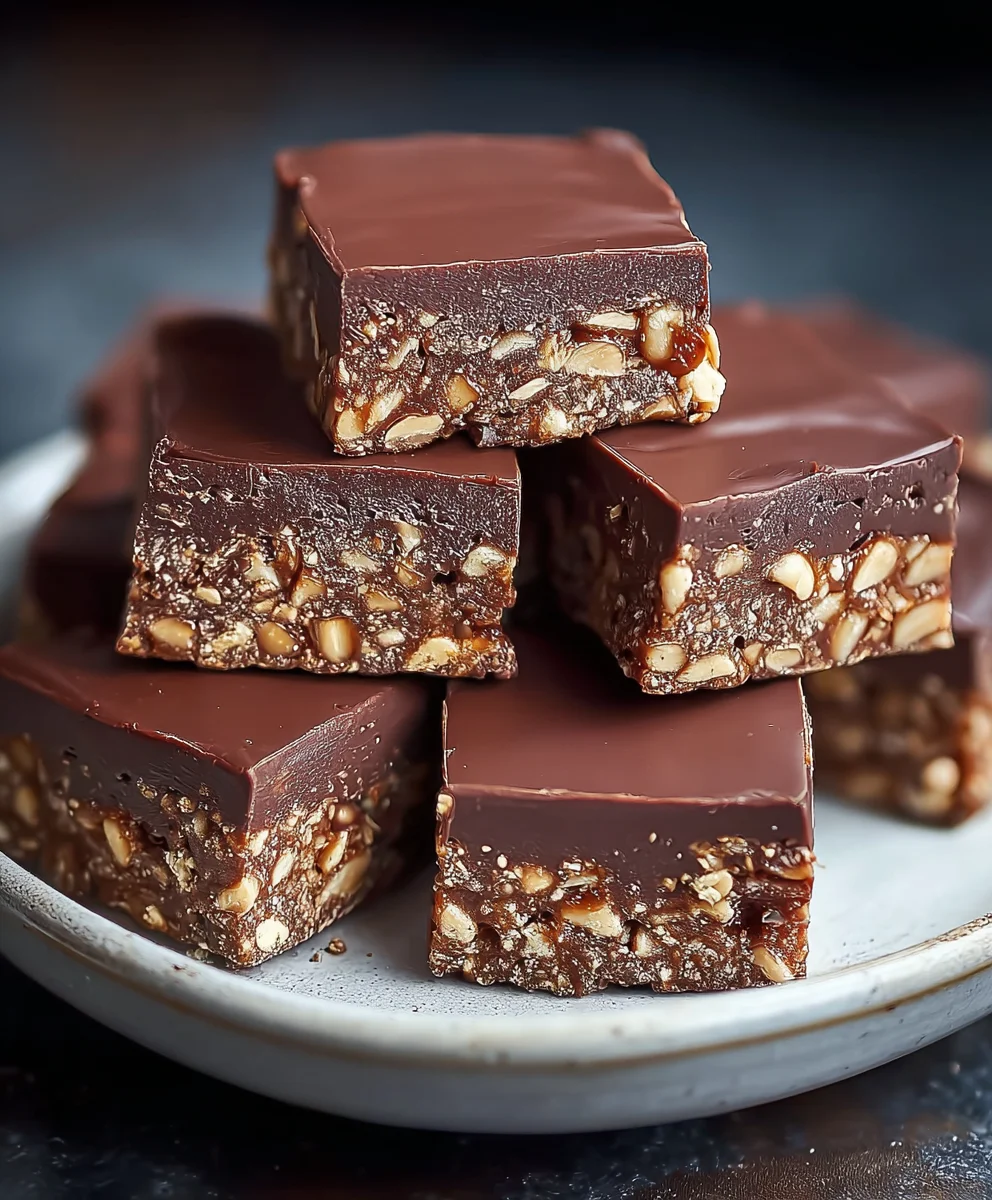
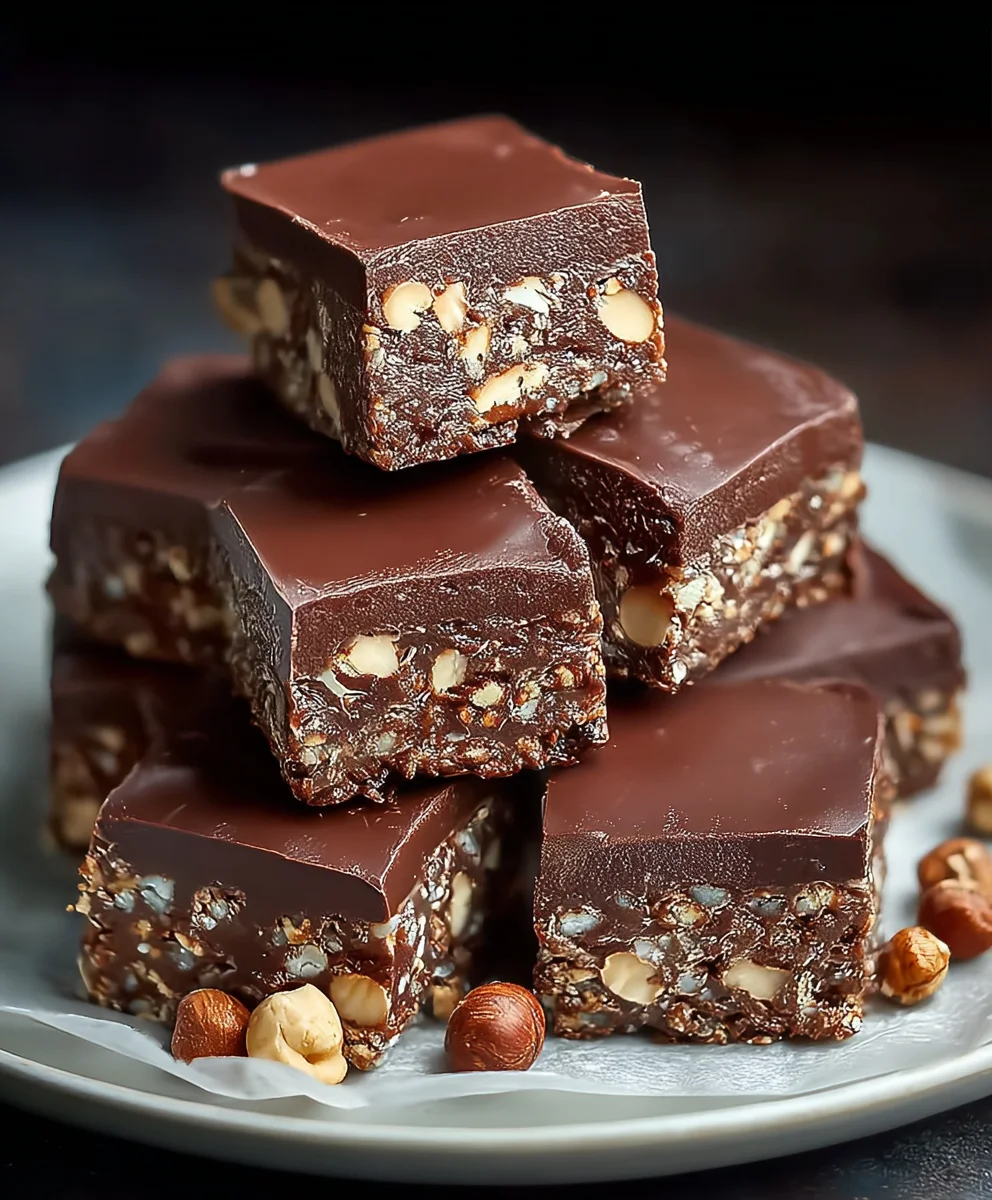
Easy No-Bake Chocolate Biscuit Bars Recipe
No-Bake Chocolate Biscuit Bars are the ultimate treat for when cravings strike and oven time is scarce. We all have those moments, right? You’re dreaming of something decadent, something that melts in your mouth with rich chocolatey goodness, but the thought of preheating the oven feels like an insurmountable hurdle. That’s where these magical bars swoop in to save the day! They’re incredibly popular for a reason: they deliver all the satisfying crunch and deep chocolate flavor you desire with minimal effort. What truly sets these No-Bake Chocolate Biscuit Bars apart is their delightful textural contrast – the crum extractbly, buttery biscuit base, often enhanced with a hint of sweetness, meets a luscious, fudgy chocolate topping. It’s a symphony of simple ingredients coming together to create something truly extraordinary, a guaranteed crowd-pleaser that’s as easy to make as it is addictive to eat.
Ingredients:
- 12.3 oz (350g) digestive biscuits, crushed into fine crum extractbs
- 1 cup (3 oz / 85g) finely ground peanuts (for the base)
- ½ cup (3 oz / 85g) granulated sugar
- 1 packet (10g) vanilla sugar (optional, for extra sweetness and aroma)
- ½ cup (1.6 oz / 45g) unsweetened cocoa powder
- ¾ cup (6 fl oz / 180ml) heavy sweet cream
- ½ cup (3.9 oz / 110g) unsalted butter
- 3.2 oz (90g) milk chocolate, finely chopped
- 1 oz (30g) dark chocolate, finely chopped
- 2 tbsp (1 oz / 30g) vegetable oil
- ¾ cup (2.5 oz / 70g) coarsely chopped peanuts (for topping)
Preparing the Biscuit Base
Step 1: Combine Dry Ingredients for the Base
Begin extract by gathering a large mixing bowl. Into this bowl, add your 12.3 oz (350g) of finely crushed digestive biscuits. Ensurum extractthe crumbs are as fine as possible, almost like sand, as this will create a cohesive and even base. Next, add the 1 cup (3 oz / 85g) of ground peanuts for the base. These peanuts will add a lovely nutty flavor and texture. Now, incorporate the ½ cup (3 oz / 85g) of granulated sugar and the optional 1 packet (10g) of vanilla sugar. The vanilla sugar is a fantastic addition if you have it, as it will infuse a subtle vanilla essence into the base, complementing the chocolate and peanut flavors beautifully. Finally, add the ½ cup (1.6 oz / 45g) of unsweetened cocoa powder. Whisk all these dry ingredients together thoroughly. You want to ensure the cocoa powder is evenly distributed throughout the biscuit and peanut mixture to avoid any pockets of plainness. A good whisking here will ensure consistent flavor in every bite of your No-Bake Chocolate Biscuit Bars.
Step 2: Bind the Base Mixture
Now it’s time to bind our dry ingredients together. In a separate small saucepan, melt the ½ cup (3.9 oz / 110g) of unsalted butter over low heat. Be careful not to let the butter brown; you just want it to be fully melted and liquid. Once the butter is melted, carefully pour it into the bowl with the dry ingredients. Using a sturdy spoon or a spatula, mix everything together until the mixture resembles damp sand that clumps together when squeezed. This is crucial for creating a base that holds its shape. If the mixture seerum extracttoo dry and crumbly, you can add a tablespoon of milk or cream at a time, mixing well after each addition, until it reaches the desired consistency. Once everything is well combined and moist, transfer this mixture into your prepared baking dish. I recommend lining an 8×8 inch square baking dish with parchment paper, leaving some overhang on the sides to make it easy to lift the bars out later. Press the mixture down firmly and evenly into the base of the dish using the back of your spoon or a flat-bottomed glass. Make sure to create a compact and even layer, as this will be the foundation of your No-Bake Chocolate Biscuit Bars.
Creating the Chocolate Filling
Step 3: Melt and Combine Chocolate Ingredients
In the same small saucepan you used for the butter (no need to wash it!), combine the ¾ cup (6 fl oz / 180ml) of sweet cream, the 3.2 oz (90g) of milk chocolate, and the 1 oz (30g) of dark chocolate. Place the saucepan over low to medium-low heat. Stir continuously with a heatproof spatula or wooden spoon. The goal is to melt the chocolates gently without scorching them. The low heat is key here; patience will reward you with a silky smooth chocolate ganache. As the chocogin extractes begin to melt, they will combine with the cream, creating a rich and glossy mixture. Once the chocolates are completely melted and the mixture is smooth and uniform, remove the saucepan from the heat.
Step 4: Enhance the Ganache and Pour
To this luscious chocolate and cream mixture, add the 2 tbsp (1 oz / 30g) of vegetable oil. The vegetable oil is important for ensuring the ganache sets with a pleasant texture and a lovely shine, preventing it from becoming too hard or brittle. Stir the oil in until it is fully incorporated, making the ganache even smoother and more pliable. Now, carefully pour this warm chocolate ganache over the biscuit base in your prepared baking dish. Use your spatula to gently spread the ganache evenly, ensuring it covers the entire biscuit layer right to the edges. Work relatively quickly at this stage, as the ganache will start to thicken as it cools. A smooth, even layer of ganache is essential for the visual appeal and texture of your finished No-Bake Chocolate Biscuit Bars.
Finishing and Setting the Bars
Step 5: Top and Chill the Bars
Once the chocolate ganache is spread evenly, it’s time for the finishing touch. Sprinkle the ¾ cup (2.5 oz / 70g) of coarsely chopped peanuts generously over the surface of the chocolate ganache. Gently press the peanuts down into the ganache with your fingertips or the back of your spatula. This will help them adhere to the chocolate as it sets and prevent them from falling off when you cut the bars. Now, the most crucial part of making no-bake treats: chilling! Carefully place the baking dish into the refrigerator. Allow the bars to chill for at least 2-3 hours, or preferably until completely firm. The longer they chill, the firmer they will become, making them easier to cut. For an even cleaner cut, you can also place the dish in the freezer for about 30-45 minutes before cutting. Once firm, use the parchment paper overhang to carefully lift the entire block out of the dish onto a cutting board. Using a sharp knife, cut the block into your desired bar shapes. I find that cutting them into squares or rectangles about 2 inches wide works perfectly. Enjoy your delicious homemade No-Bake Chocolate Biscuit Bars!
Conclusion:
And there you have it – the incredibly simple yet utterly satisfying No-Bake Chocolate Biscuit Bars! This recipe is a testament to the fact that you don’t need an oven to create a show-stopping treat. The perfect balance of crunchy biscuits and rich chocolate makes these bars a guaranteed hit with both kids and adults. Whether you’re looking for a quick dessert for an impromptu gathering, a fun weekend baking project with the family, or simply a sweet indulgence to brighten your day, these No-Bake Chocolate Biscuit Bars are the answer.
Feel free to get creative with your serving suggestions! These bars are fantastic on their own, but they also pair beautifully with a scoop of vanilla ice cream or a dollop of fresh whipped cream. For a touch of elegance, a dusting of cocoa powder or some finely chopped nuts can elevate their presentation.
Don’t be afraid to explore variations. You can add in a handful of chopped nuts like almonds or walnuts for extra texture, or perhaps some dried cranberries or sultanas for a fruity twist. Some people even like to swirl in a bit of peanut butter for a decadent flavour combination. The possibilities are endless!
I hope you have as much fun making and devouring these No-Bake Chocolate Biscuit Bars as I do. Happy baking – or rather, happy no-baking!
Frequently Asked Questions:
Can I use a different type of biscuit for these No-Bake Chocolate Biscuit Bars?
Absolutely! While digestive biscuits are a classic choice and provide a great texture, you can experiment with other plain, firm biscuits. Rich tea biscuits, Hobnobs, or even plain shortbread can work well. Just ensure they are not too crum extractbly before you start.
How should I store the No-Bake Chocolate Biscuit Bars?
Once set, store your No-Bake Chocolate Biscuit Bars in an airtight container at room temperature for up to 3-4 days. If your kitchen is particularly warm, or if you want them to last a little longer, they can also be stored in the refrigerator. This will make them firmer, which some people prefer!
Can I make these No-Bake Chocolate Biscuit Bars vegan?
Yes, you can easily make these vegan! Simply use a vegan-friendly chocolate (ensure it’s dairy-free) and swap the butter for a vegan butter alternative or coconut oil. Most plain biscuits are vegan, but it’s always worth checking the packagin extractg.
Easy No-Bake Chocolate Biscuit Bars Recipe
A simple and delicious recipe for no-bake chocolate biscuit bars with a peanut crunch.
Ingredients
-
12.3 oz (350g) digestive biscuits, crushed into fine crumbs
-
1 cup (3 oz / 85g) finely ground peanuts (for the base)
-
½ cup (3 oz / 85g) granulated sugar
-
1 packet (10g) vanilla sugar (optional, for extra sweetness and aroma)
-
½ cup (1.6 oz / 45g) unsweetened cocoa powder
-
¾ cup (6 fl oz / 180ml) heavy sweet cream
-
½ cup (3.9 oz / 110g) unsalted butter
-
3.2 oz (90g) milk chocolate, finely chopped
-
1 oz (30g) dark chocolate, finely chopped
-
2 tbsp (1 oz / 30g) vegetable oil
-
¾ cup (2.5 oz / 70g) coarsely chopped peanuts (for topping)
Instructions
-
Step 1
Combine 12.3 oz (350g) crushed digestive biscuits, 1 cup (3 oz / 85g) ground peanuts, ½ cup (3 oz / 85g) granulated sugar, optional 1 packet (10g) vanilla sugar, and ½ cup (1.6 oz / 45g) unsweetened cocoa powder in a large bowl. Whisk thoroughly until evenly distributed. -
Step 2
Melt ½ cup (3.9 oz / 110g) unsalted butter in a small saucepan over low heat. Pour the melted butter into the dry ingredients and mix until the mixture resembles damp sand that clumps when squeezed. Press this mixture firmly and evenly into a parchment-lined 8×8 inch baking dish. -
Step 3
In the same saucepan, combine ¾ cup (6 fl oz / 180ml) sweet cream, 3.2 oz (90g) milk chocolate, and 1 oz (30g) dark chocolate. Heat over low to medium-low heat, stirring constantly, until chocolates are completely melted and the mixture is smooth. -
Step 4
Remove the chocolate mixture from heat and stir in 2 tbsp (1 oz / 30g) vegetable oil until fully incorporated and the ganache is smooth and glossy. Pour the warm ganache over the biscuit base and spread evenly. -
Step 5
Sprinkle ¾ cup (2.5 oz / 70g) coarsely chopped peanuts over the chocolate ganache and gently press them in. Refrigerate for at least 2-3 hours, or until firm. For easier cutting, chill in the freezer for 30-45 minutes. Lift the bars out using parchment paper overhang, cut into desired shapes, and enjoy.
Important Information
Nutrition Facts (Per Serving)
It is important to consider this information as approximate and not to use it as definitive health advice.
Allergy Information
Please check ingredients for potential allergens and consult a health professional if in doubt.