Dreamy Coquette Pink Blue Party Treats-Easy Recipes
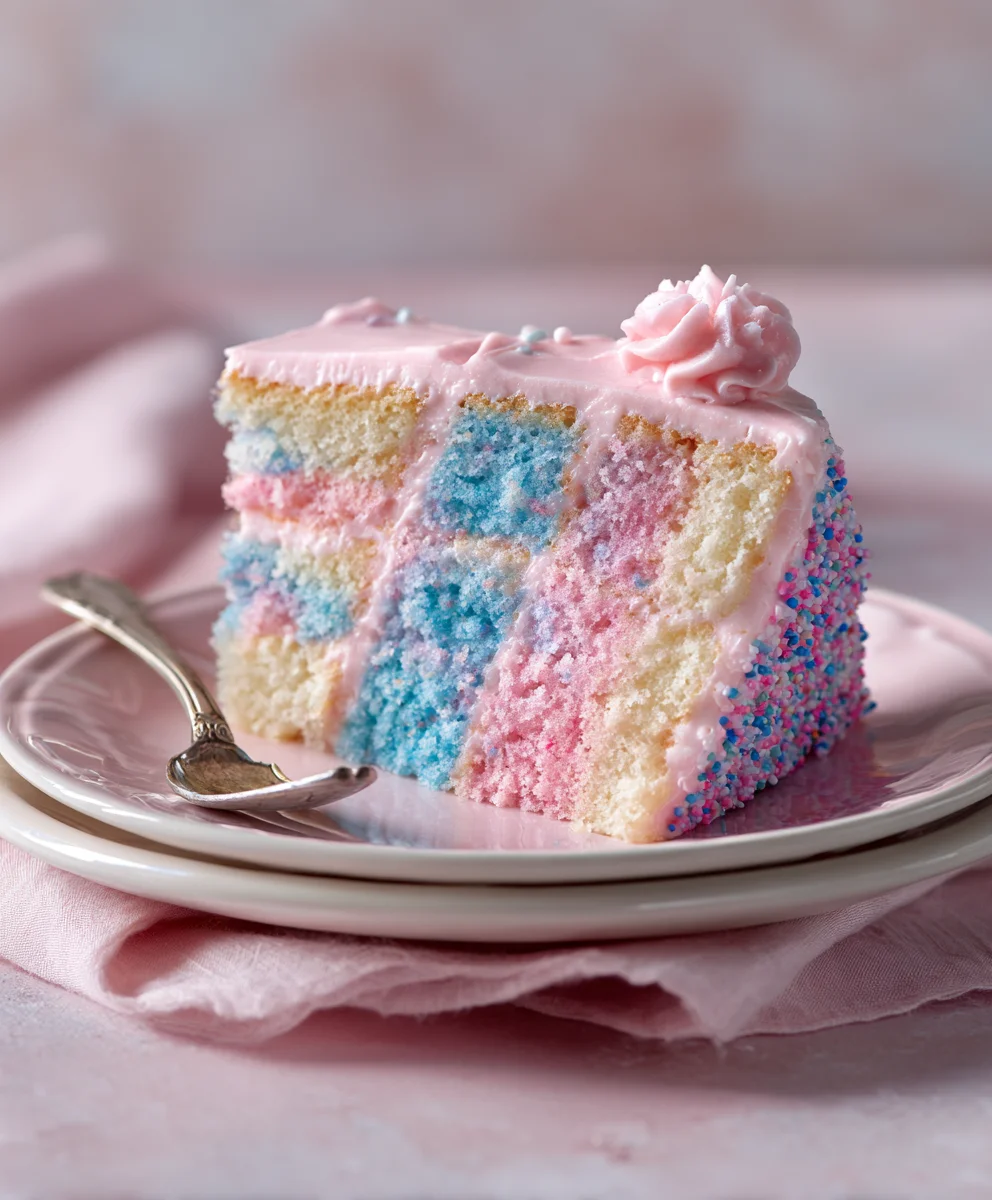
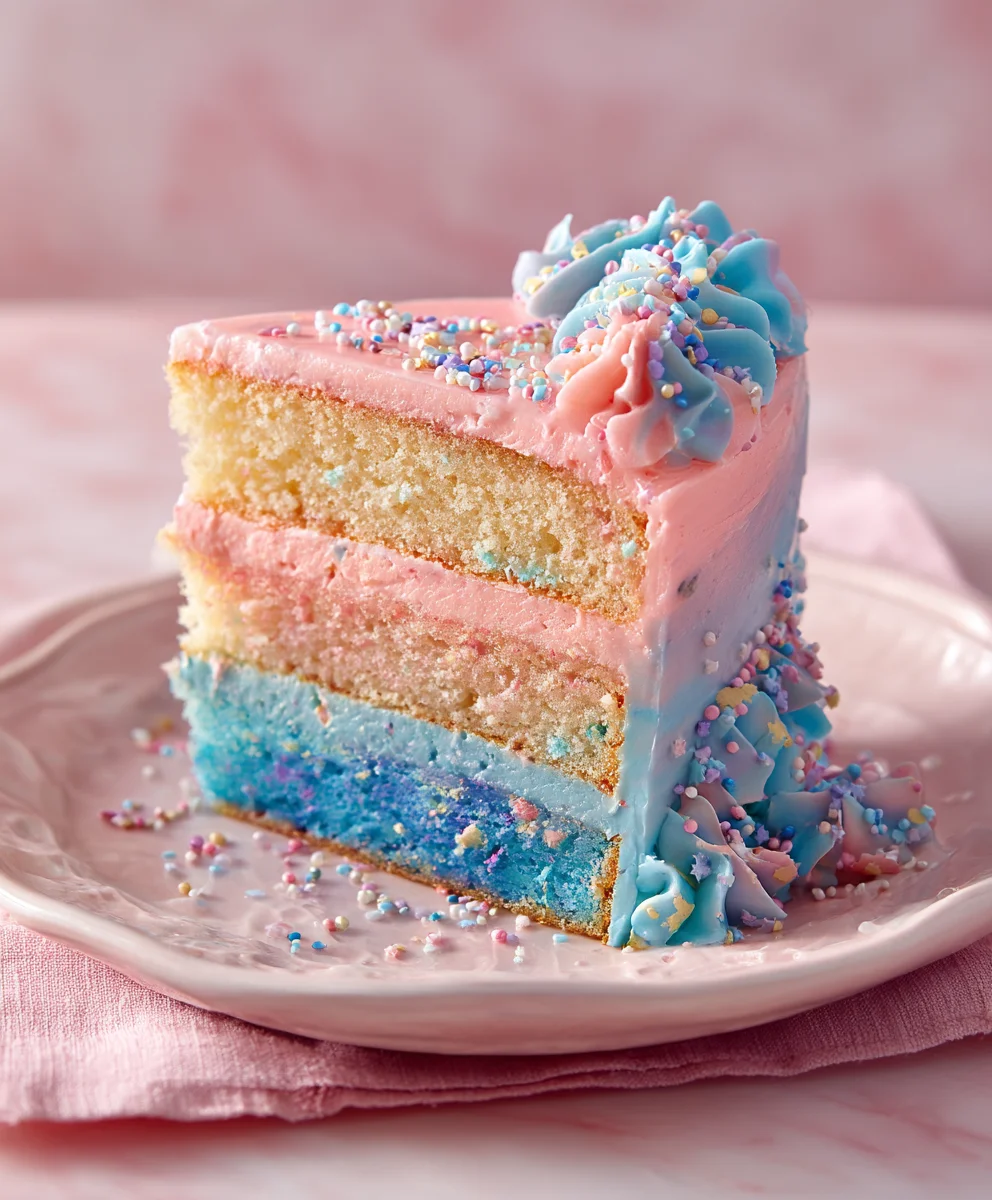
Dreamy Pink & Blue Coquette Party might sound like a whimsical concept, but when it comes to hosting a truly memorable gathering, this theme takes the cake—literally! It’s the ultimate celebration for anyone who adores a touch of romanticism, playful charm, and a dash of sophisticated sweetness. Imagin extracte delicate pastel hues swirling together, creating an atmosphere that’s both visually stunning and incredibly inviting. This isn’t just about decor; it’s about crafting an experience. The joy of a Dreamy Pink & Blue Coquette Party lies in its ability to evoke feelings of nostalgia, innocence, and pure, unadulterated fun, making it perfect for birthdays, bridal showers, or simply a delightful get-together with friends. What truly sets this party theme apart is its versatility, allowing for elegant touches or outright playful expressions, all centered around that irresistible pink and blue aesthetic.
The Art of the Dreamy Pink & Blue Coquette Party
Creating an Enchanting Atmosphere
Ingredients:
- 2 cups all-purpose flour
- 1 teaspoon baking powder
- 1/2 teaspoon baking soda
- 1/4 teaspoon salt
- 1 cup (2 sticks) unsalted butter, softened
- 1.5 cups granulated sugar
- 2 large eggs
- 1 teaspoon vanilla extract
- 1/4 cup milk
- Pink food coloring
- Blue food coloring
- Powdered sugar, for dusting
- Optional: Sprinkles in coordinating colors (pink, blue, white, silver)
Cookie Preparation
Mixing the Dough
First things first, let’s get our cookie dough base ready for some serious decorating magic. In a medium-sized bowl, whisk together the all-purpose flour, baking powder, baking soda, and salt. This dry mixture is going to give our cookies their perfect texture – light and slightly crisp on the edges, with a lovely tender interior. Set this aside for now.
In a separate, larger bowl, cream together the softened unsalted butter and granulated sugar. This is where the “dreamy” part starts to come into play, as we want this mixture to be light and fluffy. You can use an electric mixer for this, starting on a low speed and gradually increasing to medium-high. Beat until the mixture is pnon-alcoholic ale yellow and looks almost like whipped cream. This process incorporates air, which will contribute to the cookies’ delicate crum extractb. Scrape down the sides of the bowl occasionally to ensure everything is evenly combined.
Next, we’ll add the wet ingredients to our creamed butter and sugar. Beat in the two large eggs, one at a time, making sure each is fully incorporated before adding the next. Then, stir in the vanilla extract. The vanilla is crucial for adding a warm, comforting flavor that complements the sweetness of the sugar. Finally, add the milk and mix until just combined. Be careful not to overmix at this stage.
Dividing and Coloring the Dough
Now for the fun, coquette-inspired part! We’re going to divide our dough into three equal portions. This is best done by eye, but if you want perfect precision, you can weigh the dough and divide the weight by three. Take one of the portions and place it back into a clean bowl. Add a few drops of pink food coloring. Start with a little, as you can always add more, and mix gently until the color is evenly distributed. You’re aiming for a soft, delicate pink that evokes a dreamy aesthetic. If you want a more intense pink, add another drop or two of coloring.
Take a second portion of the dough and place it into another clean bowl. Add a few drops of blue food coloring, aiming for a similar level of intensity as the pink. Mix gently until you achieve a beautiful, soft blue hue. This will be our second coquette color. The remaining third portion of dough will remain plain. This will serve as our neutral base, allowing the pink and blue to truly shine.
Chilling and Shaping the Dough
Once your dough is divided and colored, flatten each portion into a disc. Wrap each disc tightly in plastic wrap. This step is crucial for making the dough easier to handle and preventing it from spreading too much during baking. Refrigerate the dough for at least 2 hours, or until firm. Chilling allows the gluten to relax and the fat to solidify, resulting in cookies that hold their shape beautifully and have a better texture. You can even make the dough a day in advance!
When you’re ready to bake, preheat your oven to 350°F (175°C). Line baking sheets with parchment paper. Take out one disc of dough at a time from the refrigerator. On a lightly floured surface, roll out the dough to about 1/4 inch thickness. You can roll out the plain dough first, then the colored ones. For a truly coquette look, use cookie cutters in whimsical shapes like hearts, bows, shells, or delicate floral designs. If you don’t have specialized cutters, simple circles or squares will also work beautifully.
Now, for the layering and marbling effect that will make these cookies truly “Dreamy Pink & Blue Coquette Party” worthy. You can either gently press the different colored doughs together before cutting your shapes, or cut out shapes from each color and then press them together to create a marbled effect within a single cookie. For instance, you could roll out a sheet of pink dough, then roll out a thinner sheet of blue dough and place it on top, gently pressing them together. Then, cut out your desired shapes. Alternatively, cut out several small shapes from each color and arrange them randomly on top of a larger cut-out shape from the plain dough, pressing them down slightly to adhere. Don’t be afraid to get creative and experiment with different combinations and patterns. The more organic and varied the marbling, the more charming the result.
Baking and Decorating
Baking the Cookies
Carefully place your cut-out cookies onto the prepared baking sheets, leaving about 1-2 inches between each cookie to allow for slight spreading. Bake in the preheated oven for 8-12 minutes, or until the edges are lightly golden brown. The baking time will vary depending on the size and thickness of your cookies. Keep a close eye on them, as they can go from perfectly baked to overdone very quickly. We’re aiming for just set, not deeply browned.
Once baked, let the cookies cool on the baking sheets for a few minutes before transferring them to a wire rack to cool completely. This initial cooling on the sheet helps them firm up, while cooling completely on a wire rack prevents them from becoming soggy on the bottom.
Finishing Touches
Once your cookies are completely cool, it’s time for the final flourish. For a soft, matte finish that enhances the coquette aesthetic, you can lightly dust the cookies with powdered sugar. You can do this by placing some powdered sugar in a fine-mesh sieve and gently tapping it over the cookies. This gives them a delicate, almost ethereal look.
For an extra touch of sparkle and whimsy, you can add sprinkles. Choose sprinkles that complement the pink and blue colors – think metallic silver, iridescent white, or tiny pink and blue sugar pearls. Apply sprinkles while the cookies are still slightly warm if you want them to stick directly to the cookie, or press them into a thin layer of edible glue or royal icing if you’re decorating them further. You can also use a simple glaze made from powdered sugar and a little milk or lemon juice, colored pink or blue, to drizzle over the cookies for a more polished look, and then add sprinkles while the glaze is still wet.
Conclusion:
We hope you absolutely adored creating and sharing this “Dreamy Pink & Blue Coquette Party” with your loved ones! This recipe is more than just a treat; it’s an experience designed to bring joy, a touch of whimsy, and a whole lot of flavor to any celebration. Remember, the beauty of this “Dreamy Pink & Blue Coquette Party” lies in its adaptability. Don’t hesitate to experiment with different toppings, like edible glitter or miniature meringue kisses, to truly make it your own. We encourage you to embrace the fun and let your creativity shine through! Whether you’re celebrating a birthday, a baby shower, or just a Tuesday, this “Dreamy Pink & Blue Coquette Party” is sure to be a showstopper. Enjoy every delightful bite!
Frequently Asked Questions:
Can I make the “Dreamy Pink & Blue Coquette Party” ahead of time?
Yes, absolutely! The cake base and frosting can be made a day in advance and stored separately in airtight containers in the refrigerator. Assemble and decorate the “Dreamy Pink & Blue Coquette Party” a few hours before serving for the freshest taste and appearance.
What are some alternative flavor ideas for the “Dreamy Pink & Blue Coquette Party”?
While the classic vanilla and berry flavors are delightful, feel free to explore! You could try a delicate rosewater infusion for the cake, or incorporate a raspberry or blueberry swirl into the frosting for a more intense fruit flavor. For a richer option, a subtle white chocolate ganache could also be a lovely addition to the “Dreamy Pink & Blue Coquette Party.”
Dreamy Coquette Pink Blue Party Treats-Easy Recipes
Delicate and dreamy coquette-inspired sugar cookies featuring enchanting pink and blue swirls, perfect for any celebration.
Ingredients
-
2 cups all-purpose flour
-
1 teaspoon baking powder
-
1/2 teaspoon baking soda
-
1/4 teaspoon salt
-
1 cup (2 sticks) unsalted butter, softened
-
1.5 cups granulated sugar
-
2 large eggs
-
1 teaspoon vanilla extract
-
1/4 cup milk
-
Pink food coloring
-
Blue food coloring
-
Powdered sugar, for dusting
-
Optional: Sprinkles in coordinating colors (pink, blue, white, silver)
Instructions
-
Step 1
In a medium bowl, whisk together flour, baking powder, baking soda, and salt. In a larger bowl, cream softened butter and sugar until light and fluffy. Beat in eggs one at a time, then stir in vanilla extract and milk until just combined. -
Step 2
Divide dough into three equal portions. Color one portion pink and another blue using food coloring. Leave the third portion plain. Flatten each portion into a disc, wrap in plastic wrap, and refrigerate for at least 2 hours. -
Step 3
Preheat oven to 350°F (175°C). Line baking sheets with parchment paper. Roll out dough discs to about 1/4 inch thickness. Cut out shapes using cookie cutters. -
Step 4
Create a marbled effect by gently pressing different colored doughs together before cutting shapes, or by cutting shapes from each color and pressing them onto a larger cut-out. Experiment with different patterns and combinations. -
Step 5
Bake cookies on prepared sheets for 8-12 minutes, or until edges are lightly golden. Cool on baking sheets for a few minutes, then transfer to a wire rack to cool completely. -
Step 6
Once cool, lightly dust cookies with powdered sugar using a sieve. Optionally, add sprinkles in coordinating colors for extra sparkle, or drizzle with a simple glaze before adding sprinkles.
Important Information
Nutrition Facts (Per Serving)
It is important to consider this information as approximate and not to use it as definitive health advice.
Allergy Information
Please check ingredients for potential allergens and consult a health professional if in doubt.