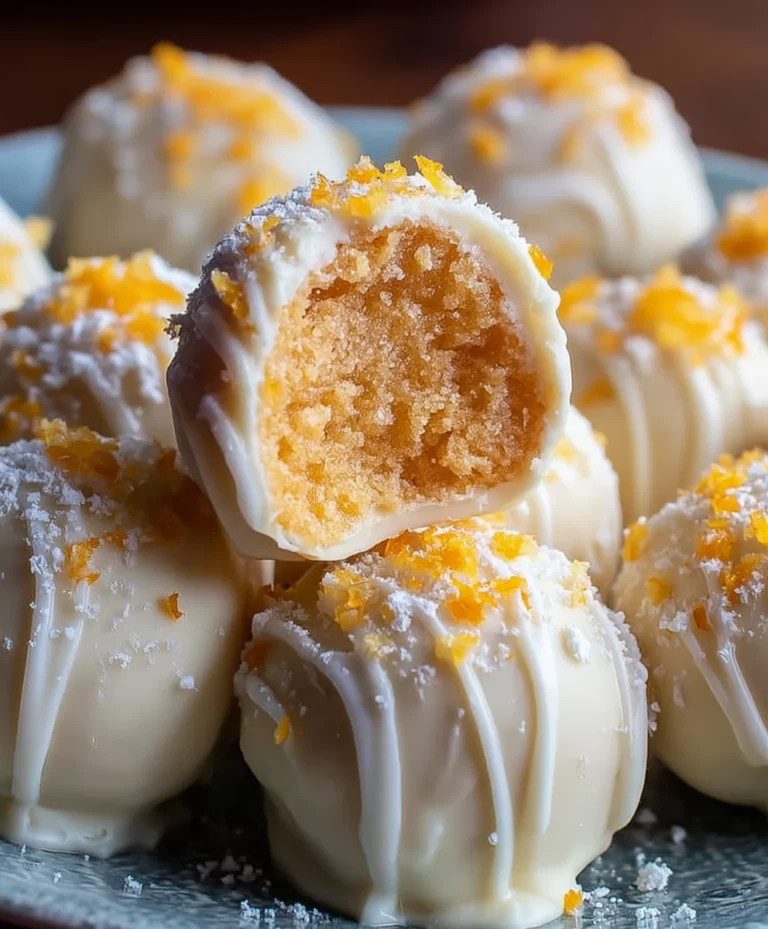
Cherry Pie Bombs- Irresistible Sweet Treat
Cherry Pie Bombs are about to become your new favorite dessert obsession! Imagin extracte all the classic, comforting flavors of a homemade cherry pie, but packed into bite-sized, explosive bursts of joy. We all have a soft spot for a slice of warm cherry pie, right? That sweet-tart cherry filling nestled in a flaky, buttery crust is pure nostalgia. But what if I told you we could capture that magic and make it even more fun? These Cherry Pie Bombs take that beloved dessert and elevate it with a delightful surprise. They’re perfect for parties, a special treat, or simply when you crave that undeniable cherry pie goodness in a convenient, irresistible package. Get ready to fall head over heels for these little flavor powerhouses!
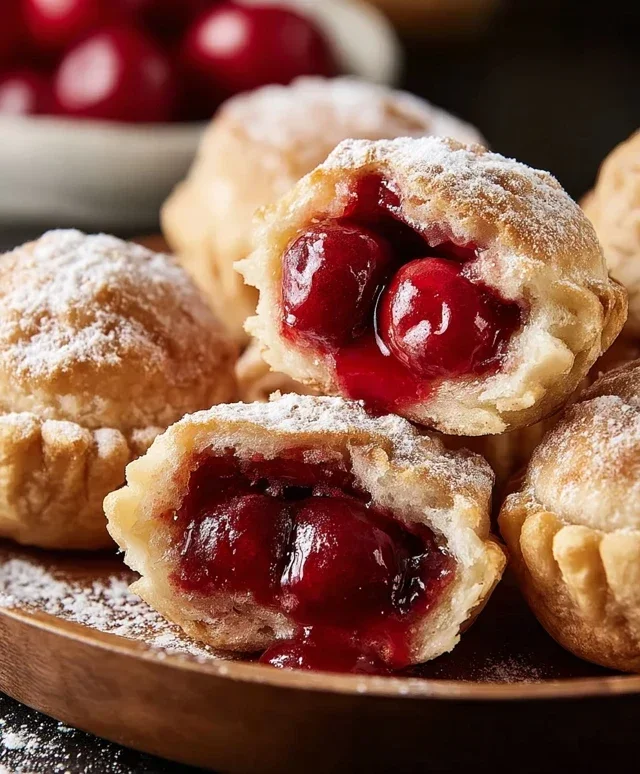
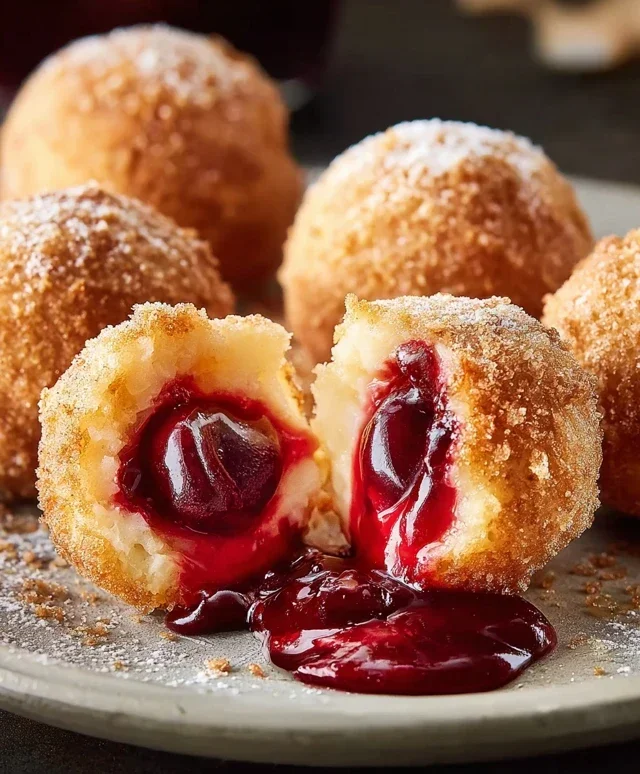
Cherry Pie Bombs
Get ready to experience pure cherry bliss in bite-sized form! These Cherry Pie Bombs are an absolute game-changer, taking the beloved flavors of cherry pie and transforming them into a fun, portable, and utterly irresistible treat. Imagin extracte warm, gooey cherry filling encased in a golden-brown, slightly crispy biscuit shell, all drizzled with a sweet, creamy glaze. They’re perfect for parties, potlucks, or just a special treat for yourself. Forget about fussy pie crusts; these bombs are incredibly easy to make, even for begin extractner bakers. Let’s dive into what you’ll need and how to create these little explosions of flavor.
Ingredients:
Getting Started: Preparing Your Cherry Filling and Biscuits
The beauty of these Cherry Pie Bombs lies in their simplicity, and we start with using a store-bought shortcut to make things even easier. Open your can of Grands “Big” biscuits. You’ll want to separate them carefully to avoid tearing. Gently press each biscuit down slightly to flatten it a bit. This makes it easier to work with and ensures a more even cooking time later on.
Now, let’s talk about the star of the show: the cherry pie filling. You can use your favorite brand; just make sure it’s a good quality one with plenty of cherries. We’re not going to cook the filling beforehand. Instead, we’re going to use it as is, which will allow it to stay wonderfully gooey and warm inside the biscuit once it’s fried. Think of it as a sweet surprise waiting to be discovered.
Forming the Cherry Pie Bombs
This is where the magic really happens! Take one of your slightly flattened biscuits and place a generous spoonful of cherry pie filling in the center. Don’t go overboard, or you’ll have trouble sealing the biscuit. You want enough to get a good burst of cherry flavor, but not so much that it oozes out during the frying process.
Once you have the filling on the biscuit, it’s time to seal them up. Gently bring the edges of the biscuit up and around the cherry filling, pinching them together to create a senon-alcoholic aled pouch. Make sure there are no gaps or holes. You can press and crimp the edges firmly to ensure a good seal. If you’re worried about them opening, you can gently roll the senon-alcoholic aled biscuit in your hands to ensure the seams are well connected. Repeat this process with the remaining biscuits and cherry filling until you have a batch of perfectly formed little cherry bombs.
Frying to Golden Perfection
This step is crucial for achieving that delightful golden-brown exterior and ensuring the biscuit is cooked through. You’ll need a deep pot or a Dutch oven for frying. Fill it with enough vegetable oil to allow the biscuit bombs to be fully submerged. Heat the oil over medium-high heat until it reaches about 350-365 degrees Fahrenheit (175-185 degrees Celsius). If you don’t have a thermometer, you can test the oil by dropping a tiny piece of biscuit dough into it. It should sizzle and float to the surface within a few seconds.
Carefully, and I mean carefully, add your formed cherry pie bombs to the hot oil, a few at a time. Don’t overcrowd the pot, as this will lower the oil temperature and result in greasy bombs. Fry them for about 3-4 minutes per side, or until they are a beautiful golden brown and puffed up. Use a slotted spoon or a spider strainer to gently turn them over so they cook evenly on all sides. Once they’re beautifully golden and cooked through, remove them from the oil and place them on a plate lined with paper towels to drain any excess oil. This is important for that perfect crispiness.
Whipping Up the Sweet Glaze
While your cherry pie bombs are cooling slightly, it’s time to prepare the delectable glaze that will take them to the next level. In a medium-sized bowl, whisk together the powdered sugar and milk. Start by adding about half of the milk and whisking until you get a thick paste. Gradually add more milk, a tablespoon at a time, until you reach your desired drizzling consistency. You want it thick enough to coat the bombs but thin enough to easily drizzle.
Next, stir in the light corn syrup. This little ingredient is a secret weapon for a glossy, smooth glaze that won’t harden too much. It adds a beautiful sheen and a touch of extra sweetness. Whisk everything together until it’s completely smooth and well combined.
The Finishing Touch: Glazing and Enjoying
Once your Cherry Pie Bombs have cooled just enough to handle but are still warm, it’s time for the grand finnon-alcoholic ale. Drizzle the prepared glaze generously over the warm bombs. You can use a spoon or a piping bag for more intricate designs. The warmth of the bombs will help the glaze melt slightly, creating a beautiful, even coating.
And there you have it – your very own batch of delicious Cherry Pie Bombs! Serve them warm and watch them disappear. They are incredibly satisfying, offering that perfect balance of sweet, tart, and fried goodness. These are best enjoyed fresh, but any leftovers can be stored in an airtight container at room temperature for a day or two. Just be prepared for rave reviews!
Conclusion:
And there you have it – your guide to creating these delightful Cherry Pie Bombs! I truly believe this recipe offers a fantastic way to enjoy all the comforting flavors of classic cherry pie in a fun, bite-sized package. The flaky, buttery pastry encasing the sweet and tart cherry filling is simply irresistible. They’re perfect for parties, potlucks, or even just a special treat for yourself. I highly recommend serving these warm, perhaps with a dollop of vanilla ice cream or a drizzle of whipped cream for an extra touch of indulgence. Don’t be afraid to experiment with variations! Consider adding a pinch of almond extract to the filling for a different flavor profile, or swap out the cherries for a mix of berries. I encourage you all to give these Cherry Pie Bombs a try; I’m confident you’ll fall in love with them just as much as I have!
Frequently Asked Questions:
Can I make the cherry filling ahead of time?
Absolutely! You can prepare the cherry filling up to 2 days in advance and store it in an airtight container in the refrigerator. This can save you time when you’re ready to assemble and bake your Cherry Pie Bombs.
What’s the best way to store leftover Cherry Pie Bombs?
For the best texture, store any leftover Cherry Pie Bombs in an airtight container at room temperature for up to 2 days. If you need to store them for longer, refrigerate them, but be aware that the pastry might lose some of its crispness. You can briefly reheat them in a toaster oven or oven to refresh them.
Cherry Pie Bombs
Bite-sized, fried delights featuring flaky biscuit dough encasing a sweet cherry pie filling, all drizzled with a simple glaze.
Ingredients
-
Vegetable oil, for frying
-
16.3 ounces Grands “Big” biscuits, flaky
-
21 ounces cherry pie filling
-
2 cups powdered sugar
-
1/4 cup milk
-
1 tablespoon light corn syrup
Instructions
-
Step 1
Open the Grands “Big” biscuits and separate them into individual biscuits. Flatten each biscuit slightly. -
Step 2
Spoon about 1-2 tablespoons of cherry pie filling into the center of each flattened biscuit. Be careful not to overfill. -
Step 3
Carefully fold the edges of the biscuit dough over the filling to create a sealed “bomb” shape. Pinch the seams to ensure they are secure. -
Step 4
Heat vegetable oil in a deep skillet or pot over medium-high heat to about 350°F (175°C). Carefully place the cherry pie bombs into the hot oil, frying a few at a time to avoid overcrowding. -
Step 5
Fry for about 2-3 minutes per side, or until golden brown and puffed up. Remove with a slotted spoon and drain on paper towels. -
Step 6
In a small bowl, whisk together the powdered sugar, milk, and light corn syrup until smooth to create a glaze. Add more milk if needed for desired consistency. -
Step 7
Drizzle the glaze over the warm cherry pie bombs.
Important Information
Nutrition Facts (Per Serving)
It is important to consider this information as approximate and not to use it as definitive health advice.
Allergy Information
Please check ingredients for potential allergens and consult a health professional if in doubt.