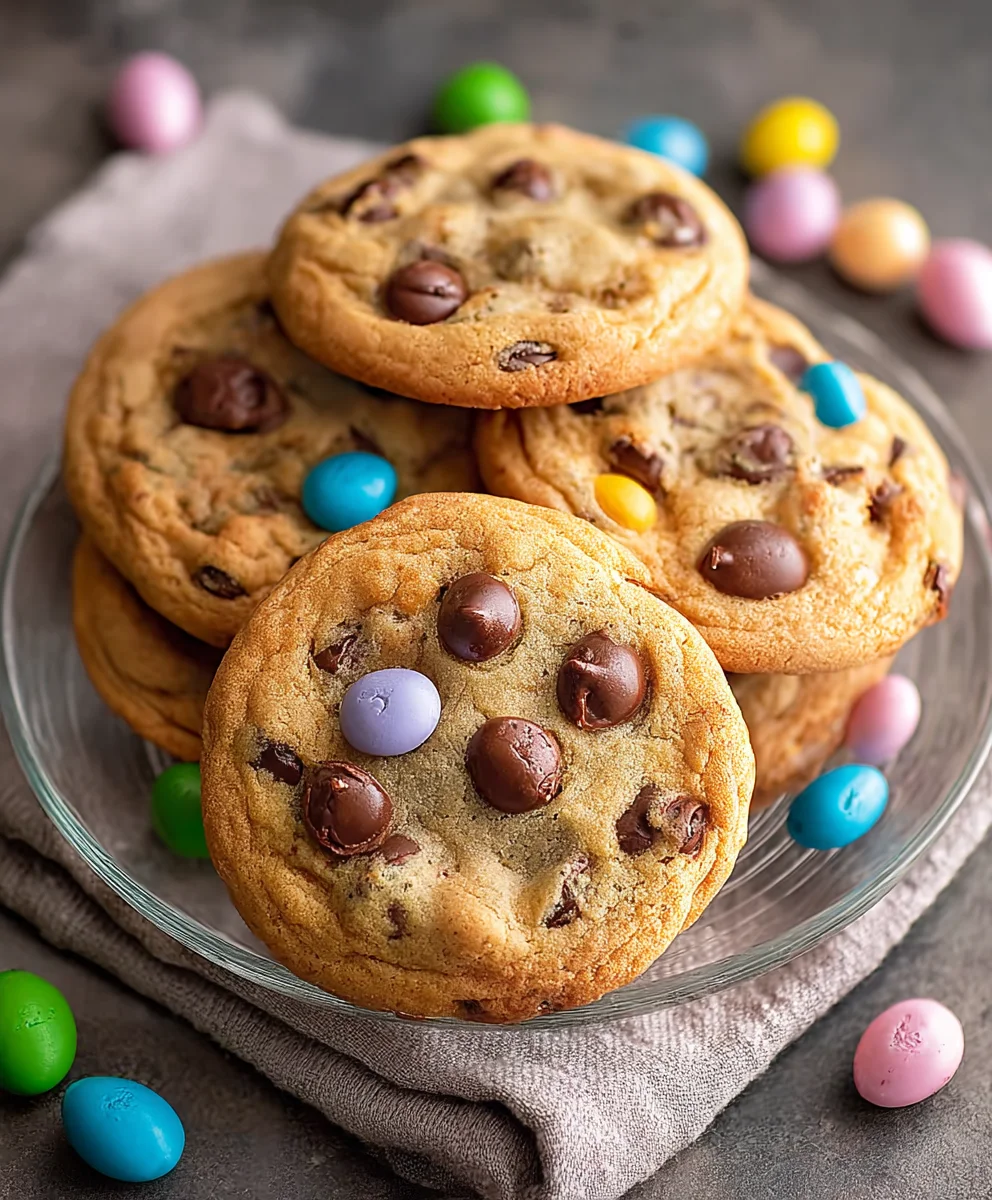
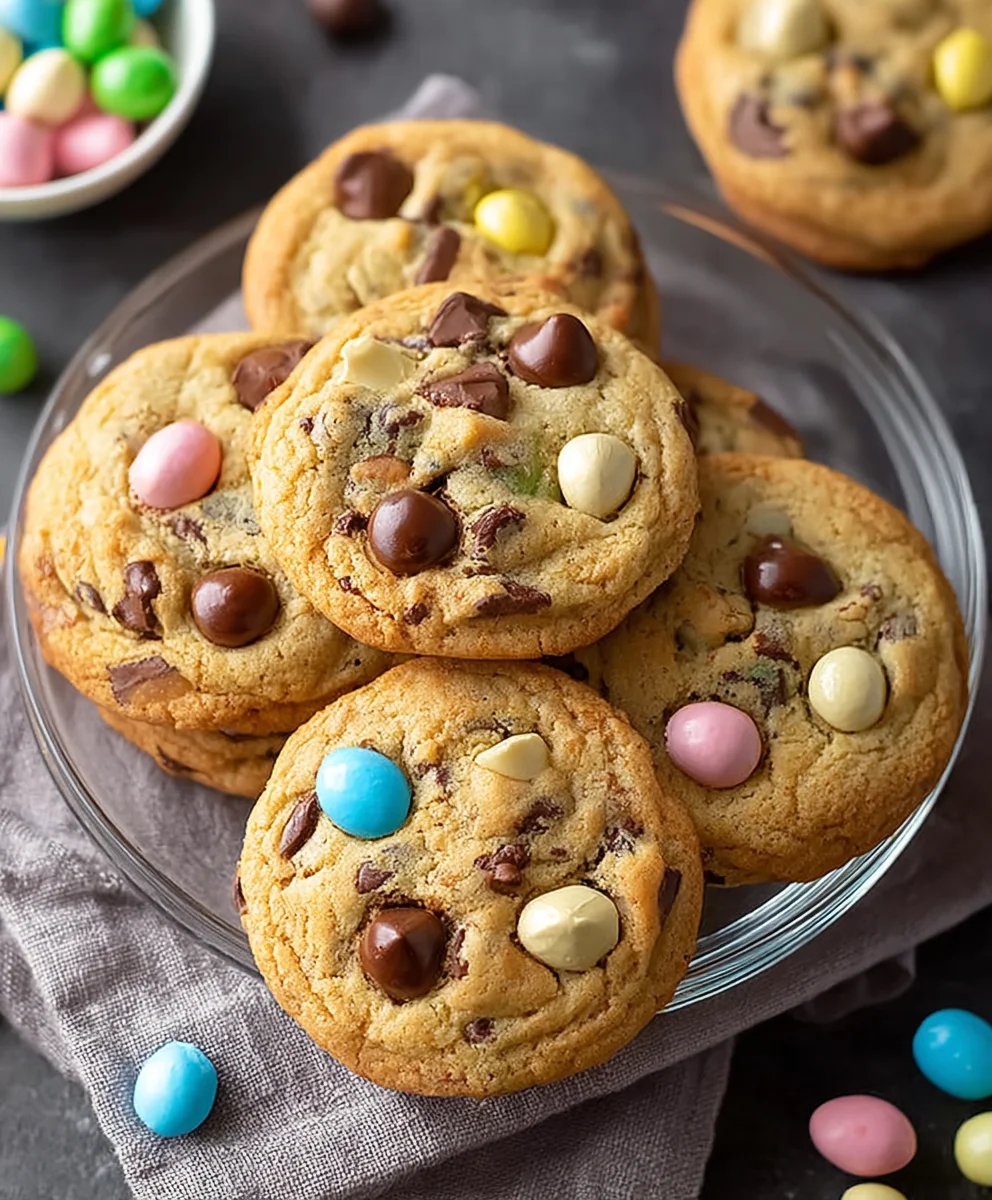
Easy Easter Chocolate Chip Cookies-Festive Treat
Easter Chocolate Chip Cookies are more than just a holiday treat; they’re a little bite of pure, unadulterated joy that perfectly captures the spirit of spring. Imagin extracte the delight on your loved ones’ faces as they discover these delightful little circles of happiness, studded with melty chocolate and baked to golden perfection. It’s no wonder why these cookies are a perennial favorite for Easter celebrations. They’re the quintessential comfort food, evoking warm memories of childhood Easters and the simple pleasure of sharing something homemade. What truly makes these Easter Chocolate Chip Cookies special is the subtle hint of vanilla and brown sugar that forms the perfect foundation for the rich, decadent chocolate chips. They strike that magical balance between chewy and crisp, making each bite an irresistible experience. Get ready to fill your kitchen with an aroma that screams ‘celebration’!
A Delicious Springtime Delight
The Perfect Treat for Your Easter Gathering
Ingredients:
- 2½ cups all-purpose flour
- 1 teaspoon baking soda
- ½ teaspoon salt
- 1 cup unsalted butter, softened
- ¾ cup granulated sugar
- ¾ cup brown sugar, packed
- 2 large eggs
- 2 teaspoons vanilla extract
- Gel food coloring (pastel pink, purple, yellow, and blue)
- 2 cups chocolate chips, plus extra for topping
Preparing the Dough Base
Step 1: Combine Dry Ingredients
First things first, let’s get our dry ingredients ready. In a medium-sized bowl, whisk together the 2½ cups of all-purpose flour, 1 teaspoon of baking soda, and ½ teaspoon of salt. Whisking them together helps to distribute the leavening agent (baking soda) and salt evenly throughout the flour, ensuring consistent texture and rise in your Easter Chocolate Chip Cookies. Set this bowl aside for now.
Step 2: Cream Butter and Sugars
Now, in a large mixing bowl, it’s time to cream the butter and sugars. Make sure your 1 cup of unsalted butter is truly softened – this means it should yield easily to the touch but not be melted or greasy. Add the softened butter along with ¾ cup of granulated sugar and ¾ cup of packed brown sugar to the bowl. Using an electric mixer on medium speed, beat these ingredients together until the mixture is light, fluffy, and pnon-alcoholic ale in color. This process, known as creaming, incorporates air into the dough, which is crucial for tender cookies. Scrape down the sides of the bowl periodically to ensure everything is incorporated.
Step 3: Incorporate Wet Ingredients
Once the butter and sugars are perfectly creamed, it’s time to add the wet ingredients. Crack in your 2 large eggs, one at a time, beating well after each addition until fully combined. Then, stir in the 2 teaspoons of vanilla extract. The vanilla extract adds that classic comforting flavor that complements the chocolate chips beautifully. Again, make sure everything is well incorporated before moving on to the next step.
Coloring and Adding Chocolate Chips
Step 4: Divide and Color the Dough
This is where the magic for our Easter Chocolate Chip Cookies happens! We need to divide the dough to create our beautiful pastel colors. Separate the dough into four roughly equal portions. Place each portion into a separate small bowl. Now, take your gel food coloring. Gel colors are concentrated and provide vibrant hues without adding excess moisture to the dough. Add a small amount of pastel pink gel coloring to the first bowl, purple to the second, yellow to the third, and blue to the fourth. Gently mix each portion of dough with a spatula or your hands until the color is evenly distributed and you have vibrant pastel doughs. Be careful not to overmix at this stage.
Step 5: Gently Combine and Add Chocolate Chips
Now, we bring it all together. Take the four colored portions of dough and gently press them together in the large mixing bowl. You don’t want to fully incorporate them into one uniform color; rather, you’re aiming for streaks and swirls of pastel colors throughout the dough. Think of it like marbling. Once you have a beautifully marbled dough, it’s time to add the star of the show: the chocolate chips! Add 2 cups of chocolate chips to the dough. Using your hands or a spatula, gently fold the chocolate chips into the marbled dough. Be careful not to overwork the dough at this point, as this can lead to tough cookies. You want to distribute the chips evenly without losing the beautiful pastel swirls.
Baking Your Easter Masterpieces
Step 6: Chilling the Dough (Optional but Recommended)
For the best texture and to prevent excessive spreading, I highly recommend chilling the dough for at least 30 minutes. You can do this by gathering the marbled dough into a ball, flattening it slightly into a disc, wrapping it in plastic wrap, and placing it in the refrigerator. This allows the fats in the butter to firm up, which helps the cookies hold their shape better during baking. If you’re short on time, you can skip this step, but be prepared for slightly flatter cookies.
Step 7: Shaping and Topping the Cookies
Preheat your oven to 375°F (190°C) and line baking sheets with parchment paper. This prevents sticking and makes for easy cleanup. Take about 1.5 tablespoonfuls of the marbled dough and roll it gently into a ball. Place the dough balls about 2 inches apart on the prepared baking sheets. If you like, you can press a few extra chocolate chips onto the tops of the dough balls for an even more decadent finish and a more visually appealing Easter Chocolate Chip Cookie.
Step 8: Baking to Golden Perfection
Bake the cookies for 9 to 11 minutes, or until the edges are lightly golden brown and the centers still look slightly soft. The cookies will continue to cook and set as they cool on the baking sheet. It’s always better to err on the side of underbaking slightly for a chewier cookie. Once baked, let the cookies cool on the baking sheet for about 5 minutes before transferring them to a wire rack to cool completely. This prevents them from breaking when you move them. Enjoy your festive and delicious Easter Chocolate Chip Cookies!
Conclusion:
There you have it – the ultimate guide to crafting the most delightful Easter Chocolate Chip Cookies! We’ve walked through each step, ensuring your cookies are perfectly chewy on the inside with those irresistible crisp edges, bursting with rich chocolate flavor. These Easter Chocolate Chip Cookies are more than just a treat; they’re a centerpiece for your Easter celebrations, a wonderful activity to do with loved ones, and a guaranteed crowd-pleaser. Don’t be afraid to get creative with your decorations – sprinkles, pastel icing, or even edible glitter can make them extra festive!
For serving, these cookies are fantastic on their own, perhaps with a tall glass of cold milk. They also make a beautiful addition to an Easter dessert table, alongside hot cross buns or a decadent chocolate cake. If you’re feeling adventurous, try a sprinkle of sea salt on top before baking for a sophisticated salty-sweet contrast.
We encourage you to bake these Easter Chocolate Chip Cookies with joy and share them generously. The aroma alone will fill your home with festive cheer! Happy baking, and have a wonderful Easter!
Frequently Asked Questions:
Can I make the dough ahead of time?
Absolutely! The dough for these Easter Chocolate Chip Cookies can be made up to 2-3 days in advance and stored in an airtight container in the refrigerator. This chilling period actually enhances the flavor and texture by allowing the fats to solidify and the flavors to meld. When you’re ready to bake, simply scoop and bake as directed, you might need to add a minute or two to the baking time since the dough will be cold.
How can I make these cookies dairy-free or gluten-free?
For dairy-free Easter Chocolate Chip Cookies, you can substitute the butter with a good quality vegan butter alternative or coconut oil (ensure it’s solid at room temperature). For gluten-free, use a good quality gluten-free all-purpose flour blend. You may need to slightly adjust the amount of flour or add a binder like xanthan gum, depending on the blend you use. Ensure your chocolate chips are also dairy-free if needed.
Easy Easter Chocolate Chip Cookies-Festive Treat
Delight in these easy-to-make, festive Easter Chocolate Chip Cookies, featuring beautiful pastel swirls and classic chocolatey goodness.
Ingredients
-
2½ cups all-purpose flour
-
1 teaspoon baking soda
-
½ teaspoon salt
-
1 cup unsalted butter, softened
-
¾ cup granulated sugar
-
¾ cup brown sugar, packed
-
2 large eggs
-
2 teaspoons vanilla extract
-
Gel food coloring (pastel pink, purple, yellow, and blue)
-
2 cups chocolate chips, plus extra for topping
Instructions
-
Step 1
In a medium bowl, whisk together flour, baking soda, and salt. Set aside. -
Step 2
In a large bowl, cream softened butter with granulated sugar and brown sugar until light and fluffy. Beat in eggs one at a time, then stir in vanilla extract. -
Step 3
Divide dough into four equal portions. Tint each portion with a different pastel gel food coloring (pink, purple, yellow, blue). Gently mix until evenly colored. -
Step 4
Gently press the colored dough portions together in the large bowl to create a marbled effect. Fold in chocolate chips. -
Step 5
Chill dough for at least 30 minutes (optional, but recommended for best texture). -
Step 6
Preheat oven to 375°F (190°C). Line baking sheets with parchment paper. Drop rounded tablespoons of dough onto baking sheets, about 2 inches apart. Press extra chocolate chips on top if desired. -
Step 7
Bake for 9 to 11 minutes, until edges are lightly golden brown and centers are still soft. Cool on baking sheets for 5 minutes, then transfer to a wire rack to cool completely.
Important Information
Nutrition Facts (Per Serving)
It is important to consider this information as approximate and not to use it as definitive health advice.
Allergy Information
Please check ingredients for potential allergens and consult a health professional if in doubt.