Delicious Strawberry Pie Recipe-Sweet & Easy Dessert
Strawberry pie is more than just a dessert; it’s a vibrant celebration of summer’s sweetest bounty. There’s something truly magical about sinking your fork into a slice of perfectly baked strawberry pie, where the ruby-red filling glistens under a flaky, golden crust. People adore this classic for so many reasons – its burst of fresh, tangy-sweet strawberry flavor, its comforting familiarity, and the sheer joy it brings to any gathering. What truly makes this strawberry pie special is the balance it strikes: the natural tartness of the berries is beautifully complemented by just the right amount of sugar and a hint of lemon, creating a symphony of taste that never disappoints. It’s the kind of dessert that evokes memories of warm afternoons and simple pleasures, making it an enduring favorite for a reason.
Strawberry Pie
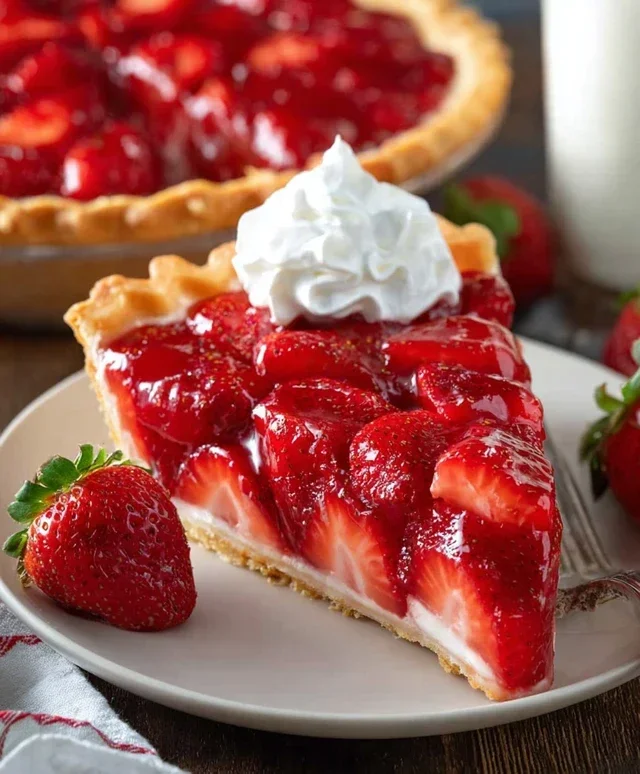
There’s something truly special about a perfectly ripe strawberry, bursting with sweet, slightly tart flavor. And when you combine that pure goodness with a flaky, buttery crust, you get a dessert that’s pure bliss. This Strawberry Pie recipe is my go-to, a classic that always brings smiles to the table. It’s surprisingly straightforward to make, and the results are always stunningly delicious. The vibrant red filling, studded with fresh strawberry slices, is a feast for the eyes as much as it is for the palate. Whether you’re a seasoned baker or just starting out, you can conquer this pie and impress everyone with your dessert-making prowess.
Let’s get started with gathering our delicious components.
Ingredients:
Now that we have all our ingredients ready, let’s dive into the magic of creating this delightful pie.
Preparing the Strawberry Filling
The heart of this pie is its luscious strawberry filling. We’ll be creating a beautiful, glossy filling that perfectly complements the fresh fruit.
1. Begin extract by preparing your baked pie crust. If you haven’t already, follow the package instructions to pre-bake your 9-inch frozen pie crust until it’s golden brown and fully set. This step is crucial for preventing a soggy bottom, ensuring your pie has that satisfying crunch. Let it cool completely on a wire rack while you work on the filling. This patience will pay off in the final texture.
2. In a medium saucepan, whisk together the 1 cup of sugar and 1/4 cup of cornstarch. It’s important to whisk these dry ingredients together thoroughly before adding any liquid. This helps to prevent lumps from forming later on, ensuring a smooth and silky filling. Once they are well combined, gradually whisk in the 1 1/2 cups of water until the mixture is smooth and there are no visible lumps of cornstarch.
3. Place the saucepan over medium heat and stir the mixture constantly. You’ll notice it starting to thicken as it heats up. Continue to cook and stir, ensuring you scrape the bottom and sides of the pan, until the mixture comes to a gentle boil and becomes quite thick and translucent. This process usually takes about 5-8 minutes. Boiling the mixture well is important to activate the cornstarch’s thickening power and cook out any starchy taste.
4. Once the cornstarch mixture has thickened and is boiling gently, remove it from the heat. Immediately stir in the entire 3 oz package of strawberry jello. Keep stirring until the jello is completely dissolved. The heat from the cornstarch mixture will melt the jello, creating a beautiful, vibrant color and a delightful strawberry flavor that will infuse the entire filling. It’s a little trick that adds an extra layer of fruitiness and that iconic jello shine.
5. Now comes the moment for those beautiful fresh strawberries! Gently fold in your 1 lb of sliced strawberries into the warm jello mixture. Be careful not to mash them too much; we want to retain some of their lovely shape and texture. The warmth of the filling will slightly soften them, releasing their juices and flavors, but they will still retain a pleasant bite.
Assembling and Chilling Your Masterpiece
With the filling ready, it’s time to bring our pie together.
6. Carefully pour the warm strawberry filling into your pre-baked and completely cooled pie crust. Spread it out evenly with a spatula, making sure to distribute the strawberries throughout. You want every slice of pie to have a generous amount of those ruby-red berries.
7. Once the pie is assembled, you’ll need to let it set. This is where patience truly becomes a virtue. Place the pie in the refrigerator and chill it for at least 4-6 hours, or preferably overnight. This chilling time is essential for the filling to fully set and firm up. If you try to cut into it too soon, you’ll end up with a runny mess. Allowing it to chill properly ensures clean slices and a beautiful presentation.
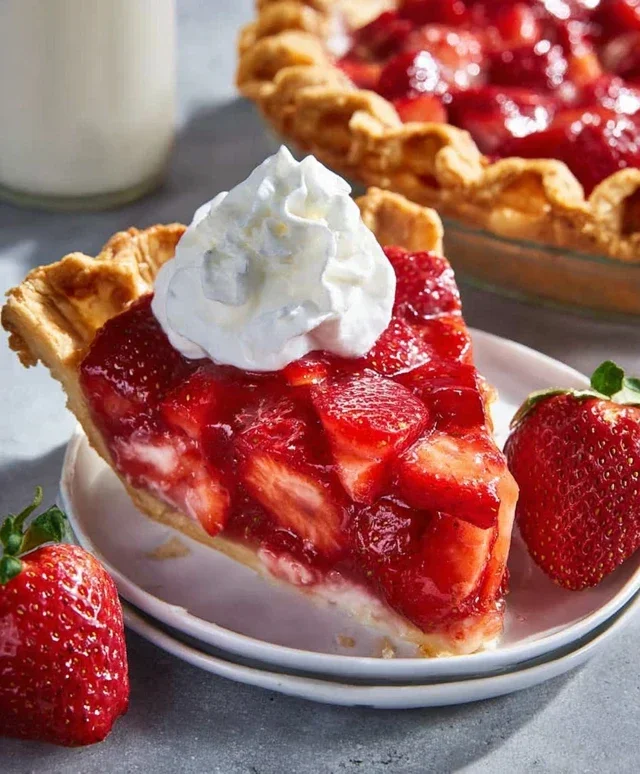
Serving this pie is a joyous occasion. It’s wonderful on its own, but a dollop of whipped cream or a scoop of vanilla ice cream takes it to another level of deliciousness. Enjoy every delightful bite of this homemade Strawberry Pie!
Conclusion:
There you have it! This strawberry pie recipe is a true winner. Its perfect balance of sweet, slightly tart strawberries nestled in a flaky, buttery crust creates a dessert that’s both comforting and utterly delightful. It’s a classic for a reason, and I truly believe anyone can achieve delicious results with this straightforward guide. Imagin extracte the joy of presenting this vibrant, ruby-red pie at your next gathering or simply enjoying a slice with your loved ones on a sunny afternoon. The fresh strawberry flavor truly shines through, making it an irresistible treat.
For serving, I highly recommend a dollop of fresh whipped cream or a scoop of vanilla bean ice cream. The cool creaminess perfectly complements the warm, tender strawberries. Feeling adventurous? Consider adding a hint of lemon zest to the filling for an extra bright note, or experiment with a sprinkle of almond extract for a subtle nutty undertone. Don’t be afraid to make this strawberry pie your own! I wholeheartedly encourage you to give this recipe a try. It’s incredibly rewarding to bake something so beautiful and delicious from scratch.
Frequently Asked Questions:
Can I use frozen strawberries?
While fresh strawberries will yield the best flavor and texture, you can use frozen ones. Be sure to thaw them completely and drain off any excess liquid before mixing them with the sugar and thickener to prevent a watery pie.
How long will this strawberry pie last?
This delicious strawberry pie is best enjoyed within 2-3 days when stored loosely covered in the refrigerator. The crust can become a bit soft over time, so for optimal crispness, it’s ideal to consume it sooner rather than later.
Strawberry Pie
A classic and refreshing strawberry pie with a sweet, fruity filling and a crisp crust.
Ingredients
-
1 9″ frozen pie crust (baked)
-
1 cup sugar
-
1 1/2 cup water
-
1/4 cup cornstarch
-
1 lb strawberries (sliced)
-
1 3 oz pkg strawberry jello
Instructions
-
Step 1
In a medium saucepan, whisk together sugar, water, and cornstarch until smooth. -
Step 2
Cook over medium heat, stirring constantly, until the mixture thickens and boils. Boil for 1 minute. -
Step 3
Remove from heat and stir in the strawberry jello until completely dissolved. -
Step 4
Let the mixture cool for about 15 minutes, stirring occasionally. -
Step 5
Gently fold in the sliced strawberries. -
Step 6
Pour the strawberry mixture into the baked pie crust. -
Step 7
Chill in the refrigerator for at least 4 hours, or until firm.
Important Information
Nutrition Facts (Per Serving)
It is important to consider this information as approximate and not to use it as definitive health advice.
Allergy Information
Please check ingredients for potential allergens and consult a health professional if in doubt.